Adding, Editing, and Deleting Meta Items
Print
Adding, Editing, and Deleting Meta Items
In Meta Options, Site Managers can also create and set meta items as desired.
* Administrator menu is available in Japanese and English only. If you select another language site, please log in again to the Japanese or English site.
* New meta items cannot be added to the amanaimages.com menu.
Adding User-created Meta Items
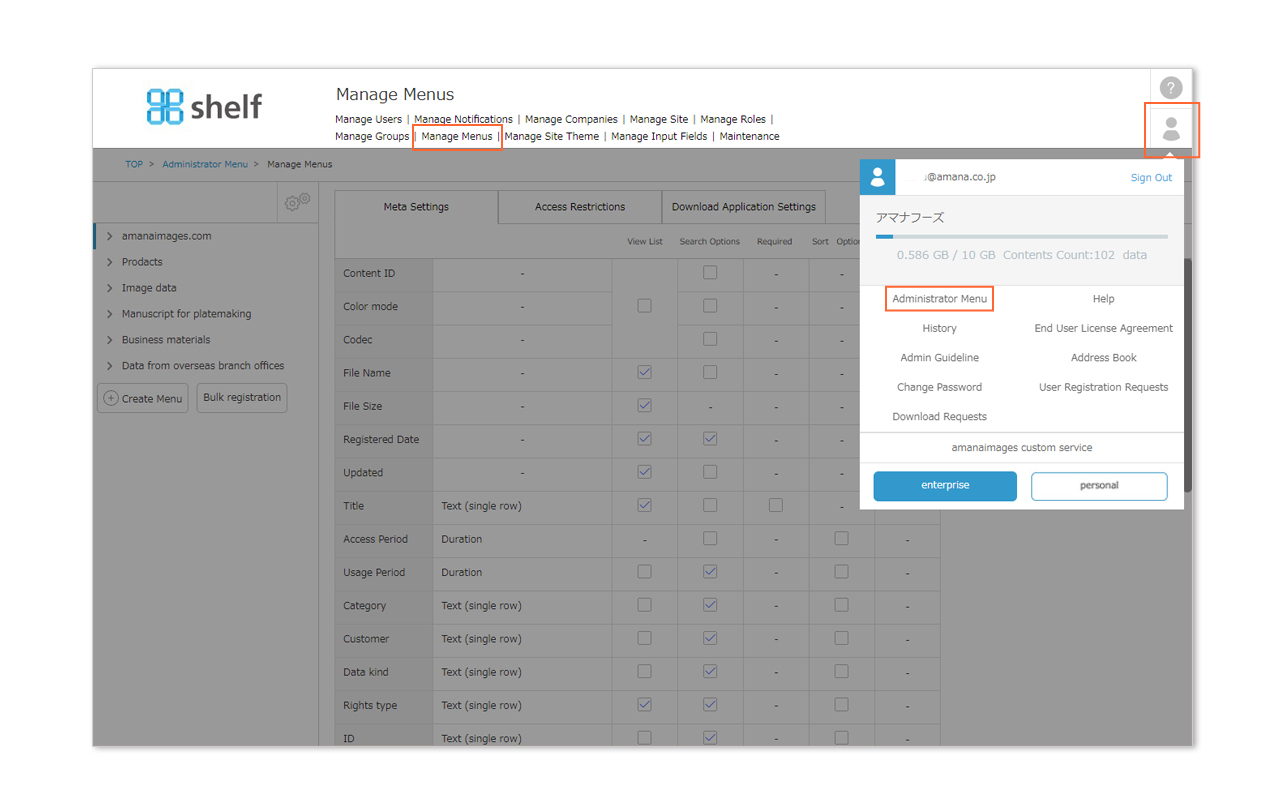
- Click Administrator Menu from User Menu
 in the upper right of the screen, then click Manage Menus.
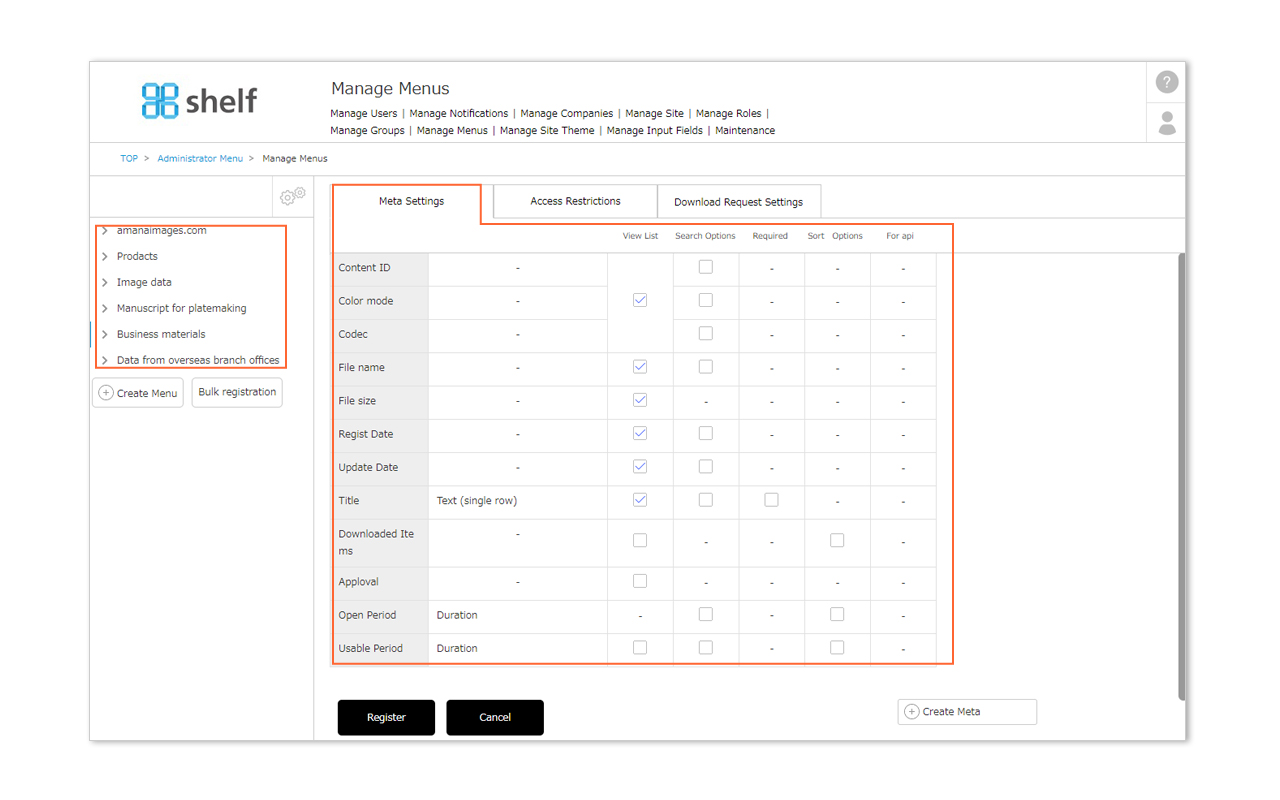
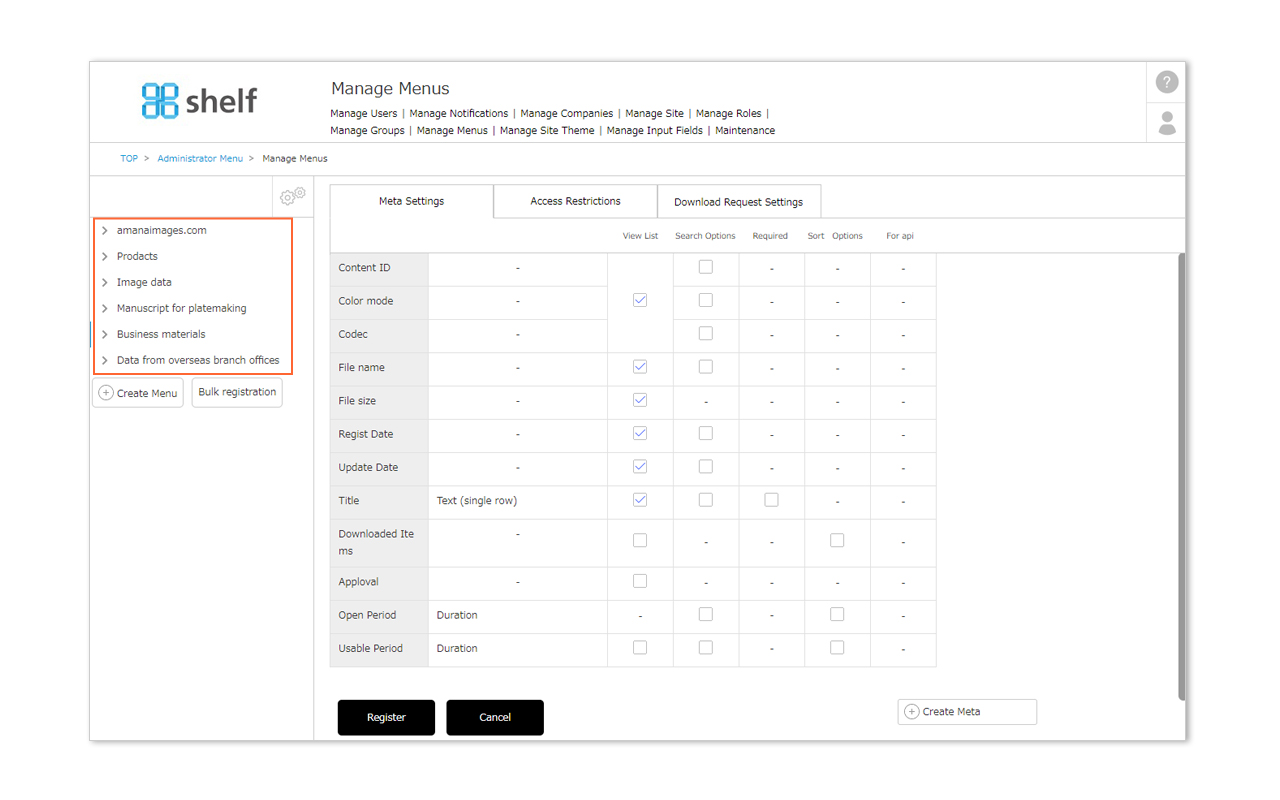
- A list of currently created menus will appear on the left side of the screen. Click a menu name to display a list of meta items currently set to that menu.
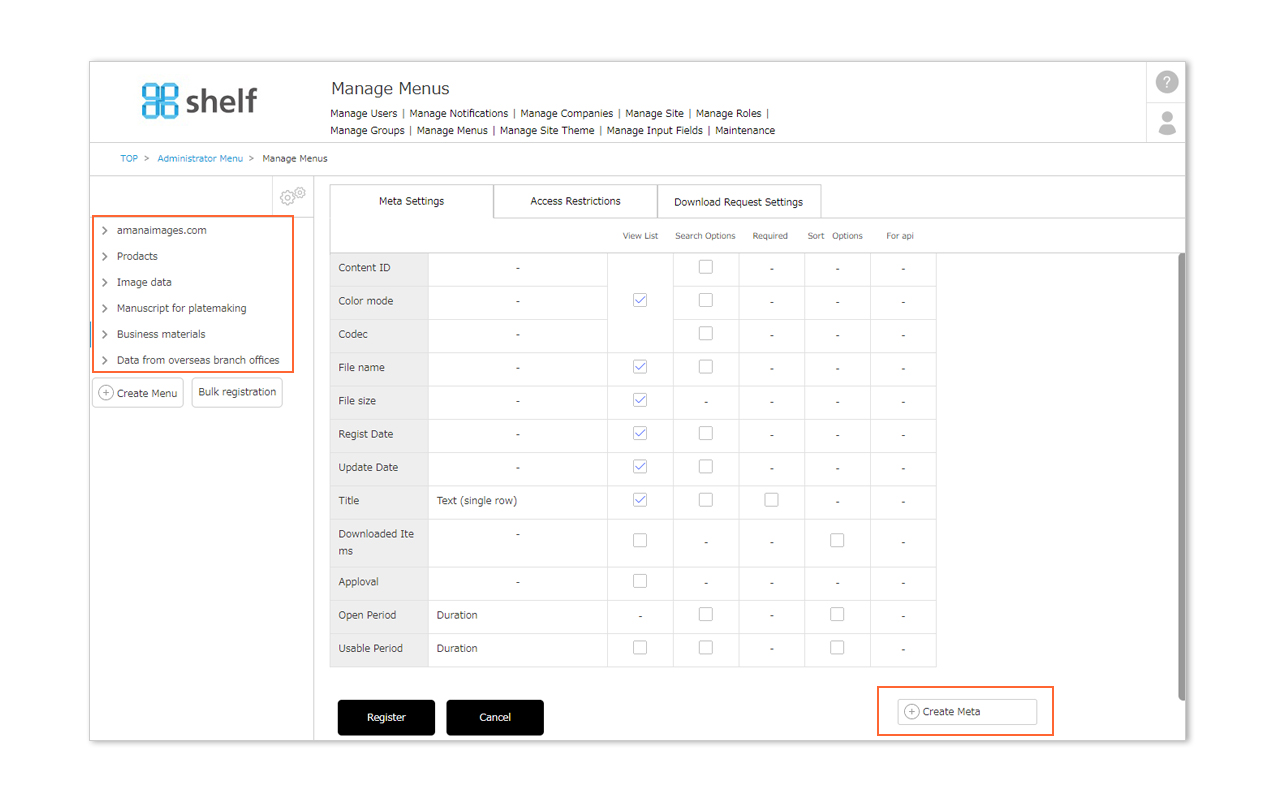
- Click the Create Meta button below the meta items.
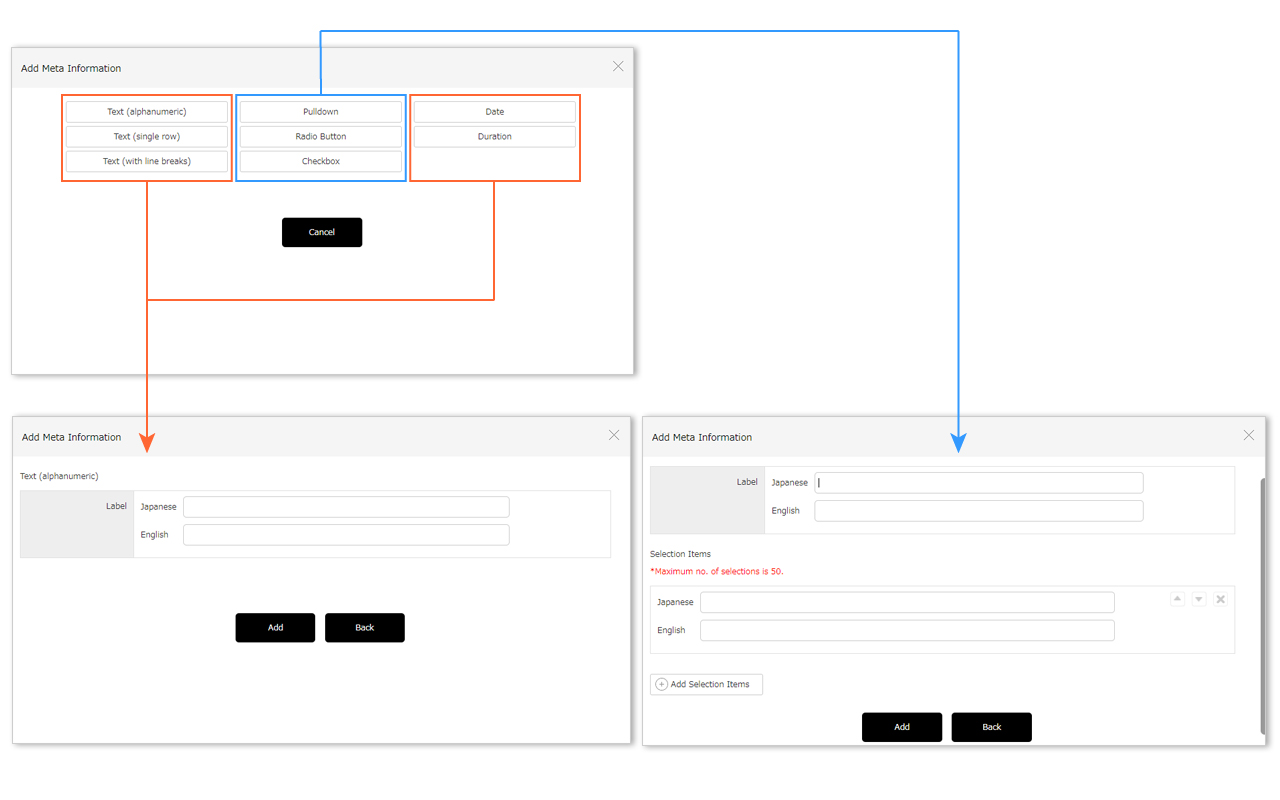
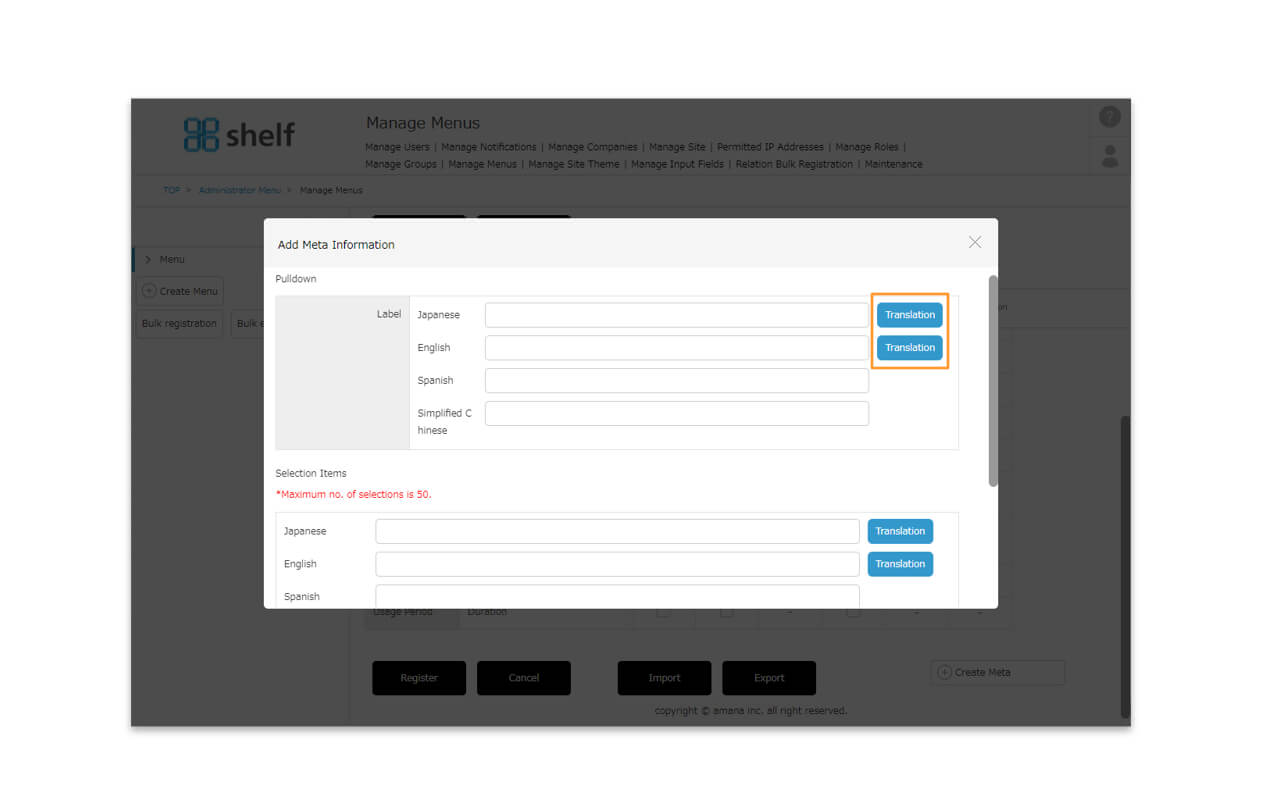
- On the Add Meta Information window which appears, enter the input type of the meta item to be added.
- If any of Text (alphanumeric), Text (single row), Text (with line breaks), Date, or Duration are selected, enter the label (the meta item’s name) and click the Add button.
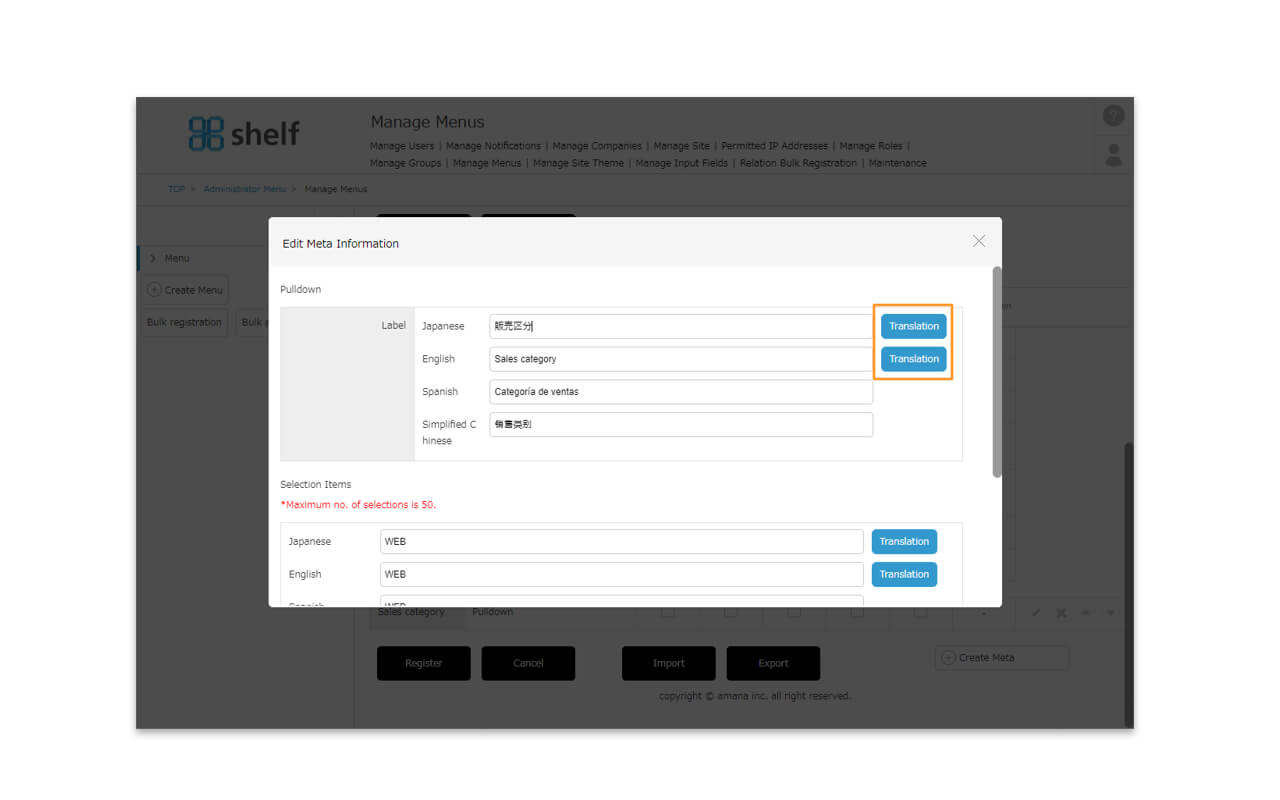
- If any of Pulldown, Radio Button, or Checkbox are selected, enter the label (item name) and create the selection item. If multiple selection items are necessary, click the Add Selection Items button and create these. Once this is complete click Add to complete.
* The label (the meta item’s name) can have a maximum of 50 characters.
* Entries in text fields can have a maximum of 1000 characters.
*In case of using the automatic translation function
A [Translation] button will appear next to the Japanese/English field. The translated text based on the language in which this button is clicked will also appear in the other language fields. You can also modify each of them.
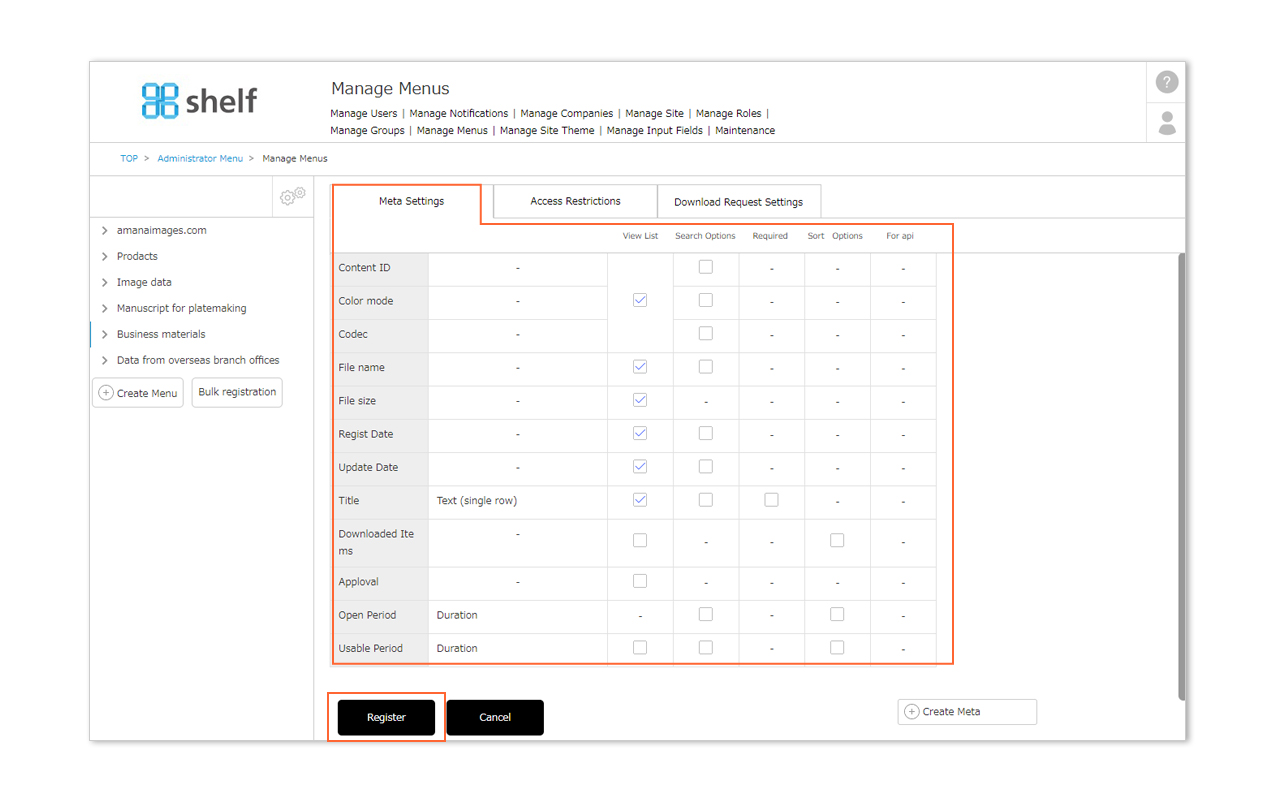
- Set the display options for the added item(s).
- If View List is selected, the meta item will be displayed below the thumbnail image in the list page.
- If Search Options is selected, it will be displayed in the advanced search window and can be used as a search condition.
- If Required is selected, the item will become required, and content cannot be registered without this item being filled in.
- If Sort Conditions is selected, the sort function items will be added and can be used. However, checkboxes cannot be set for sort conditions.
- If For API is selected, it will not be visible or usable to any users except for Site Managers.
- If Automatic translation is selected, the text entered in that meta will be automatically translated and reflected on each language site.
*On/Off of the check can be changed only by the amana system administrator. Please contact us as needed.
*Automatic translation is available in the meta format of text (single row)/text (with line breaks).
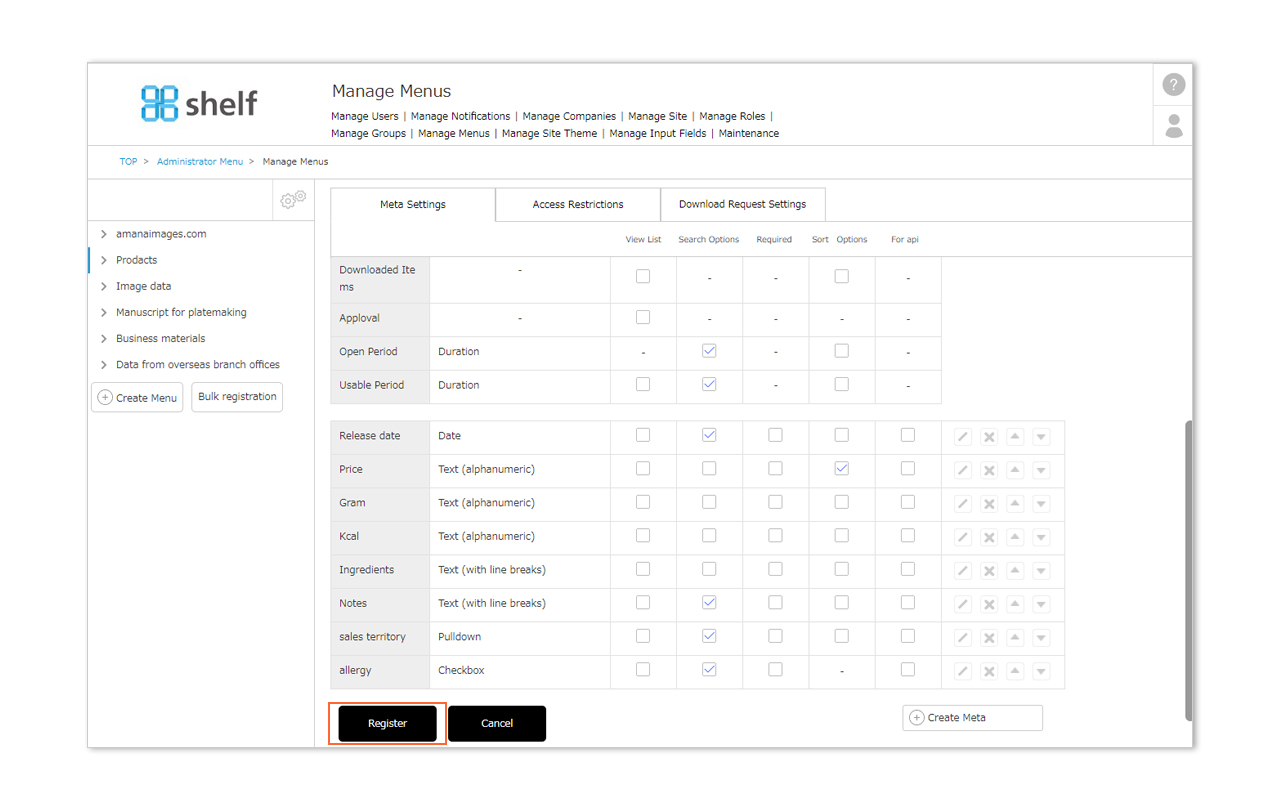
- Click Register.
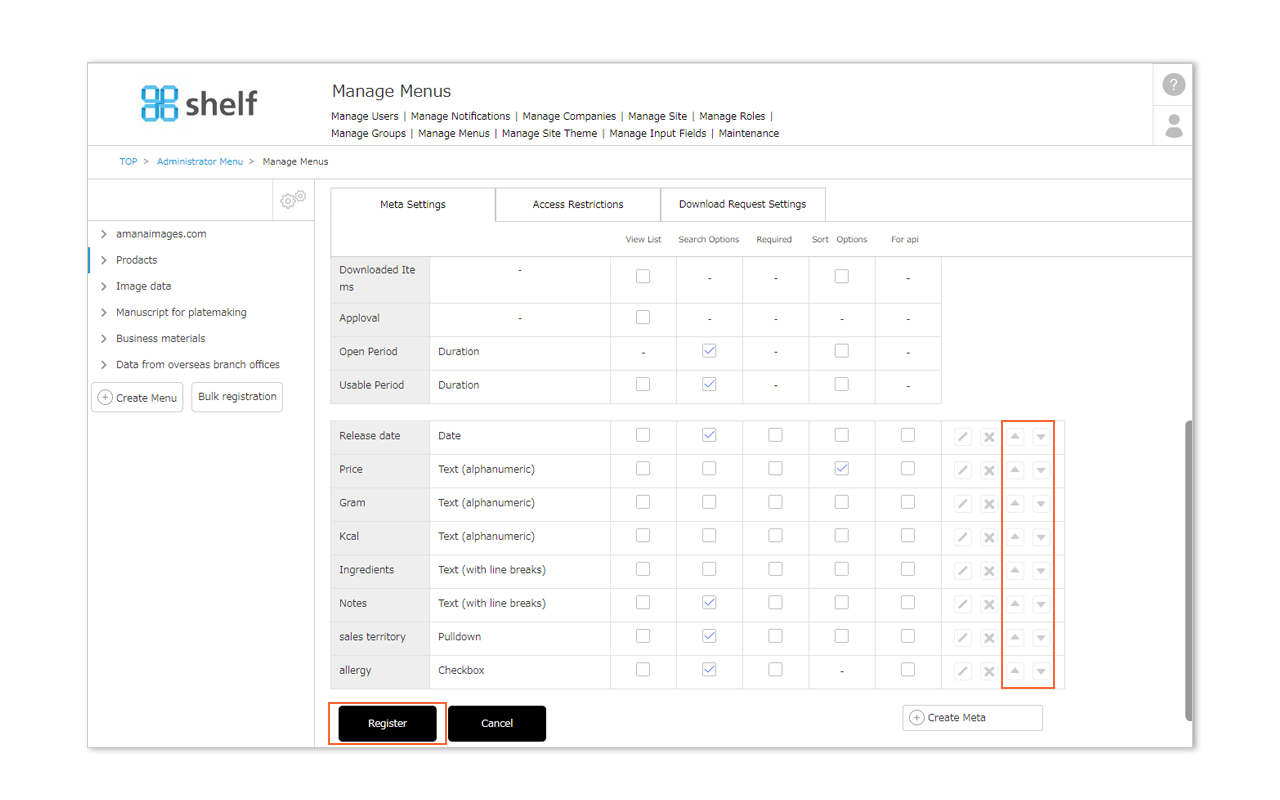
Sorting Added Meta Items
On the Manage Menus page, click the ▲▼ buttons to change the order in which meta items are shown. Click Register to complete.
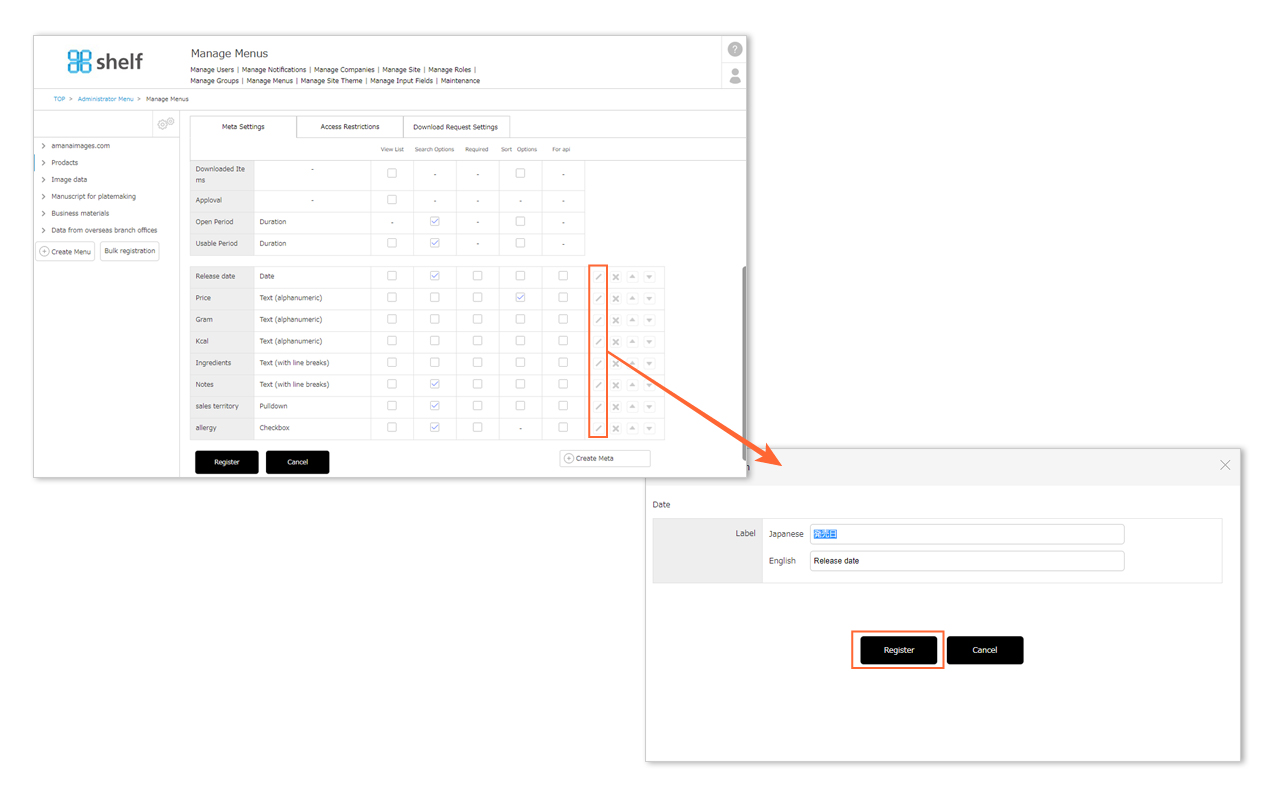
Editing Added Meta Items
- On the Manage Menus page, click the pencil icon next to the meta item you want to edit.
- Edit the fields as desired on the Edit Meta Information window which appears, and click Register.
*In case of using the automatic translation function
A [Translation] button will appear next to the Japanese/English field. The translated text based on the language in which this button is clicked will also appear in the other language fields. You can also modify each of them.
- Click Register once more on the Manage Menus page to complete.
* Meta items using a pulldown, radio button, or checkbox style cannot be changed if there is already content using these items.
Deleting Added Meta Items
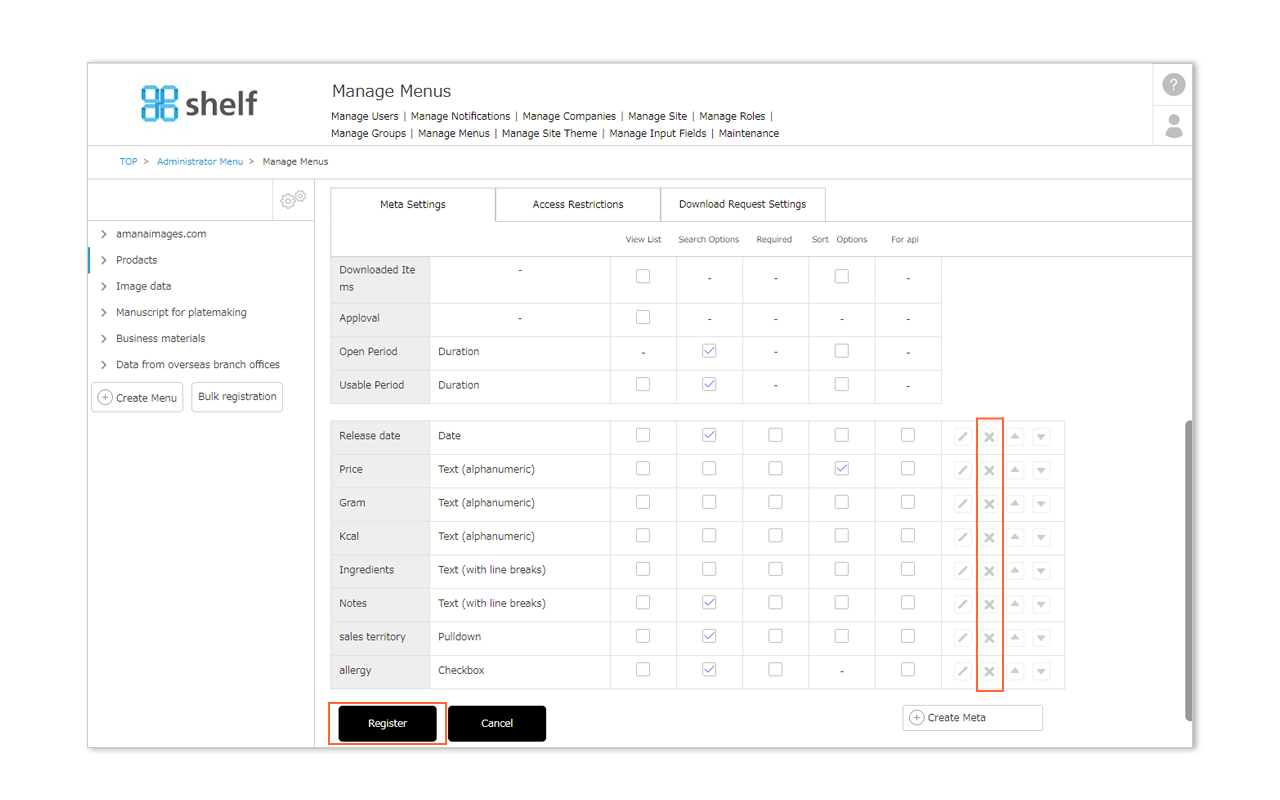
- On the Manage Menus page, click the X icon next to the meta item you want to delete.
- Click Register to complete.
【Bulk Registration of Meta Items】
You can export the created meta items and settings as a list, and bulk edit or bulk register in other menus.
Please refer to Importing/Exporting Lists for the details.
Close
Download Request Settings
Print
Download Request Settings
With download request settings, you can set whether or not an authorizer’s approval is required when downloading.
Settings are applied on a per-menu basis. If the request feature is enabled, when an item of content is uploaded to the applicable menu, you can specify whether or not a request is required to download that item.
Enabling Download Requests
- Click Administrator Menu from User Menu in the upper right of the screen, then click Manage Menus.
*Administrator menu is available in Japanese and English only. If you select another language site, please log in again to the Japanese or English site.
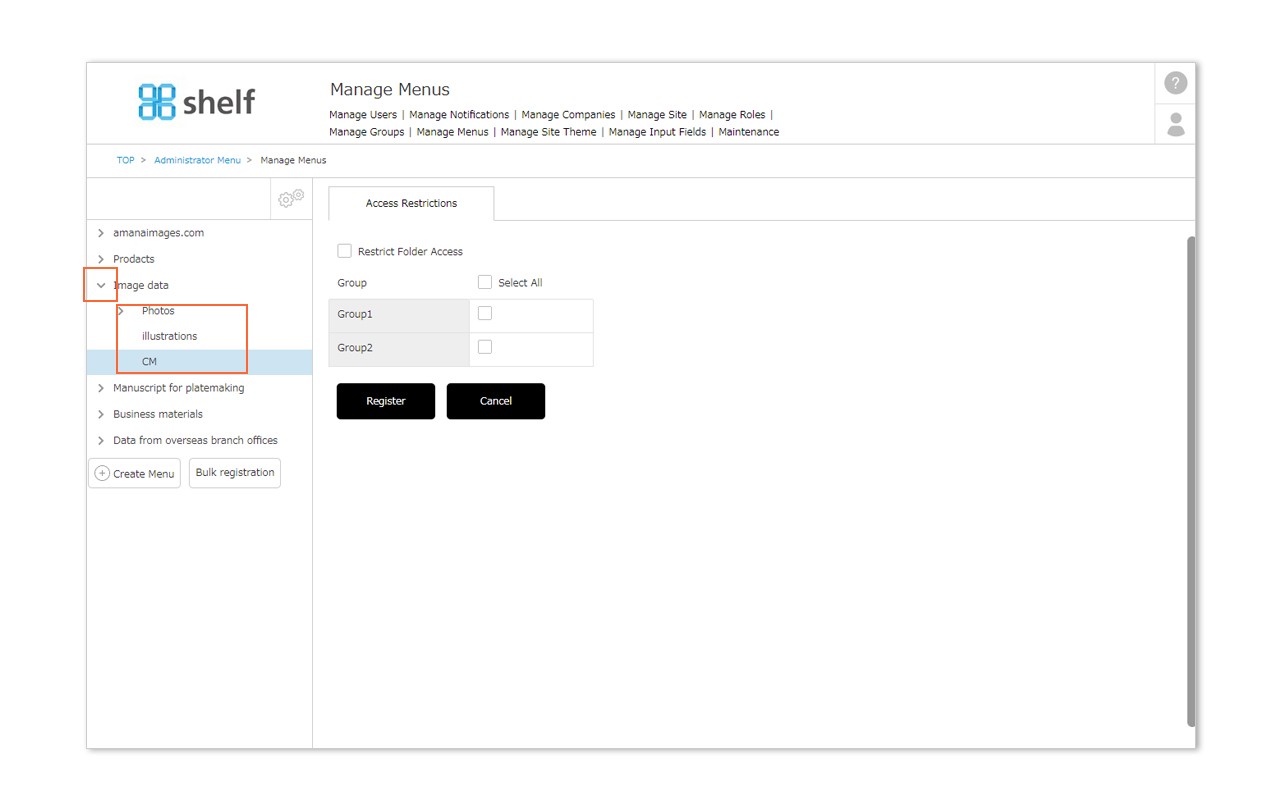
- A list of menus and meta items currently set will be displayed. Click the name of the menu to which you want to apply download request settings.
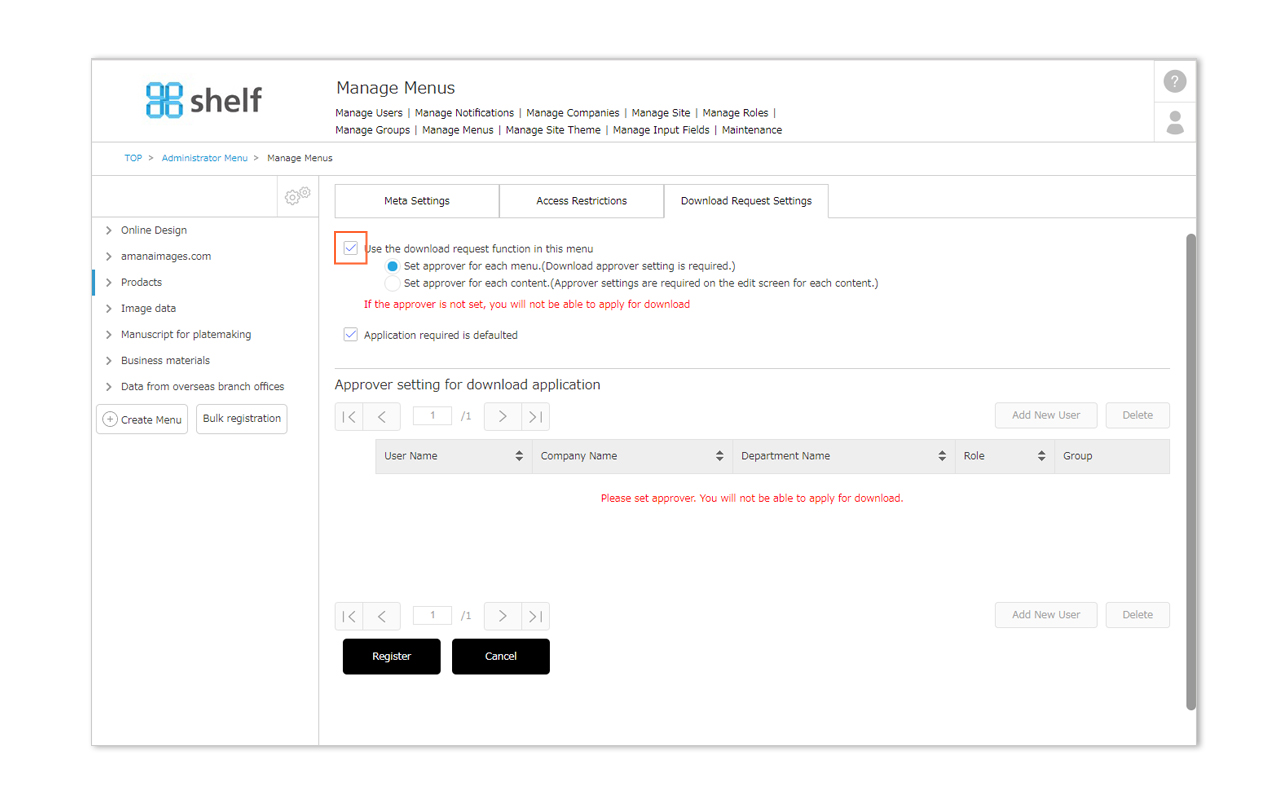
- Click the Download Request Settings tab to open the settings page.
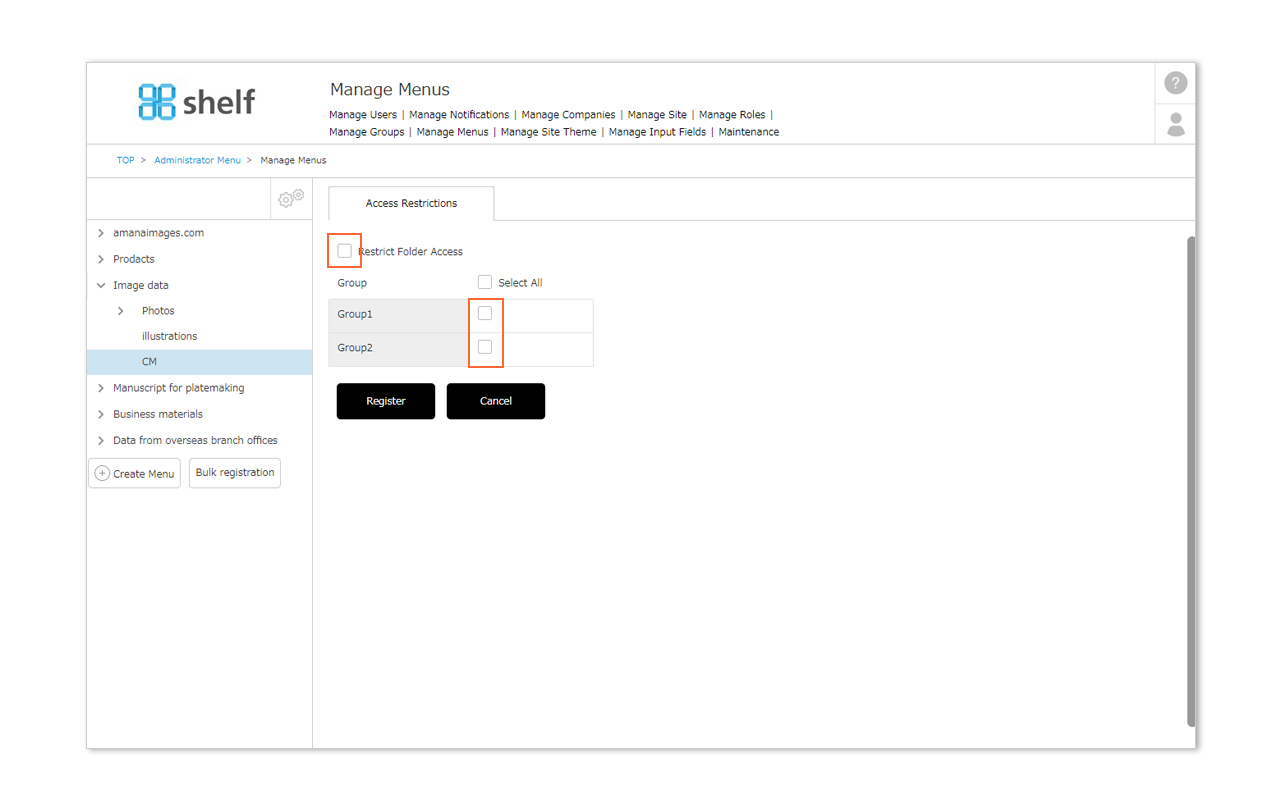
- If Use Download Request Settings on This Menu is selected, the registering user will be able to specify whether or not a download request is required to download that content.
* For more information on how to set download request authorizers, please see Download Request Authorizer Settings.
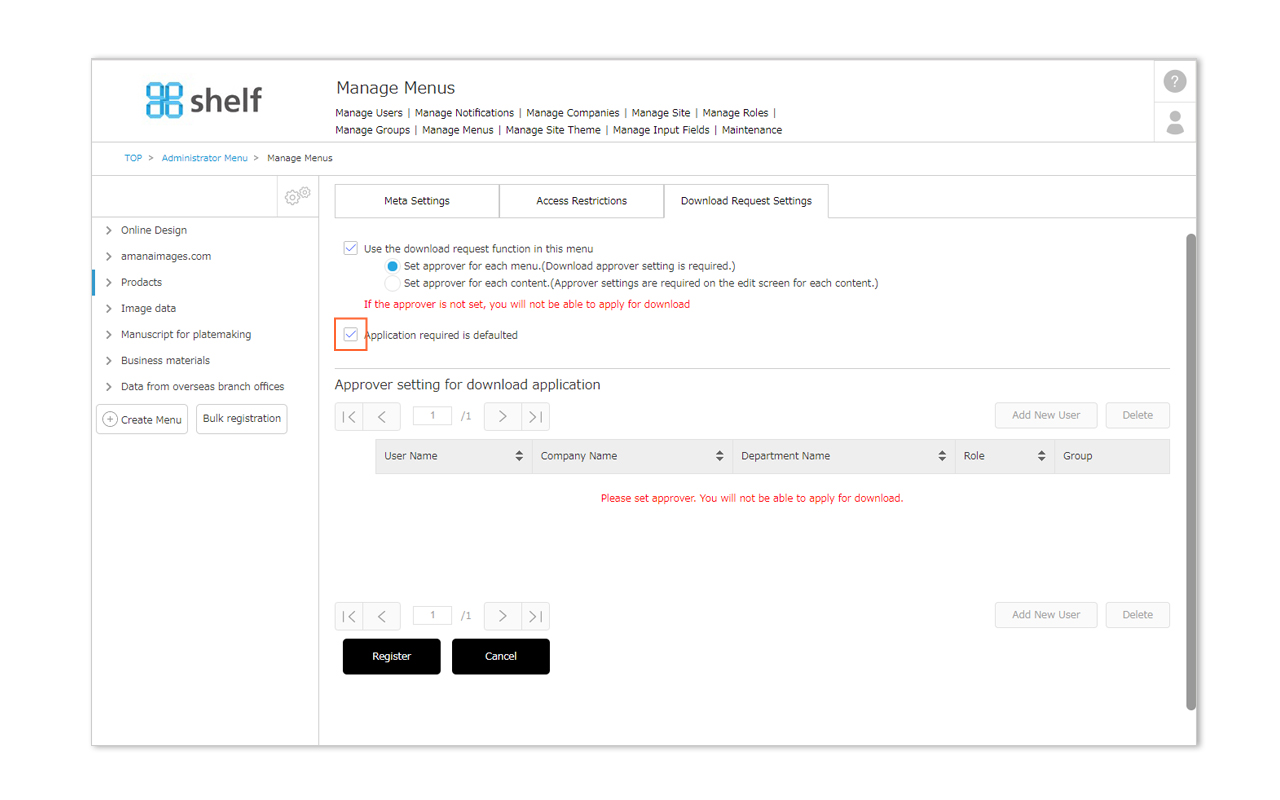
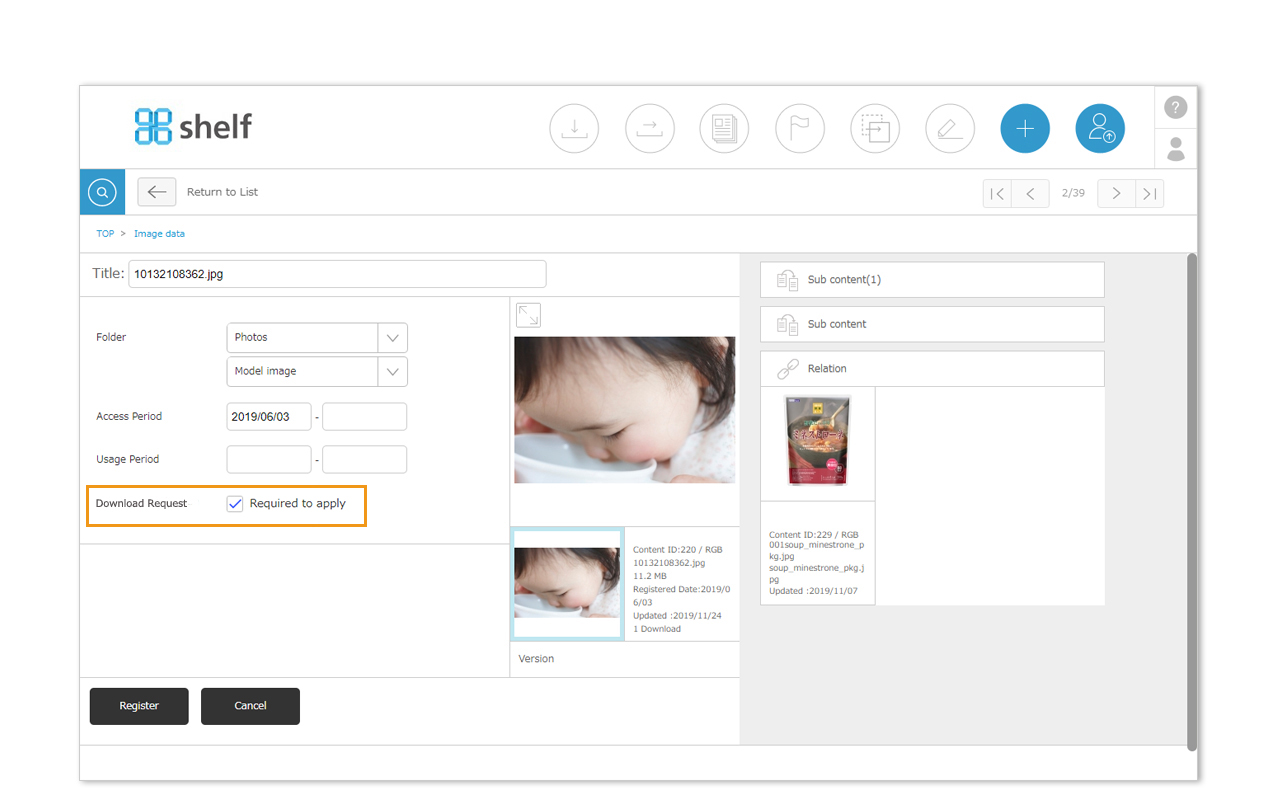
- If Require Request by Default is selected, the Request Required checkbox will always be selected by default when registering.
* Download request requirement can be toggled from the edit page for individual content items.
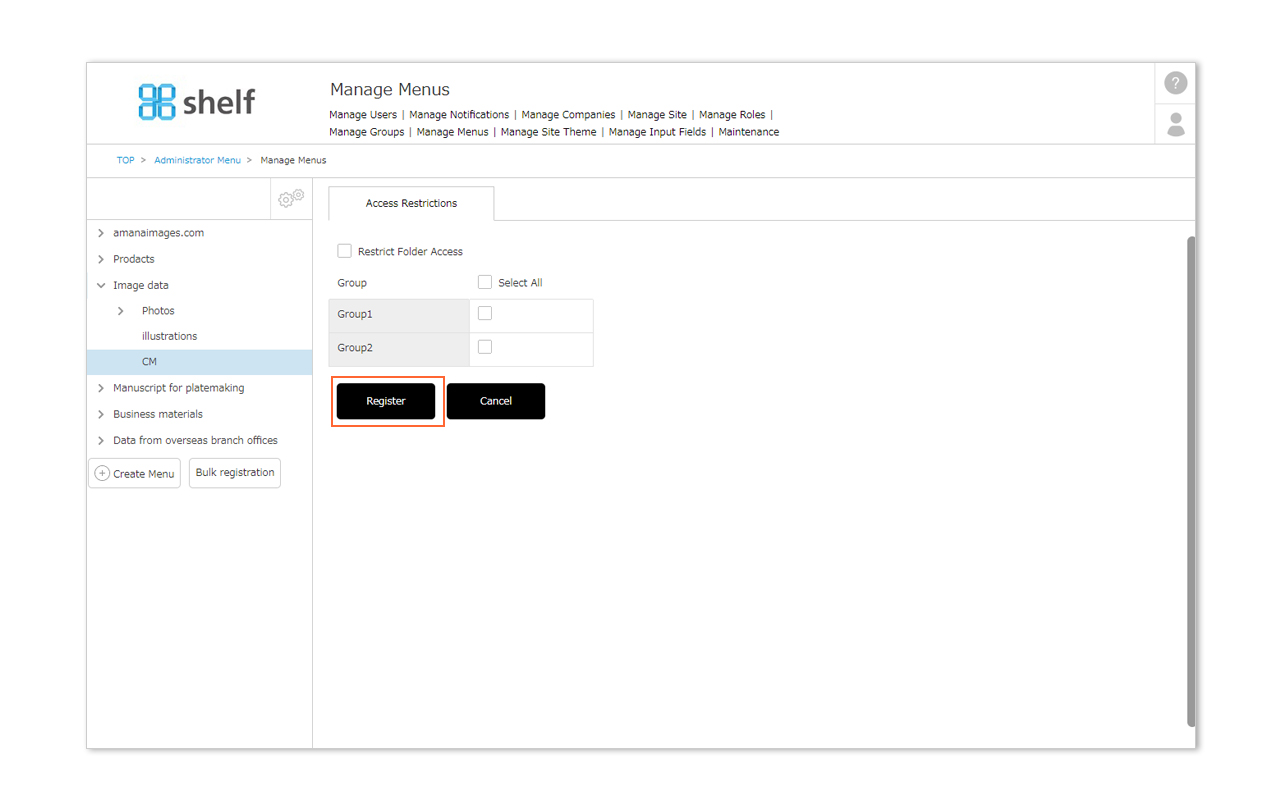
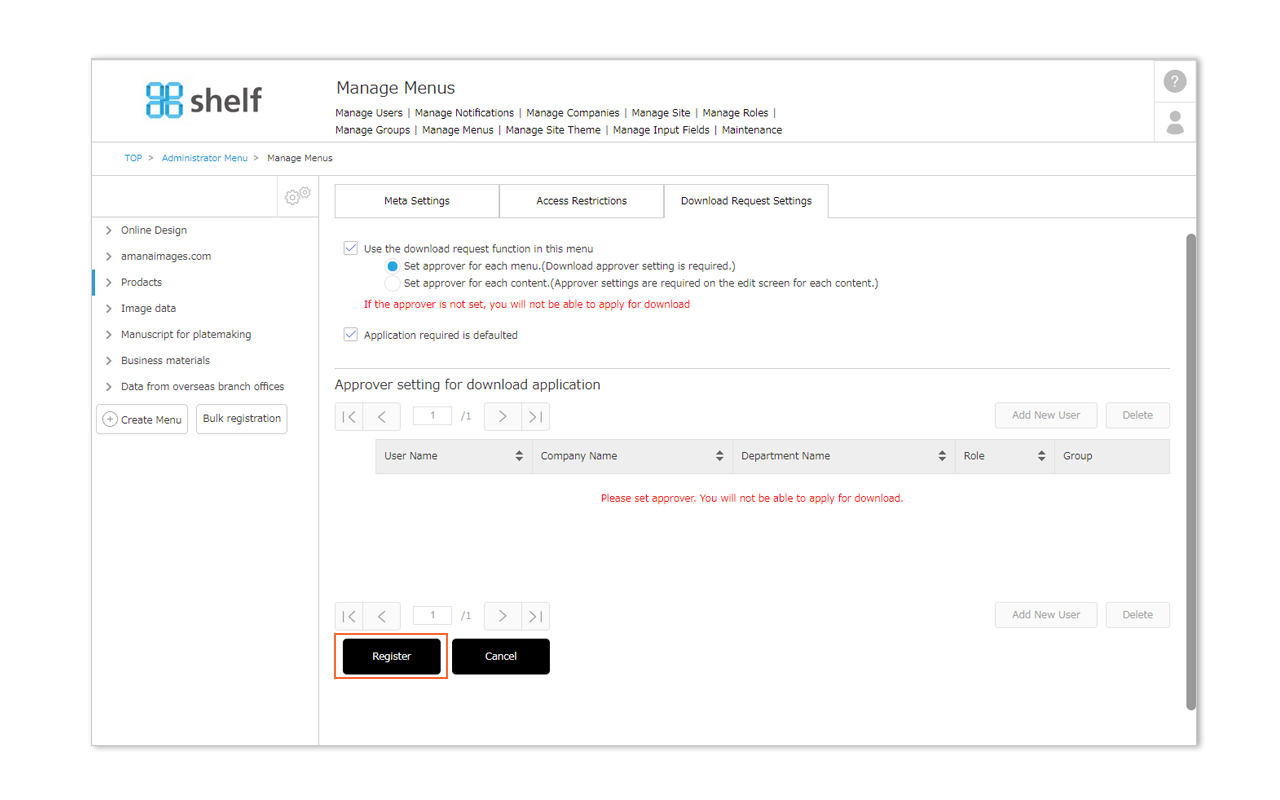
- Click Register to complete.
* If download requests are enabled on a menu to which content has already been registered, any content registered up to that time will be set to not require a download request by default. This can be changed to require a download request from the edit page of each item of content.
Changing Request Requirements Per Content
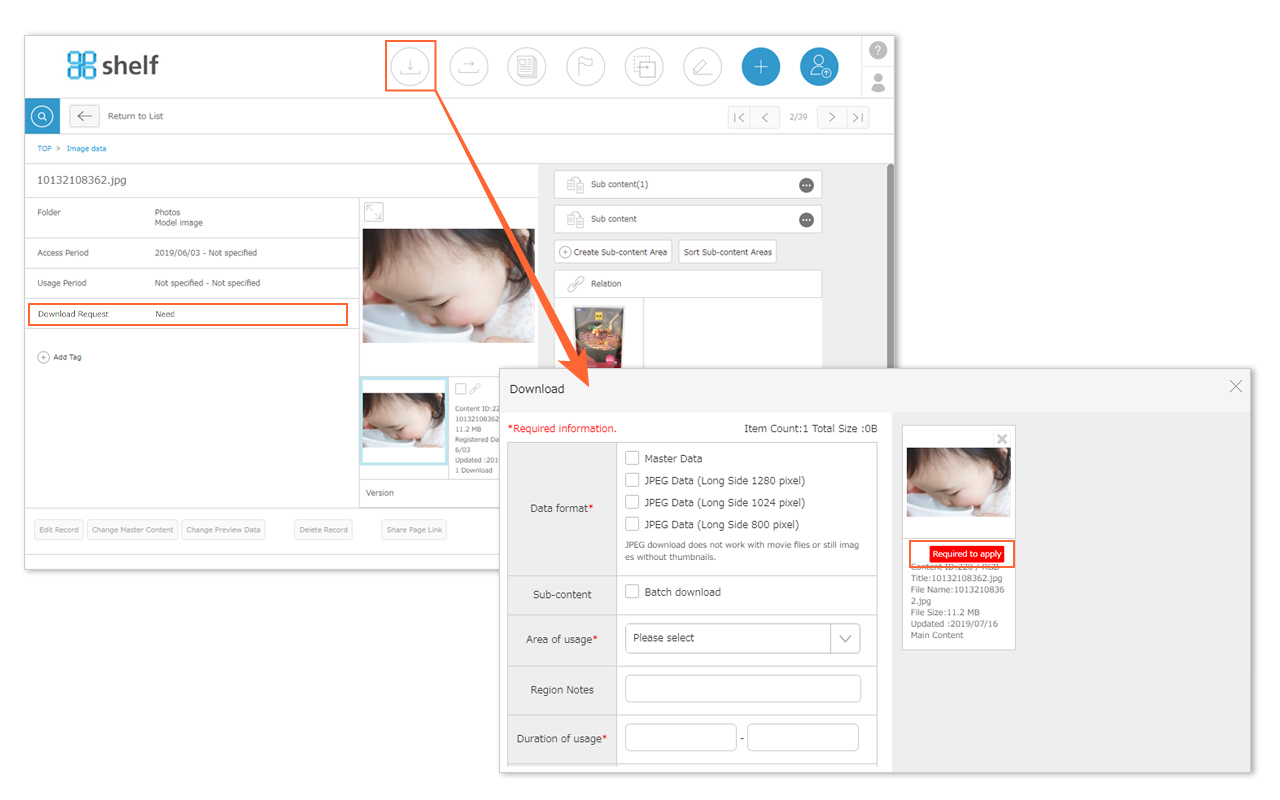
To enable or disable download requests for individual content items, select or clear the Download Request checkbox when registering or editing the item.
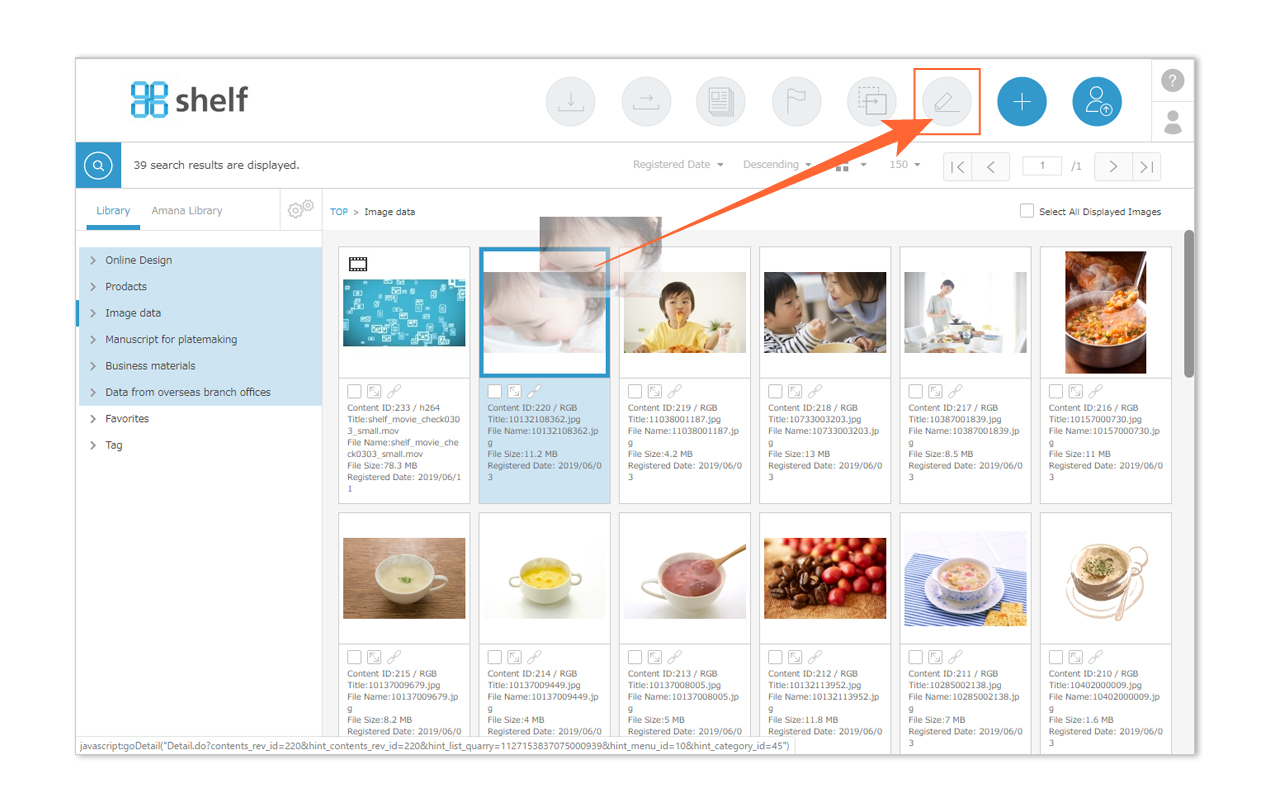
- Select the content to be edited via ≪dragging and dropping≫, or ≪using the checkboxes≫.
- From the edit page of the selected content, select the Download Request checkbox to require download requests, or clear the checkbox to disable this feature.
To allow users other than Site Managers to manage this, the following permissions need to be set.
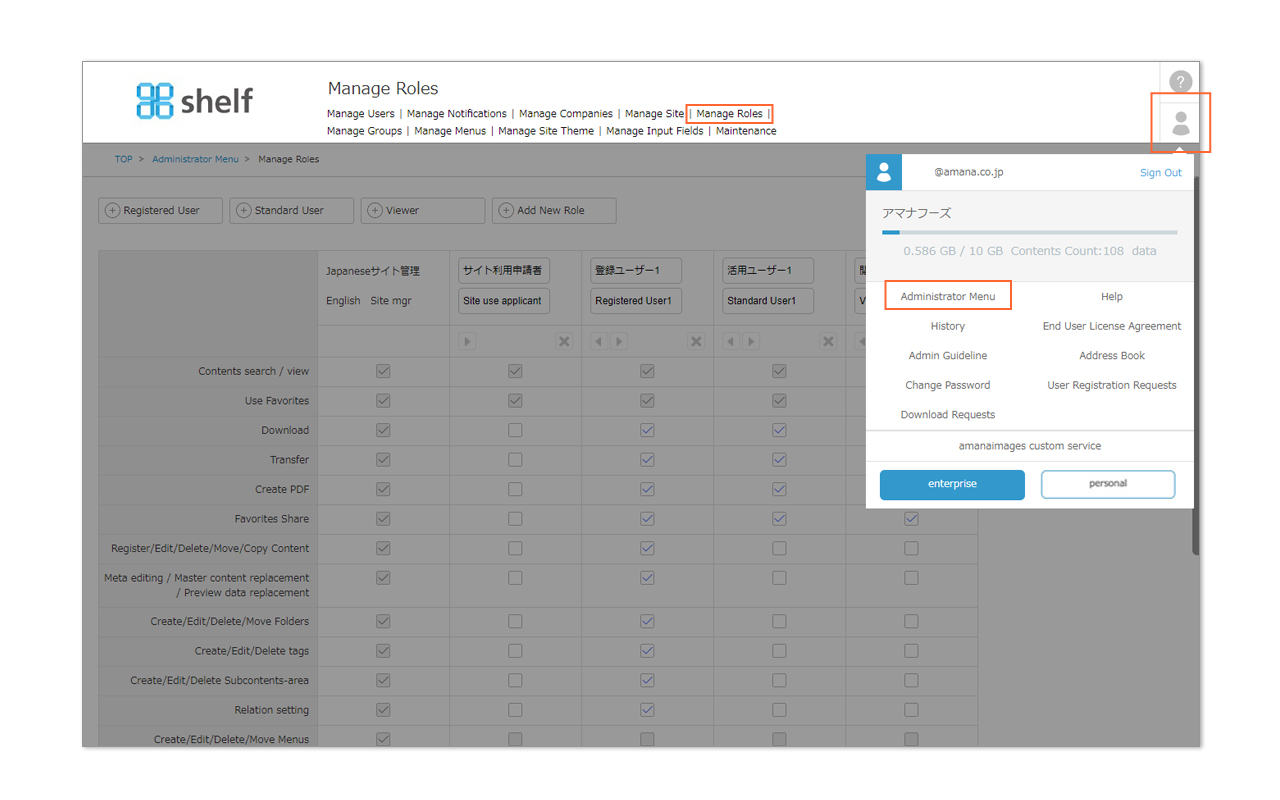
- Click Administrator Menu from User Menu in the upper right of the screen, then click Manage Roles.
*Administrator menu is available in Japanese and English only. If you select another language site, please log in again to the Japanese or English site.
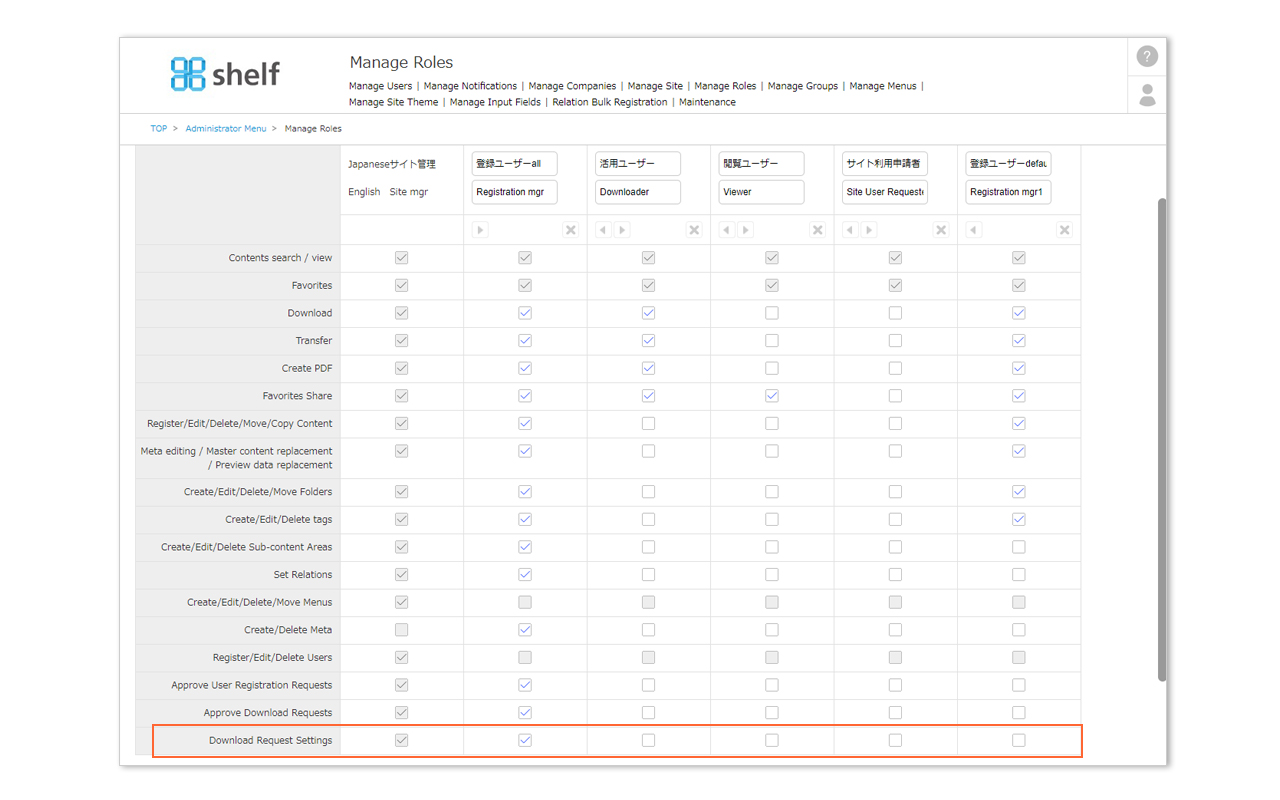
- In the role of the user to which you want to grant the permission to manage requirement of download requests, select the checkbox for Manage[Download Request Settings]
- Click Register to complete.
* In order to use the Download Request feature, please contact your sales representative or Amana systems administrator.
Close
Download Request Authorizer Settings
Print
Download Request Authorizer Settings
Download request authorizer can be set per menu, or per item of content.
On the Manage Menus page, an authorizer can be set per menu by selecting the Use Download Request Settings on This Menu checkboxes, or specified per individual content item.
*Please note that download requests cannot be made if an Authorizer is not set.
* Administrator menu is available in Japanese and English only. If you select another language site, please log in again to the Japanese or English site.
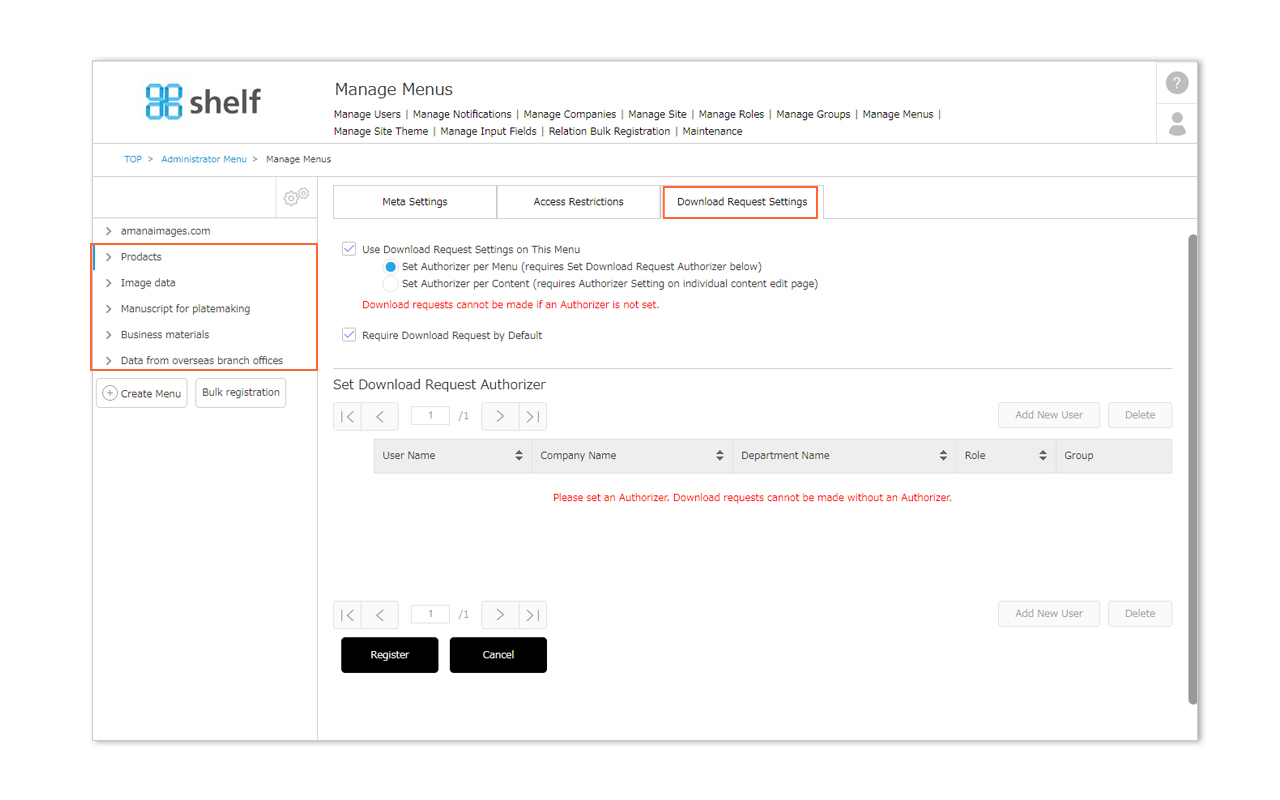
Setting Authorizer Per Menu
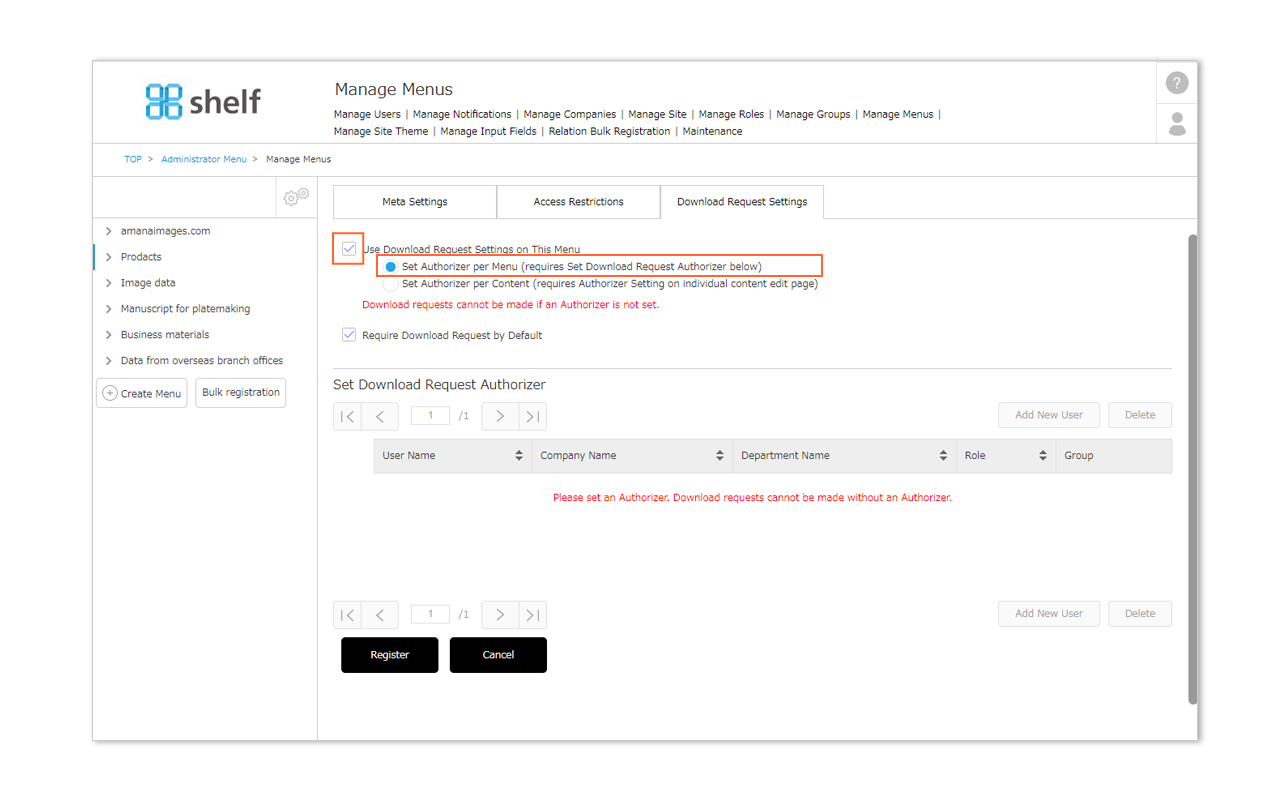
- Click Administrator Menu from Options in the upper right of the screen, then click Manage Menus.
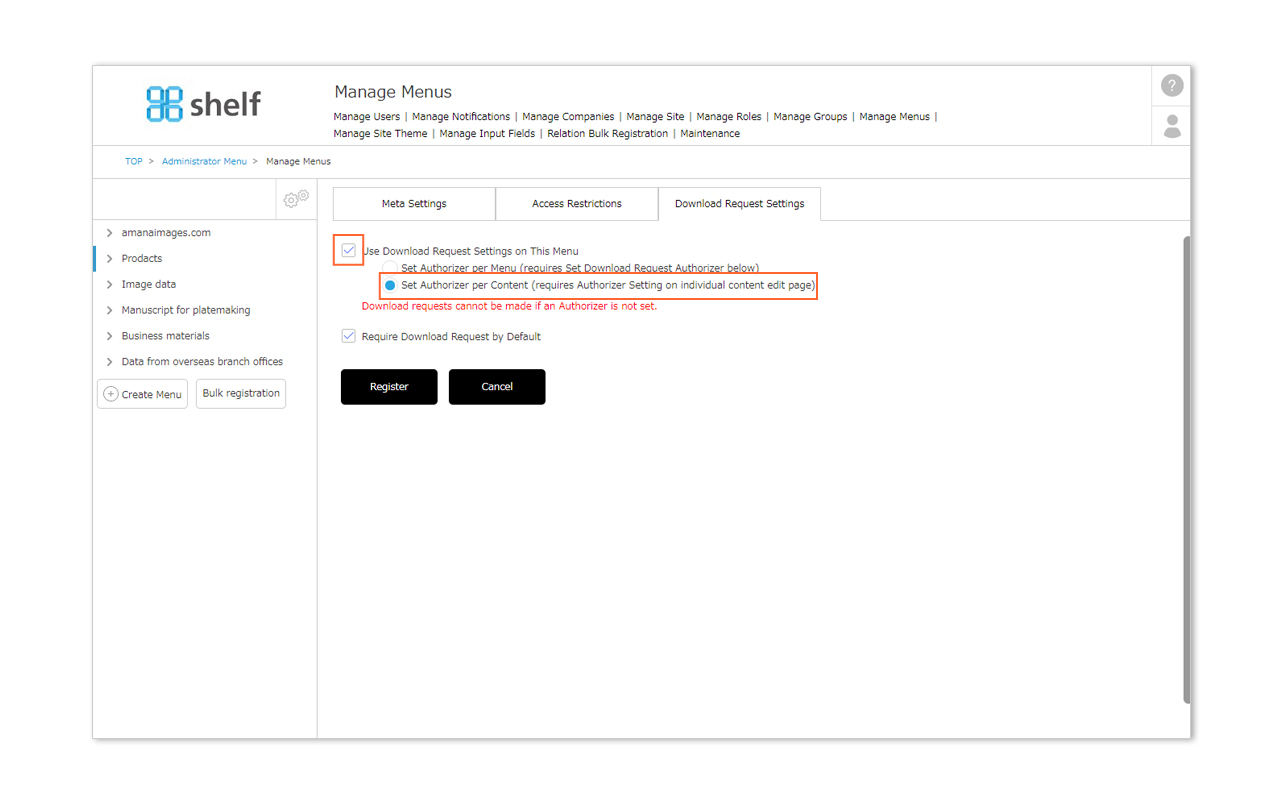
- Select the Download Request Settings tab, then with the Use Download Request Settings on This Menu checkbox selected, select Set Authorizer Per Menu.
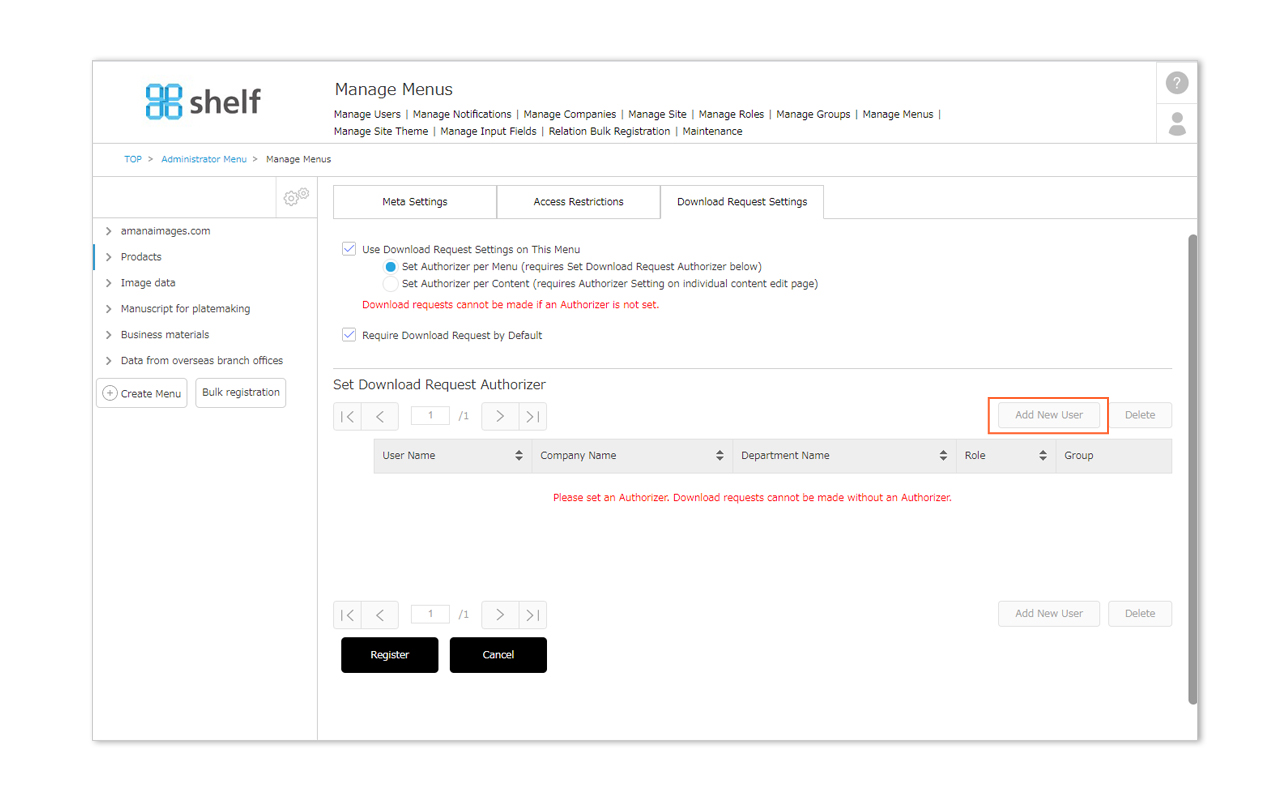
- From Set Download Request Authorizer, click Add New User.
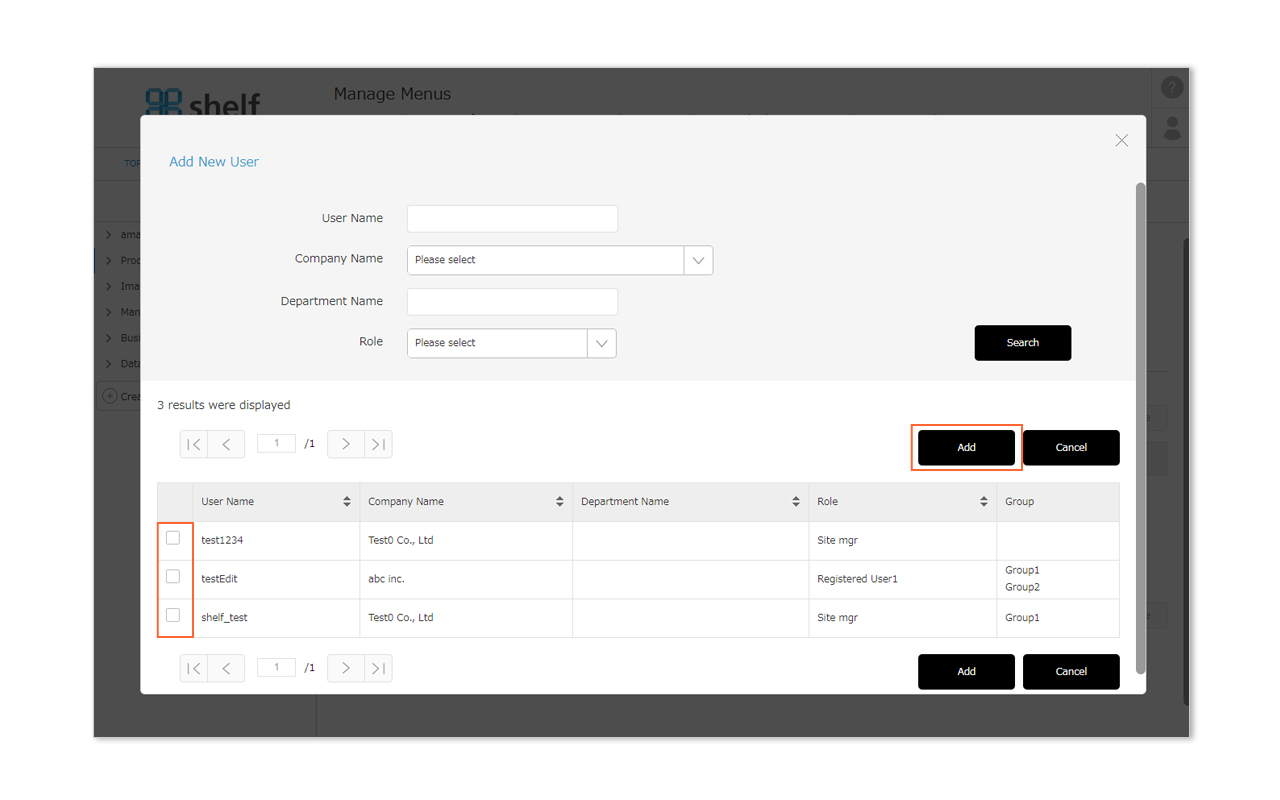
- Search for and select the user you want to add as an authorizer, then click Add.
Users who can be set as authorizers are limited to Site Manegers and roles which have the Approve Download Requests permission enabled.
* Users be searched by user name, company name, department name, or role. For multilingual sites, the search text will be in Japanese/English as set when registering as a user.
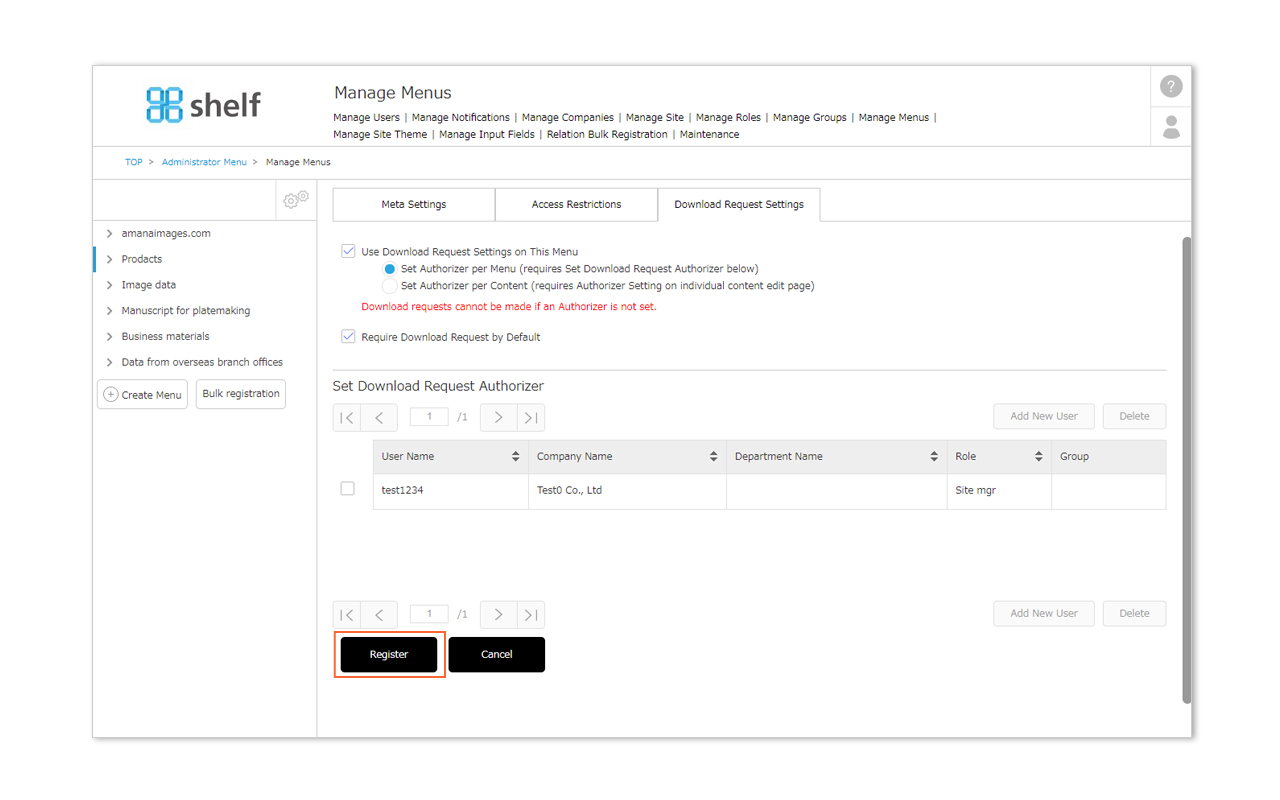
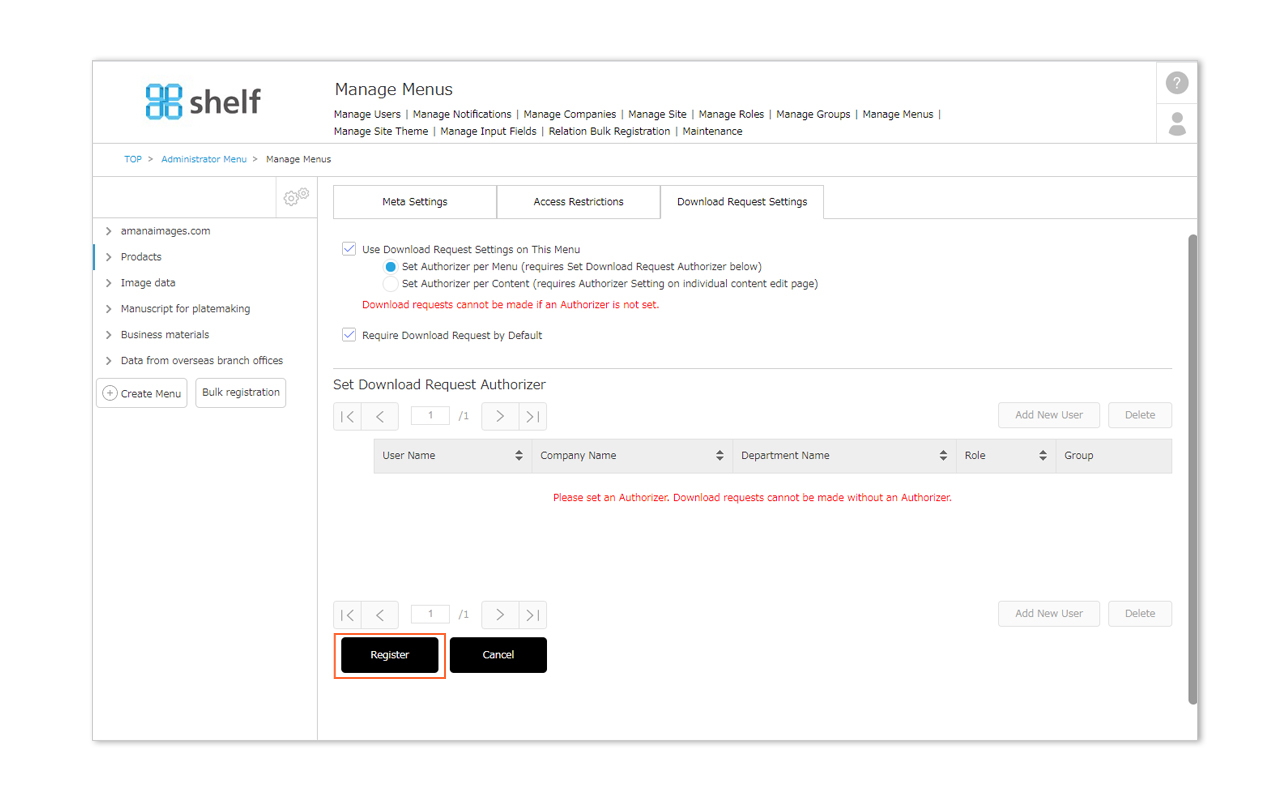
- Click Register to complete.
*To add additional authorizers, repeat steps 3 to 5.
Setting Authorizer Per Content
- Click Administrator Menu from Options in the upper right of the screen, then click Manage Menus.
- Select the Download Request Settings tab, then with the Use Download Request Settings on This Menu checkbox selected, select Set Authorizer Per Content.
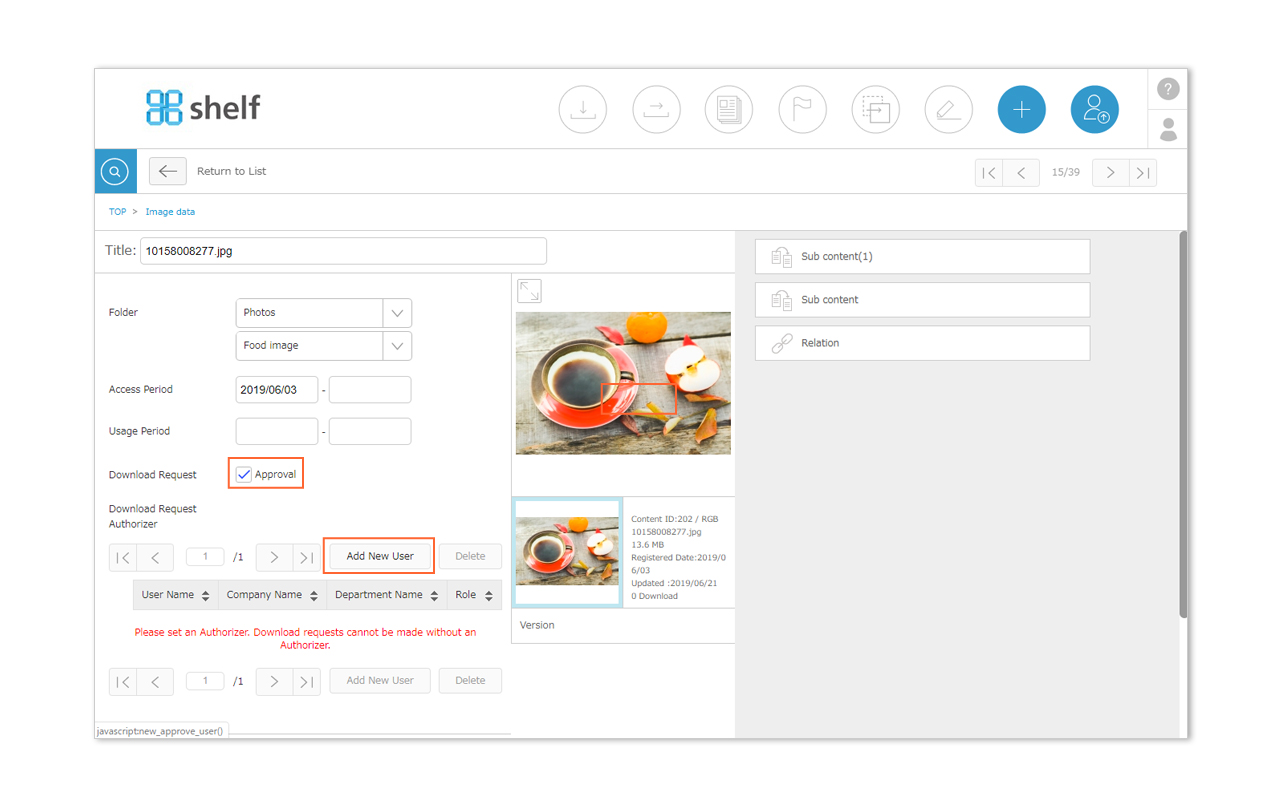
- For individual content items which require a download request, you can set the authorizer from the edit page. From Set Download Request Authorizer, click Add New User.
- Search for and select the user you want to add as an authorizer, then click Add.
Users who can be set as authorizers are limited to Site Manegers and roles which have the Approve Download Requests permission enabled.
* Users be searched by user name, company name, department name, or role. For multilingual sites, the search text will be in Japanese/English as set when registering as a user.
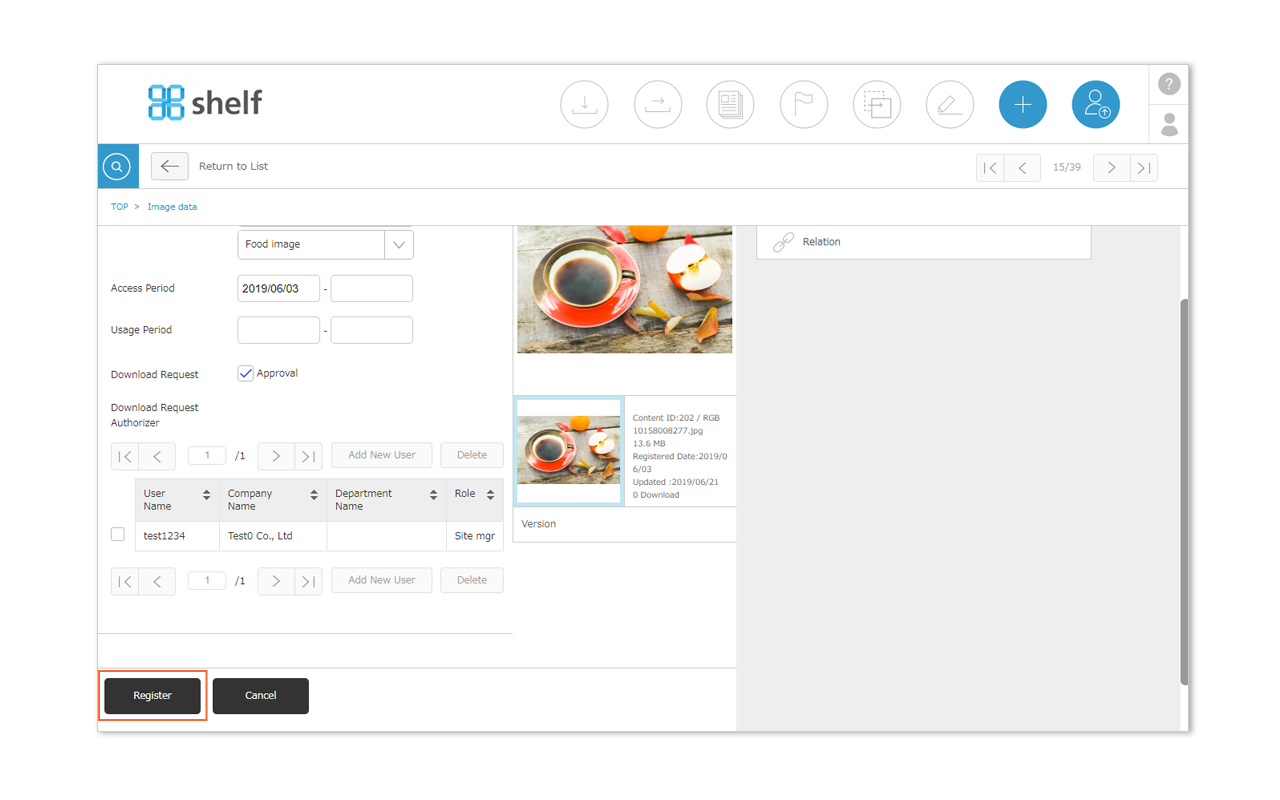
- Click Register to complete.
*To add additional authorizers, repeat steps 3 to 5.
*Authorizer settings are shared across old and current versions of content; changing an authorizer on the current version of a content item will also change the previous version(s).
Allowing users other than Site Managers to act as download request authorizers can be performed in the Manage Roles permissions settings.
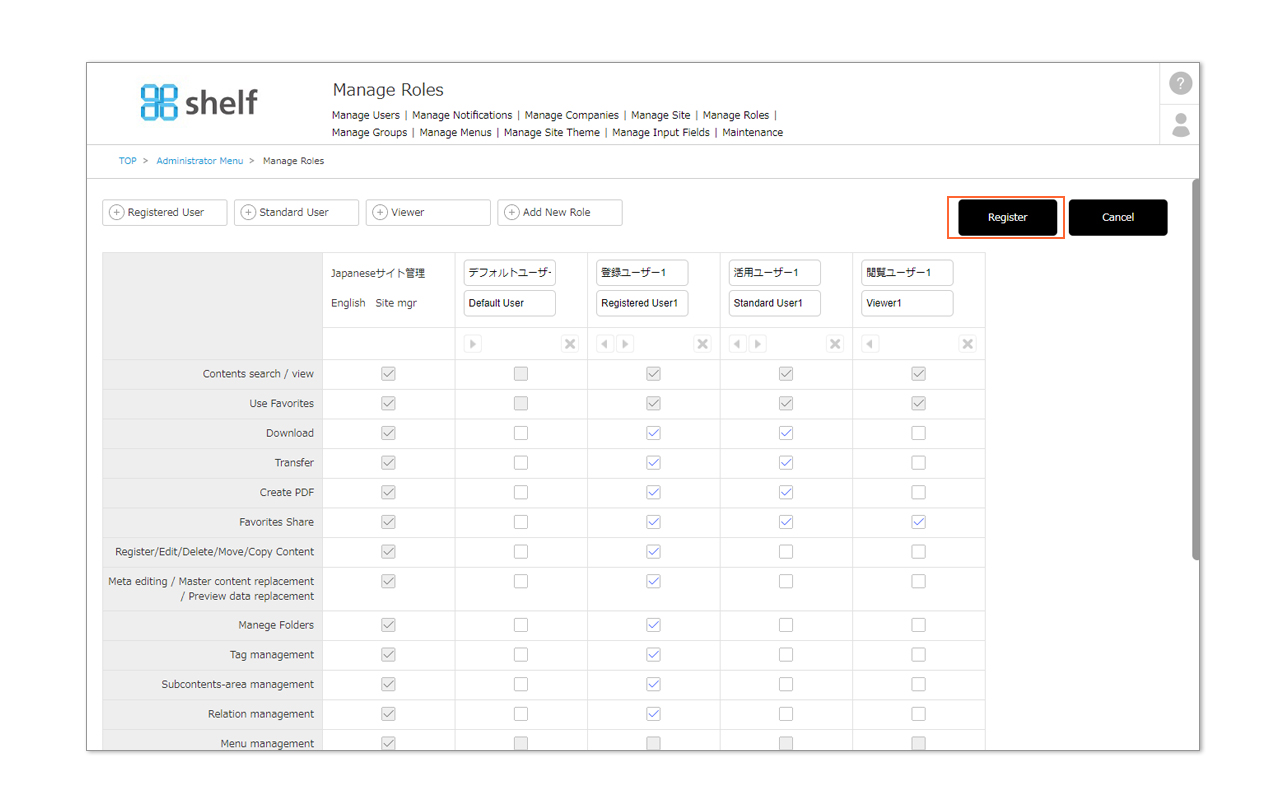
- Click Administrator Menu from Options in the upper right of the screen, then click Manage Roles.
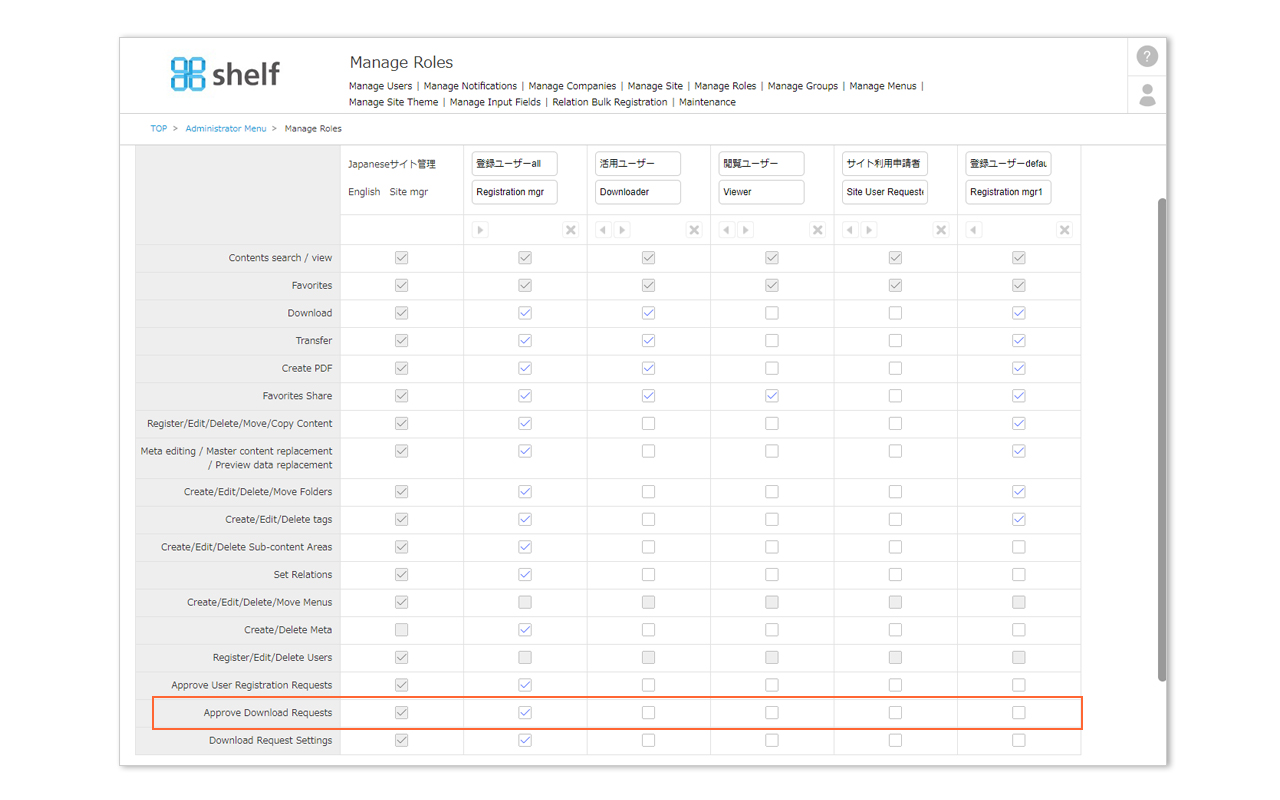
- In the role of the user to which you want to grant the permission to manage requirement of download requests, select the checkbox for Manage[Approve Download Requests]
- Click Register to complete.
*Note that this setting will apply to all users in that role. Before making this change, we recommend checking other users with the same permissions from the Manage Users menu.
To limit this permission to a select group of users, you can create a new role, and register the desired users to this.
*For more information on the process of approving/rejecting requests, please see Approving/Rejecting Requests section of Download Requests.
*In order to use the Download Request feature, please contact your sales representative or Amana systems administrator.
Close
Download Request Authorizer Removings
Print
Download Request Authorizer Removings
Download request authorizer can be removed per menu, or per item of content.
*Please note that download requests cannot be made if an Authorizer is not set.
*Authorizer settings are shared across old and current versions of content; changing an authorizer on the current version of a content item will also change the previous version(s).
*Administrator menu is available in Japanese and English only. If you select another language site, please log in again to the Japanese or English site.
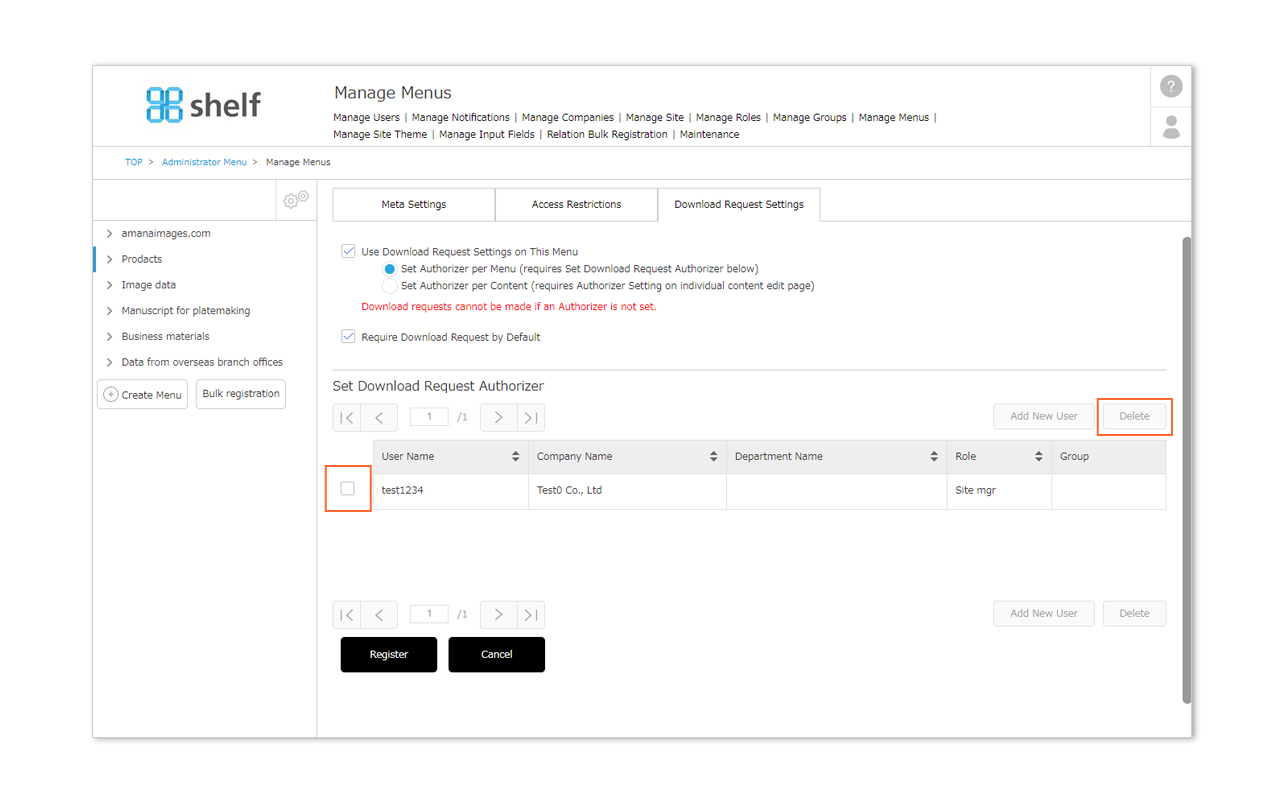
Removing Authorizer Per Menu
- Click Administrator Menu from User Menu in the upper right of the screen, then click Manage Menus.
- Select the menu from which you want to remove an authorizer, then click the Download Reqeust Settings tab.
- From Set Download Request Authorizer, select the checkbox for the user you want to remove as authorizer, then click Delete.
- Click Register to complete.
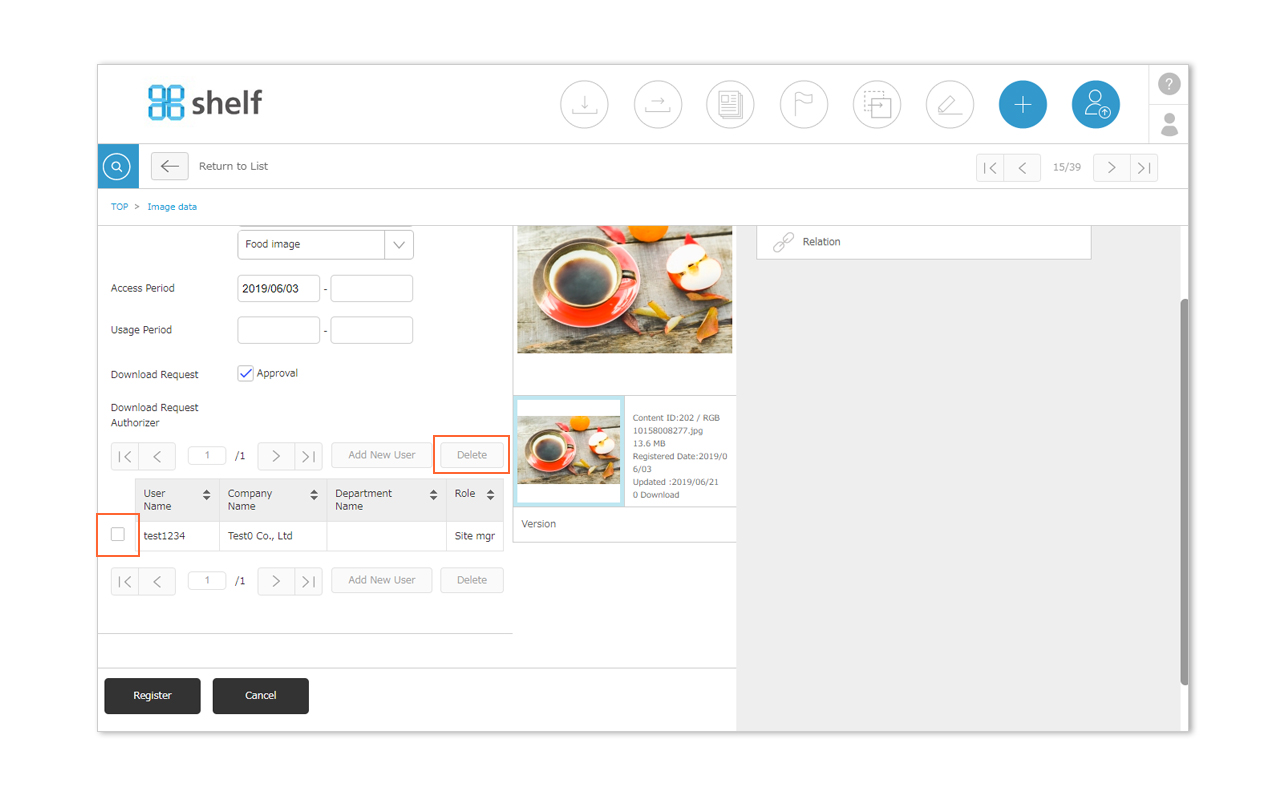
Removing Authorizer Per Content
- Enter edit mode for the content for which you want to remove the authorizer.
- From Set Download Request Authorizer, select the checkbox for the user you want to remove as authorizer, then click Delete.
- Click Register to complete.
Close