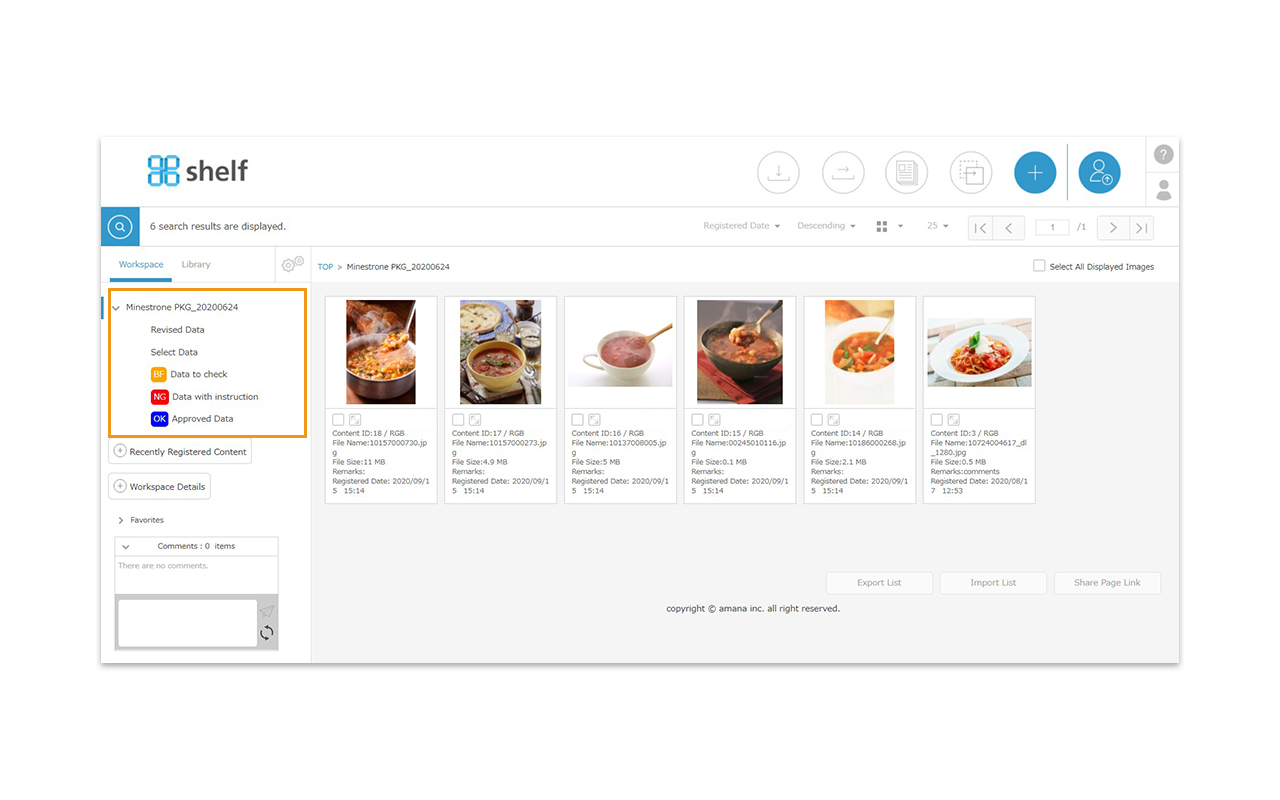
Basic Main Screen
- Click the “Workspace” tab on the content menu pege.
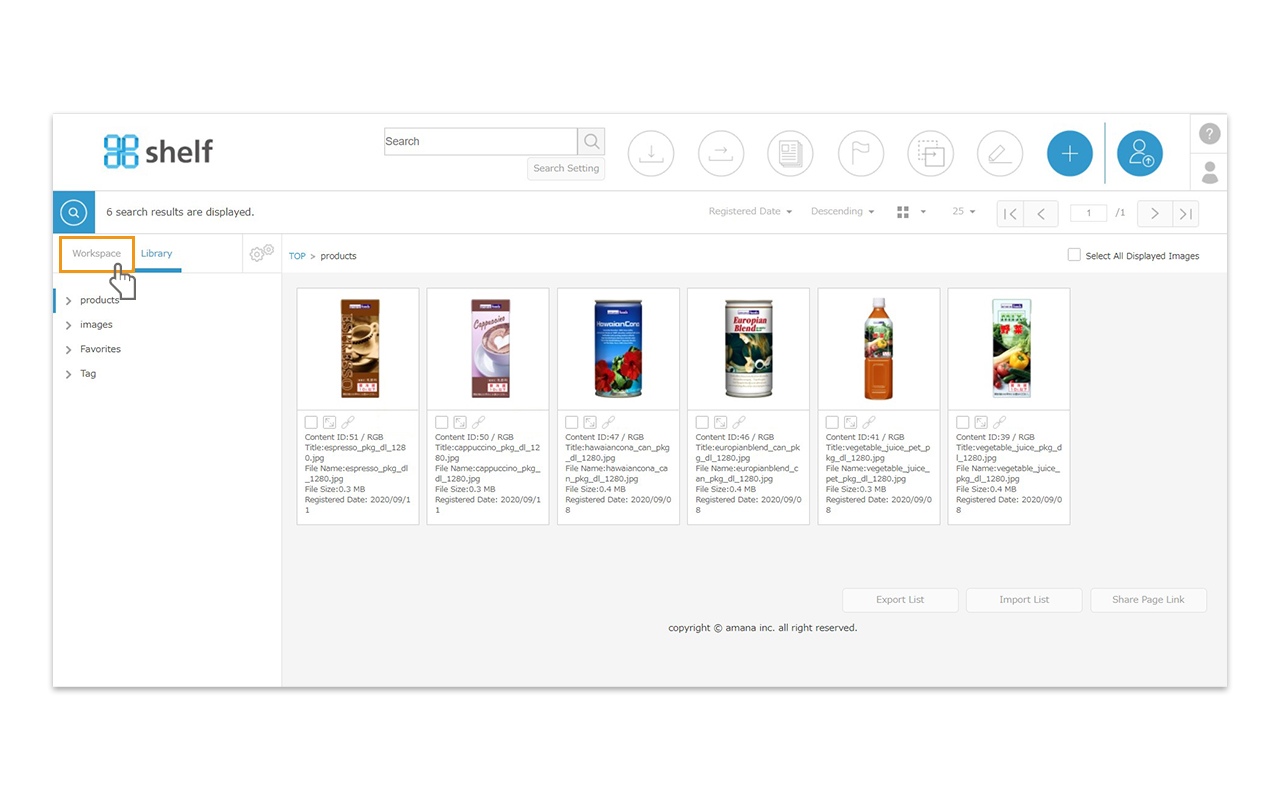
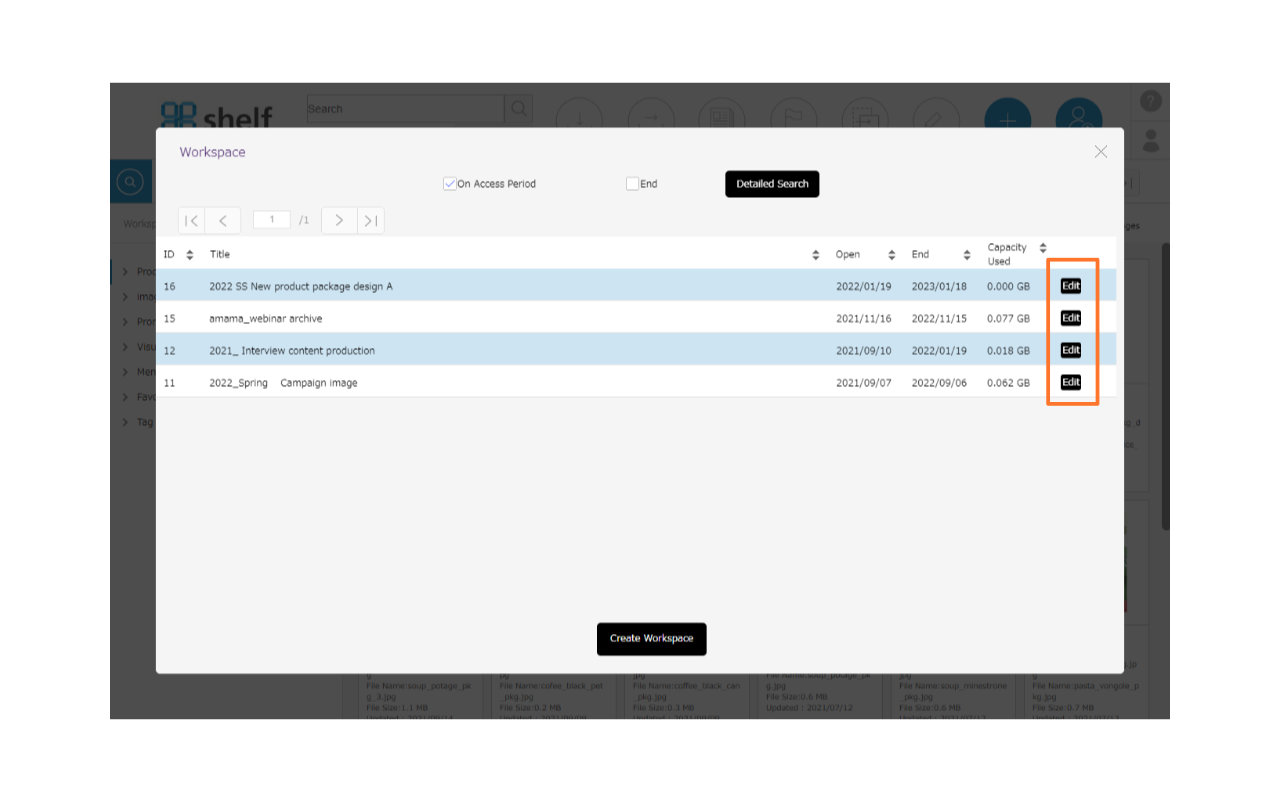
- A list of Workspace will appear and you can click on the workspace you want to use.
The workspace list can be selected to show “On Access Period”, “End” or both options.
-
- *Basically, workspace that has been closed for less than a month will be visible as “End” , and that which has been closed for more than a month will be automatically deleted. However, you can save them according to the setting. For details, see Delete Workspace on Create/Edit/Delete Workspace.
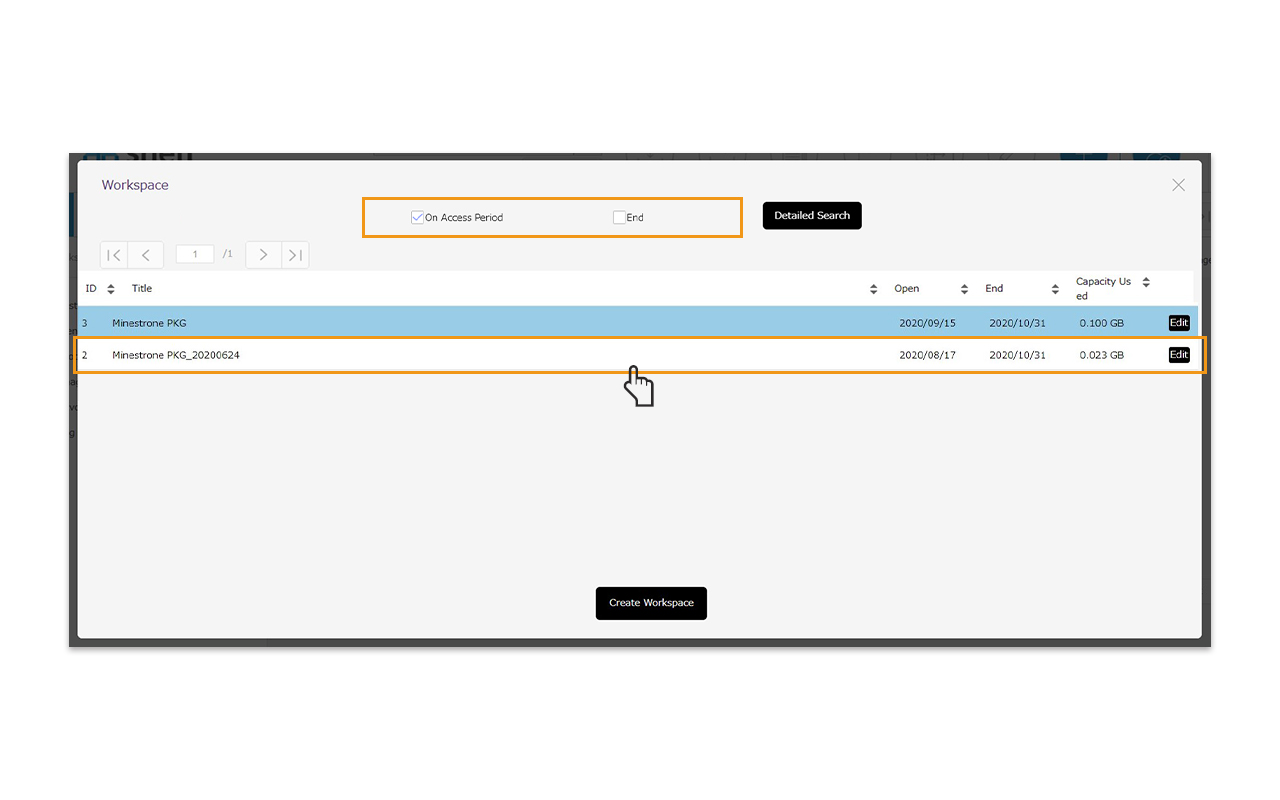
You can also click [Detailed Search] to search by title, access period, comments, or user name.
* For multilingual sites, the search text for title and user name will be in Japanese/English as set when registering.

*The list shows only the workspaces in which you are registered as a member.However, site administrator can see and operate all workspaces.
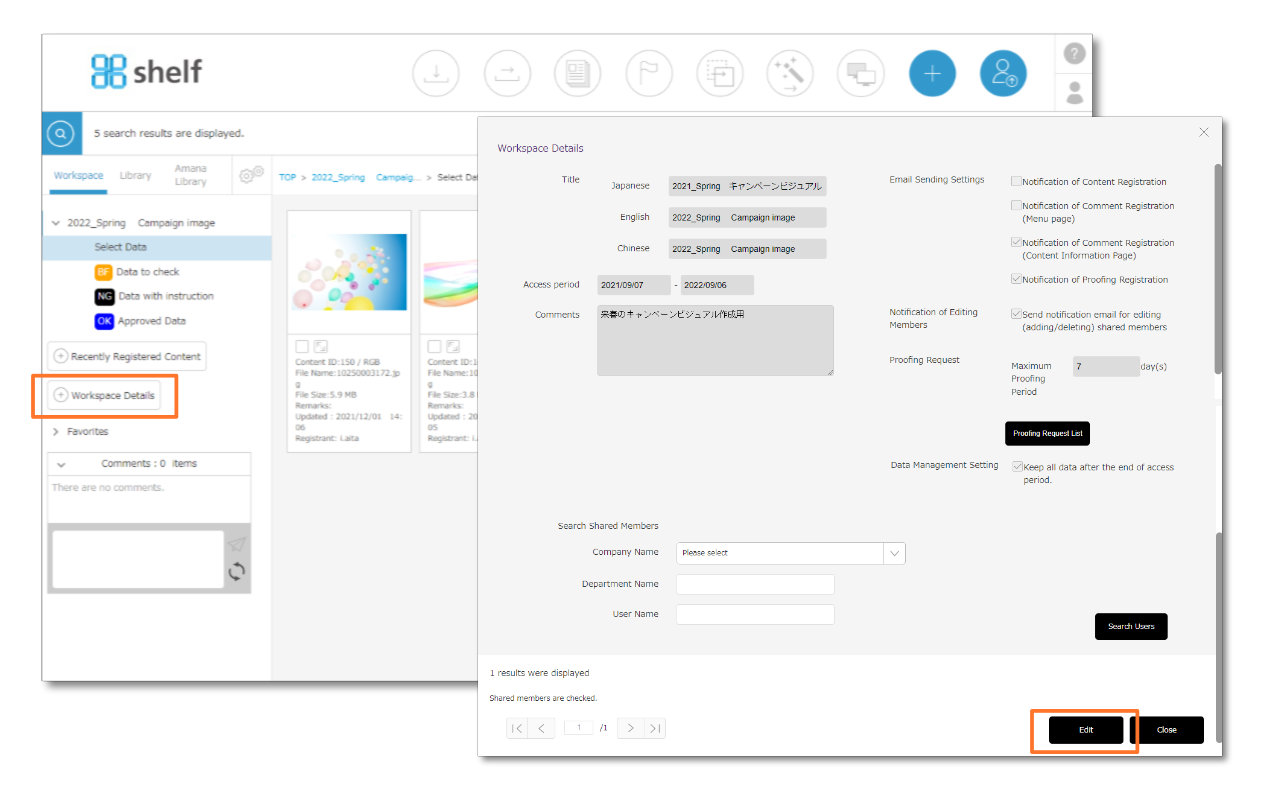
*Click [Edit] to change workspace information. Only site administrator and workspace administrator can see the edit button. For other members, the button is changed to [View] and they can only check the information.
*If you access workspace details directly from the content menu page, click the edit button in the center of the page. Only site administrators and workspace administrators are allowed.
- Workspace opens up.
*Workspace can be created three levels of folders, and the top level folder can have five different colored icons.
*For details on folders, please refer to Add/Edit/Delete Folder.
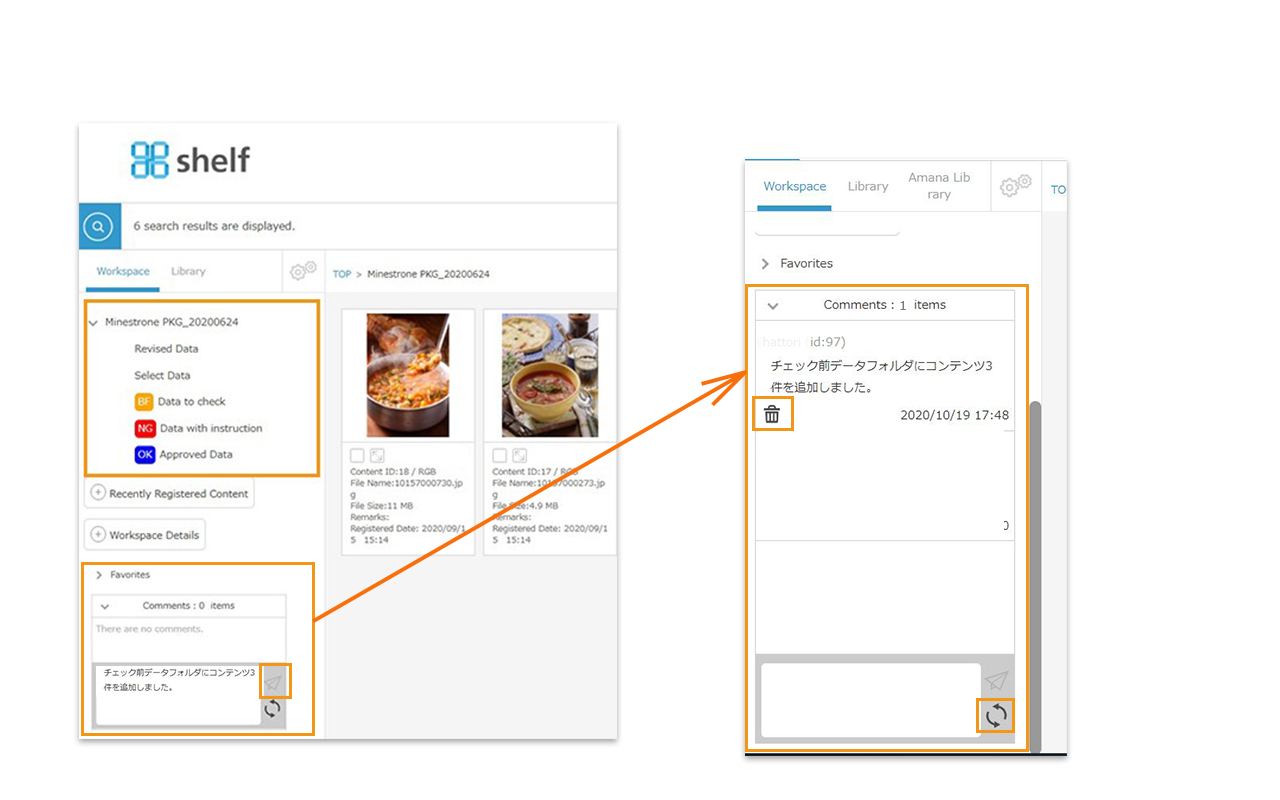
- You can register your comments on the content menu page. Enter your comment in the comment box at the bottom of the menu and click on [Send]
 icon. Click on [Refresh]
  icon to check the new comments (It will not automatically update while you are logged in).
To delete a comment, click the [Trash] icon in each comment field.
*You can only delete comments that you have registered by yourself.
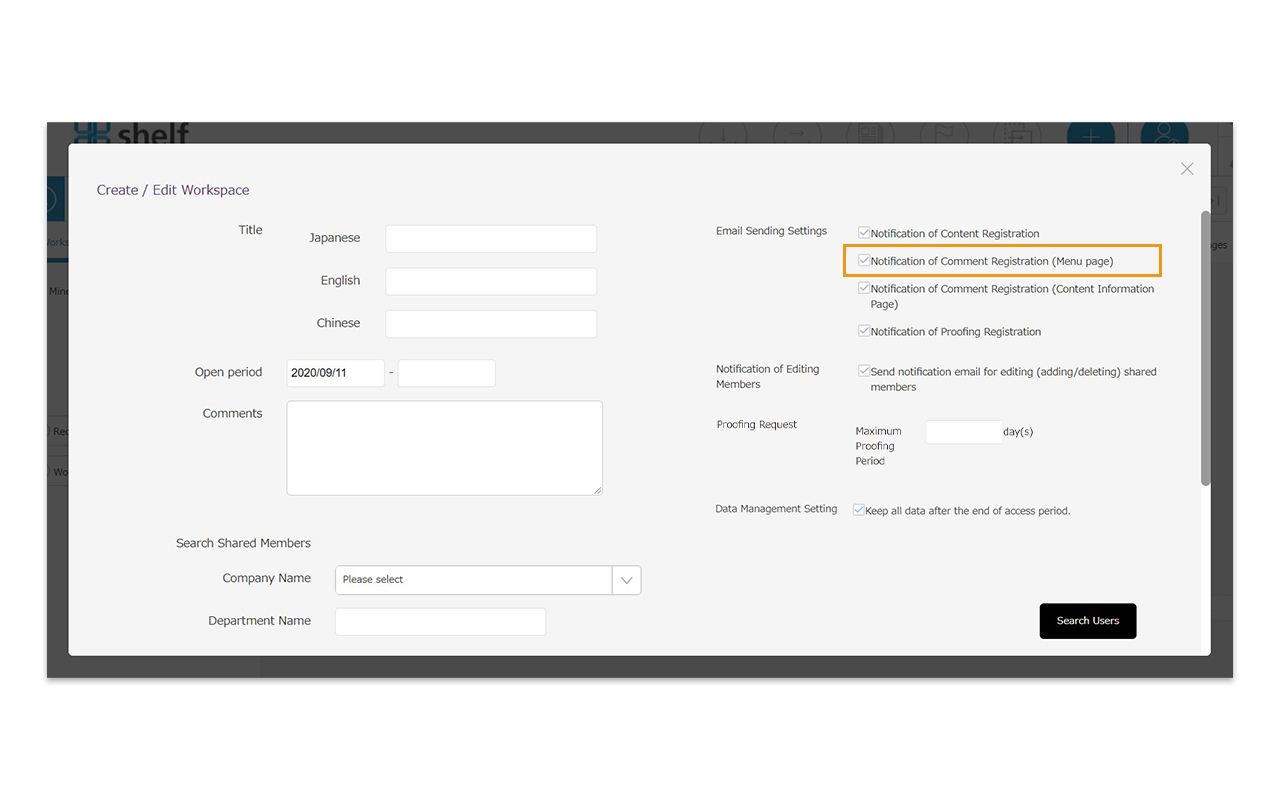
- When you register a comment, a notification email will be sent to members of the workspace.
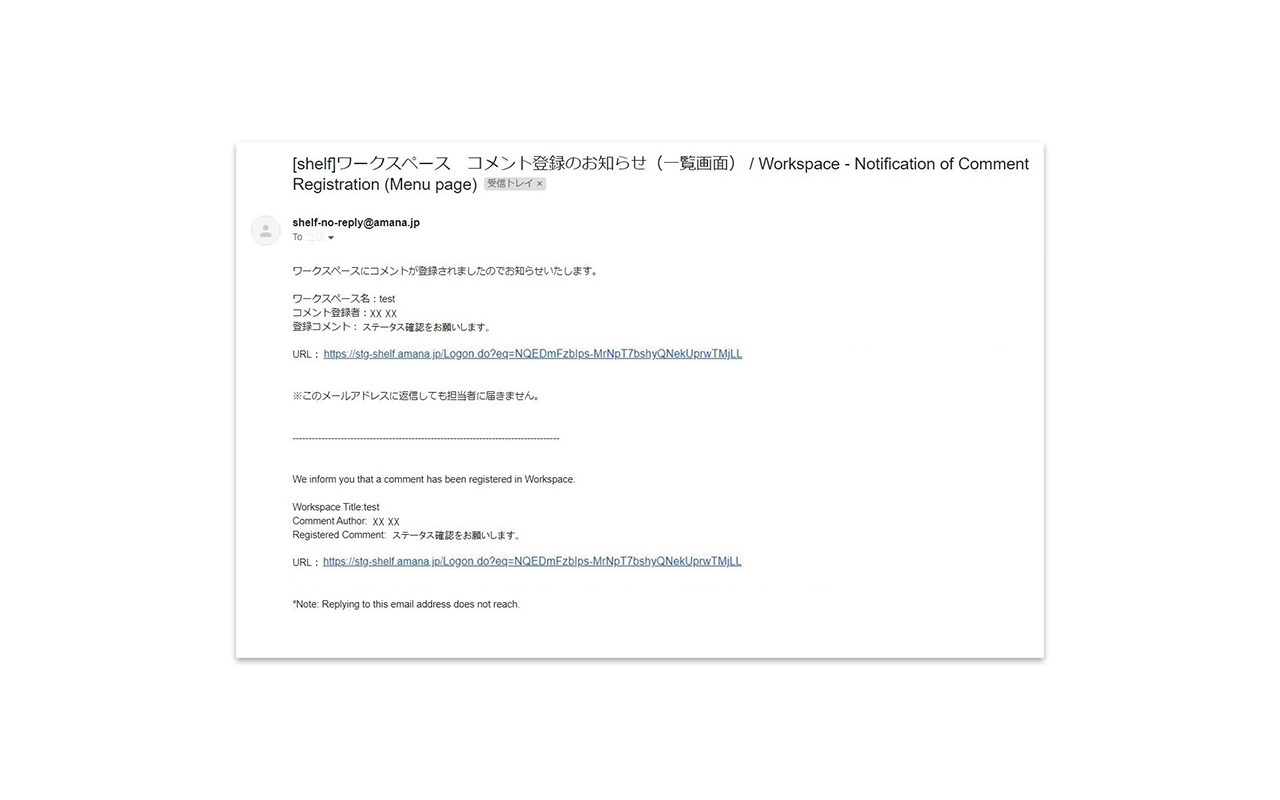
*The sending of notification emails can be set to turned on or off. By default, it is set to send ON.
If you do not want the notification email, uncheck the checkbox on the right side of [Create/Edit Workspace] window and click [Create] button at the bottom of window.
- Click on the thumbnail of the content in the content menu page to open the content’s information page.
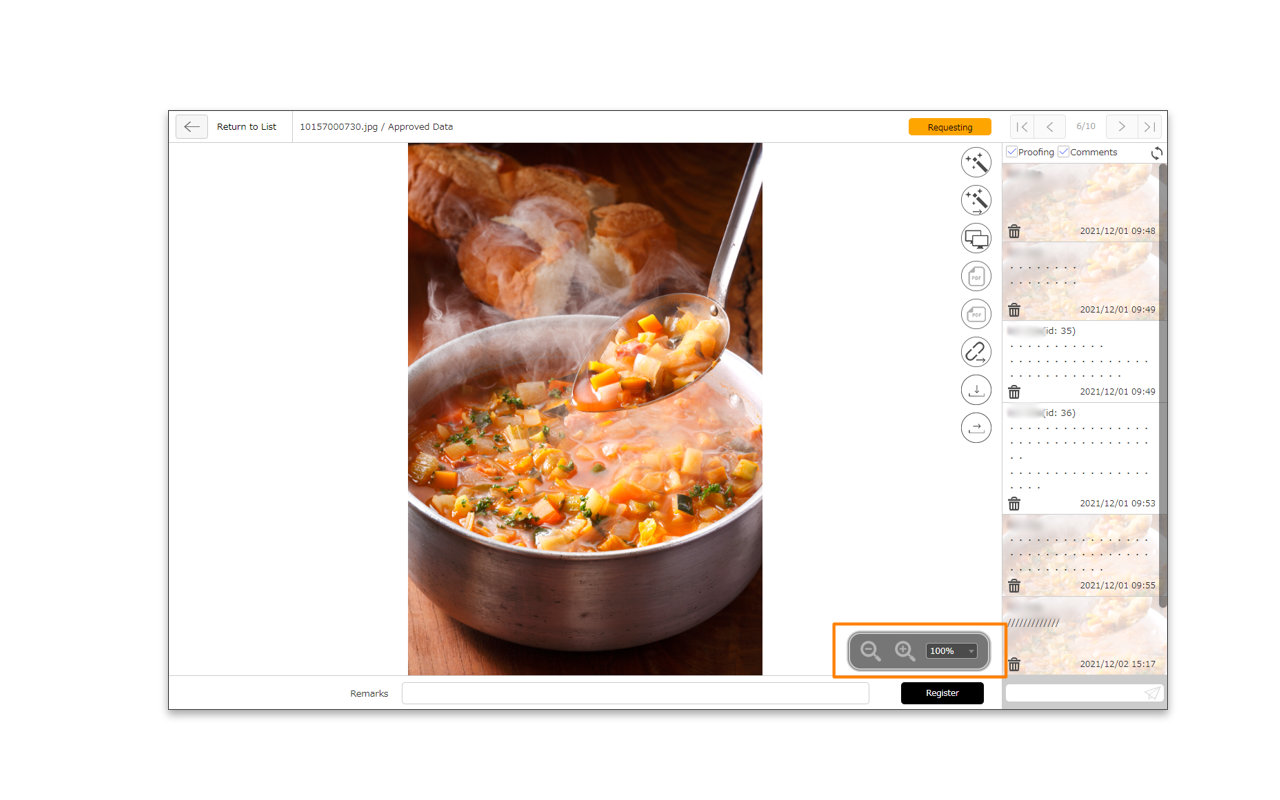
On the content’s information page, you can use the buttons on the right side of the preview to proof, request proof, compare proofs, generate PDF, download, send, and issue share link. Please note that these buttons shown will vary depending on the user’s authorization.You can move to the content’s information page of the contents that were listed back and forth in the content menu page by clicking the page feed button on the upper right.Click on [Refresh] icon to check the new comments (It will not automatically update while you are logged in).
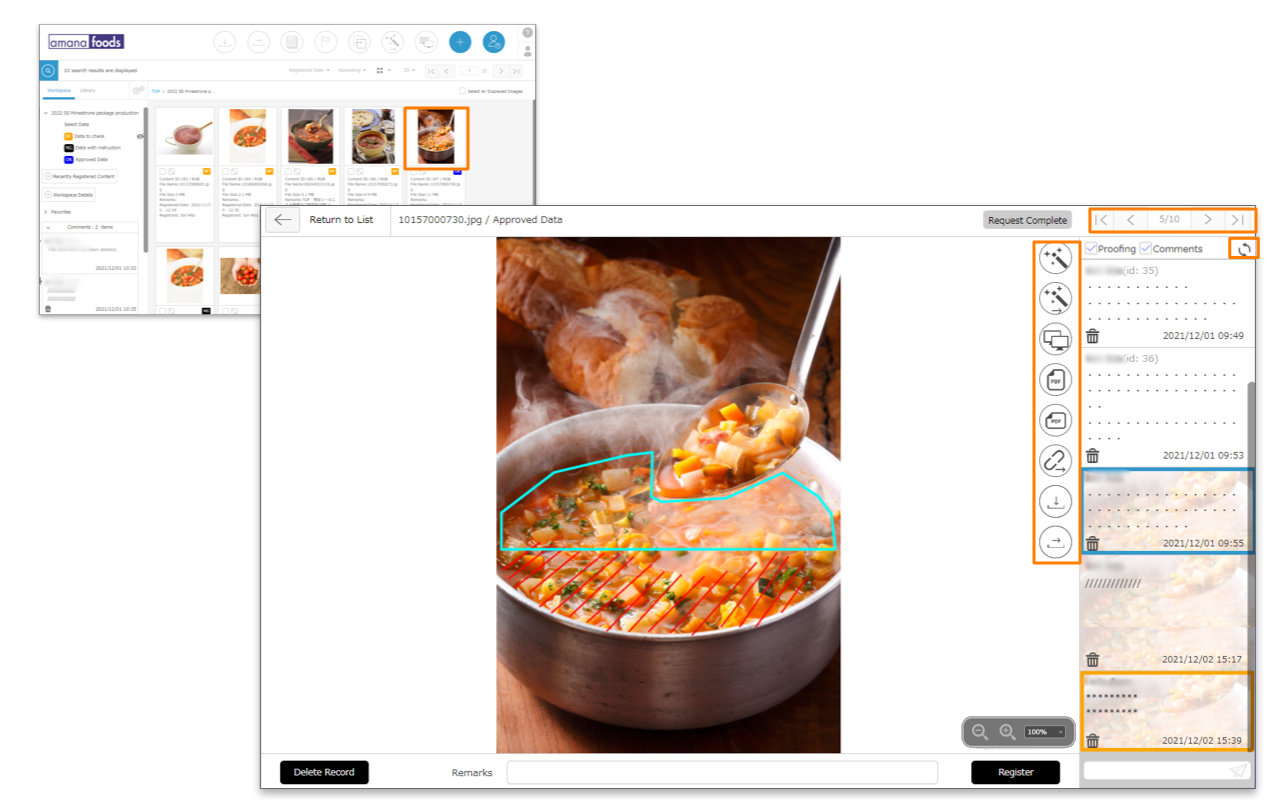
- Also, mouse over the screen control panel operate it and you can change the display zoom size.
【Edit/View Authorization for workspace】
On the right side of the workspace window that appears in step 2 above, you will see the permissions set for each workspace (“Edit” or “View”).
- Edit : You are registered as a workspace administrator and can edit the settings.
- View : You are registered as a member. You can check your registration information, but you cannot edit it. Members can also add folders and register content.
*Depending on the user permissions registered in Library, operations such as adding folders and registering contents may not be possible.