Proofing
This function allows you to write correction instructions directly to images on the detail screen of each content registered in workspace.
It can be used for both still images and videos.
You can also do proofing document file as well as images. Check here for file formats that support still image/video/document files.
*The proofing of Workspace is not available on mobile. Please access to the PC version when using the proofing function.
*The content that users post in the Remarks and Proofing History/Comment sections of the detail screen are not covered by the multilingual and automatic translation.
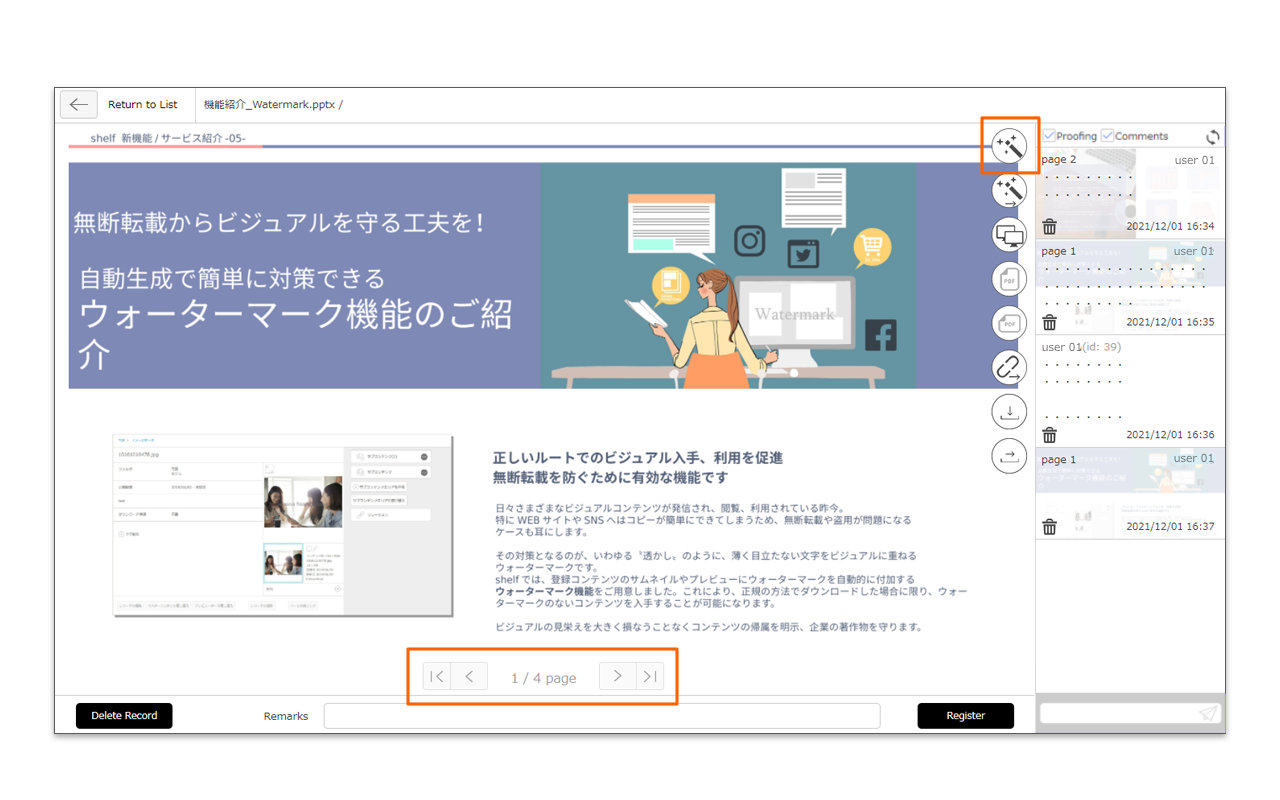
- Click the thumbnail of the content you want to write correction instruction from the content menu page.
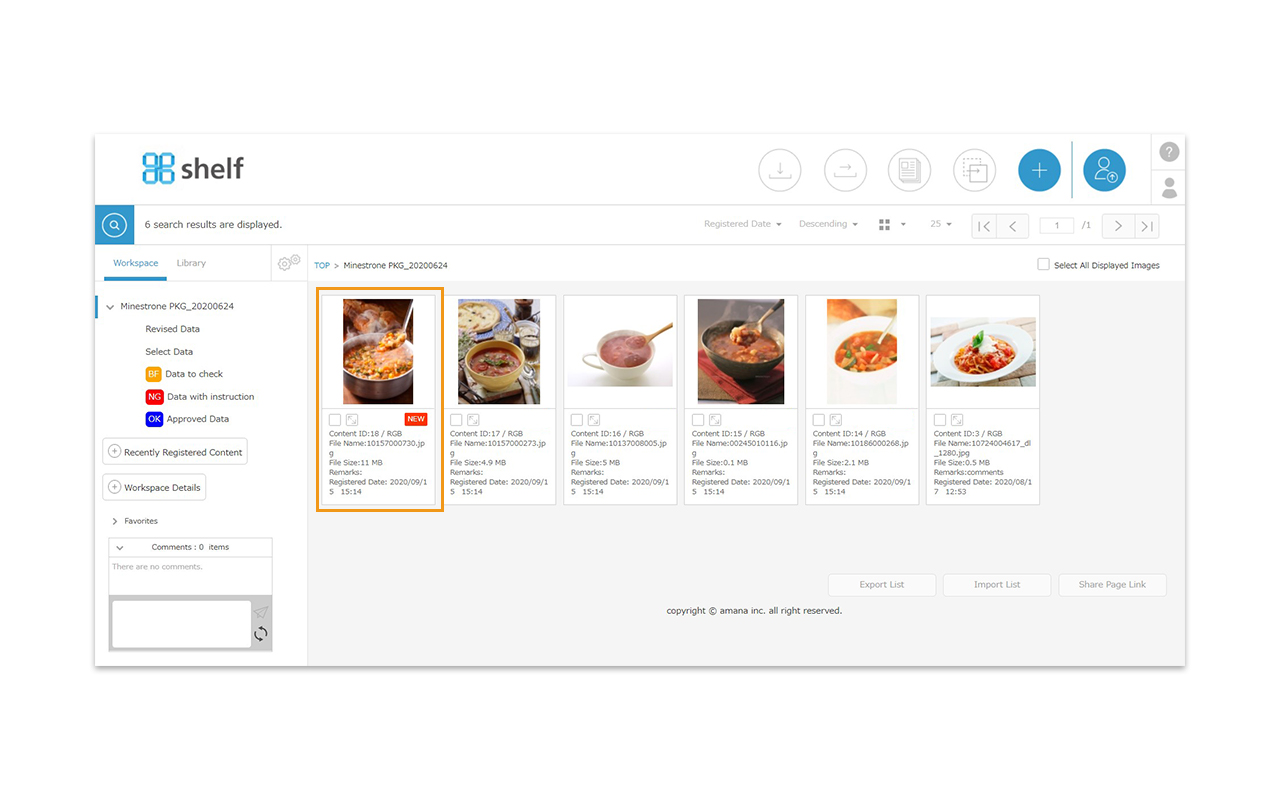
- The content’s information page will open. Please refer to the following for proofing registration.
【Still image】
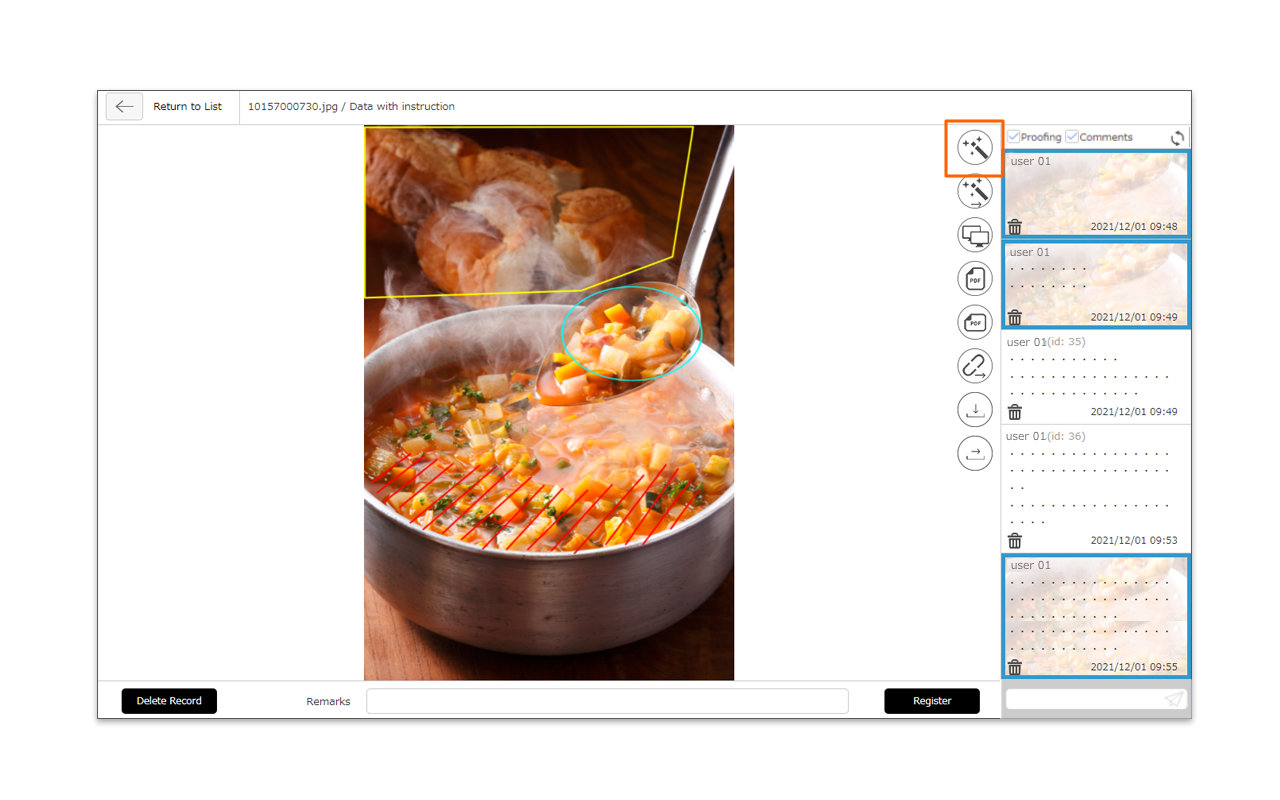
To register the correction instruction in the still image, click ![]() Proofing icon in the upper right of the screen.
Proofing icon in the upper right of the screen.
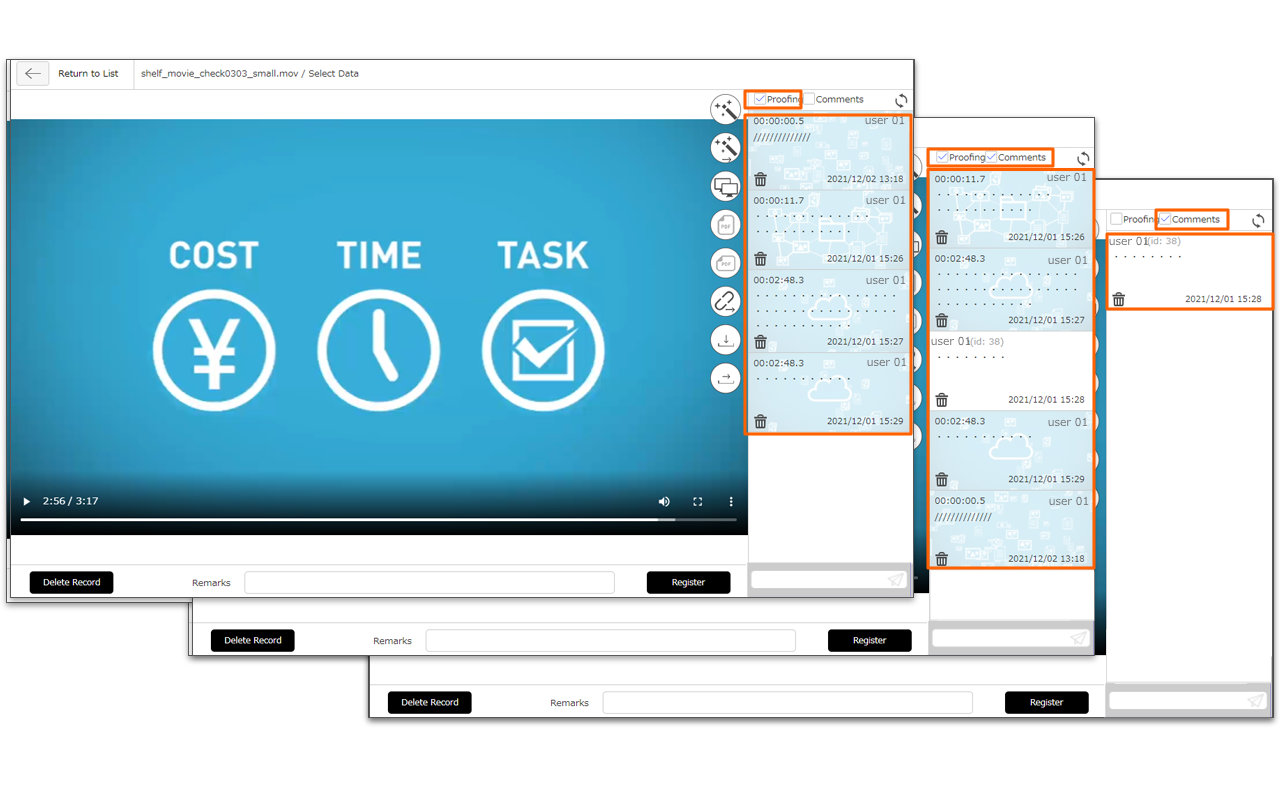
【Video】
To register the correction instruction in the video, check the contents of the video by clicking [Play] button. Click the [Stop] button at the point where you want to add the correction instruction, and then click ![]() Proofing icon.
Proofing icon.
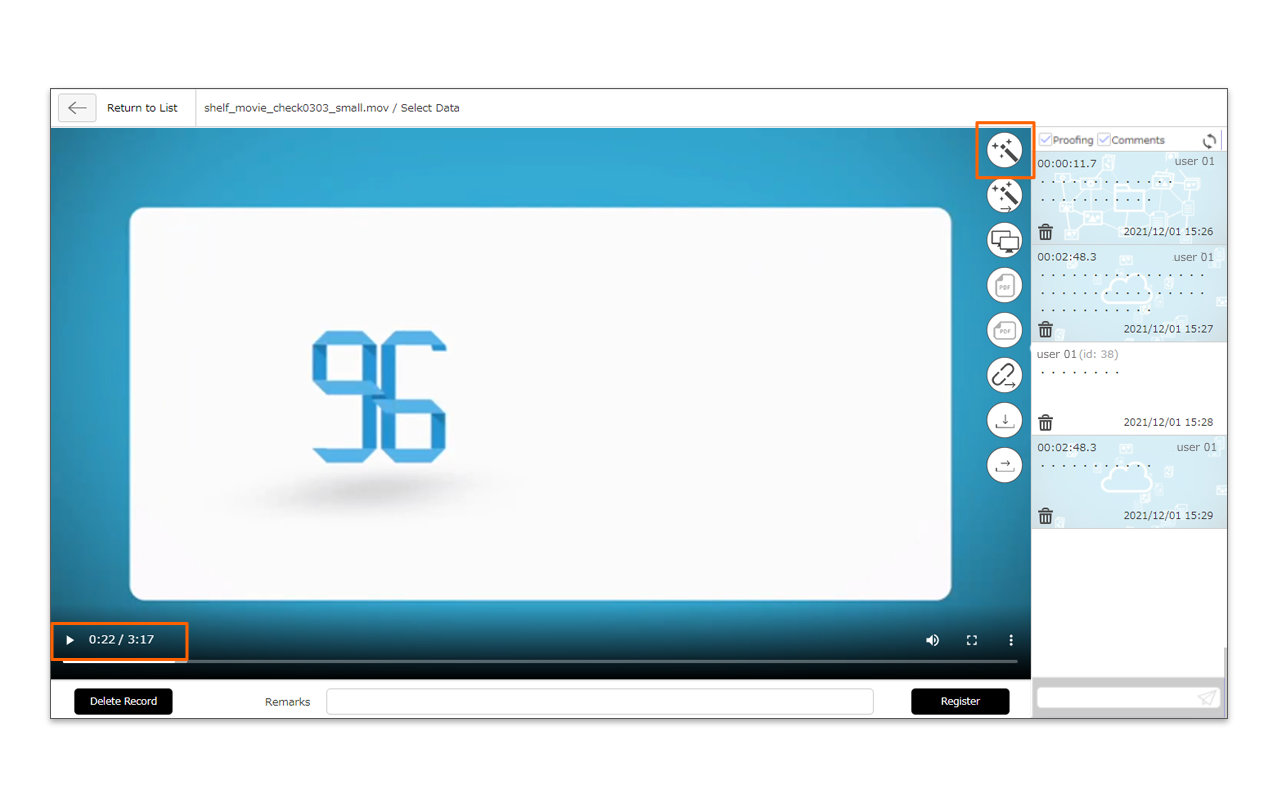
*The video will show a screen capture with playback stopped. For captures, those with the same duration up to 0.1 seconds are considered to be the same frame and can be overlaid in the proofing history in the same way as still images.
*Even if you click ![]() Proofing icon during playback, you cannot save the proofing history to the capture at that timing.
Proofing icon during playback, you cannot save the proofing history to the capture at that timing.
*The registered video contents can be previewed for up to 30 minutes.
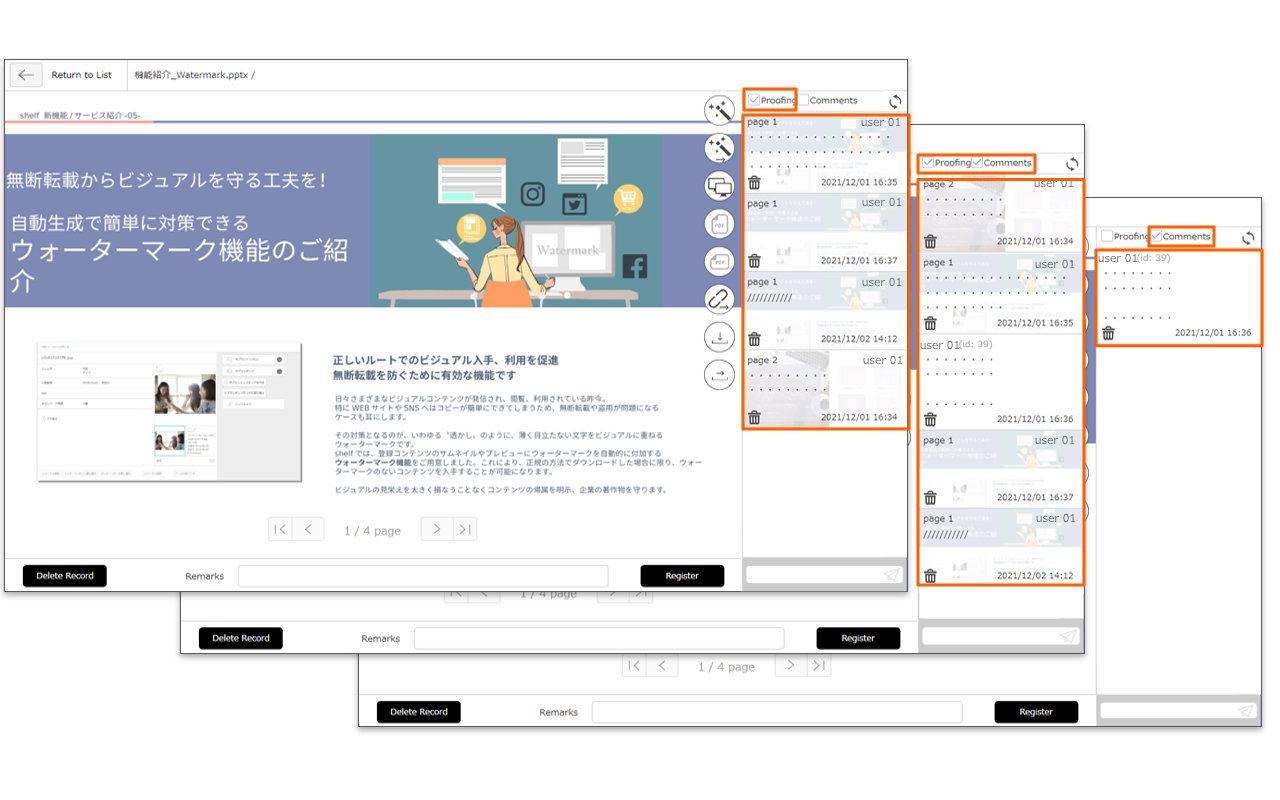
【Document file】
The page feed will enable you to browse the content. Click ![]() proofing icon to display the page where you need to register the correction instruction.
proofing icon to display the page where you need to register the correction instruction.
- When the Proofing Screen appears, you can use the Proofing Function Tool to register the correction instruction. Please click [Register] when the input is completed. To register memo, fill in the memo field at the bottom of the window and click [Register]. Please refer to the following for the detailed explanation of each tool.
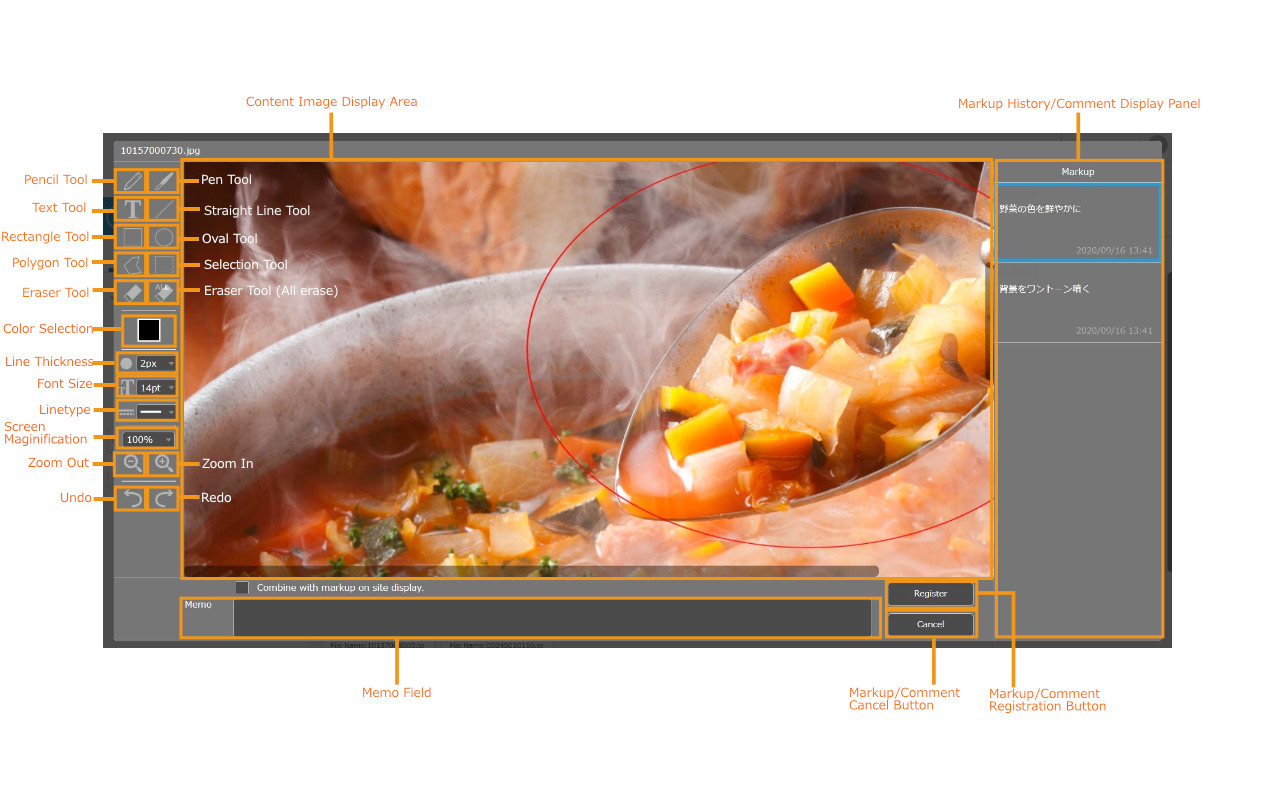
【Tool Description】
Pencil Tool: Draw a path as the mouse moves
Pen Tool: Create an anchor point and draw a straight line/curve
Text Tool: Enter characters
Straight Line Tool: Draw a straight line
Rectangle Tool: Draw a rectangle
Oval Tool: Draw a circle or ellipse
Polygon Tool: Create an anchor point and draw a polygon
Selection Tool: Move the drawing of the selected area with a rectangle
Eraser Tool: Erase the depiction as the mouse moves
Eraser Tool (All erase): Erase all drawings
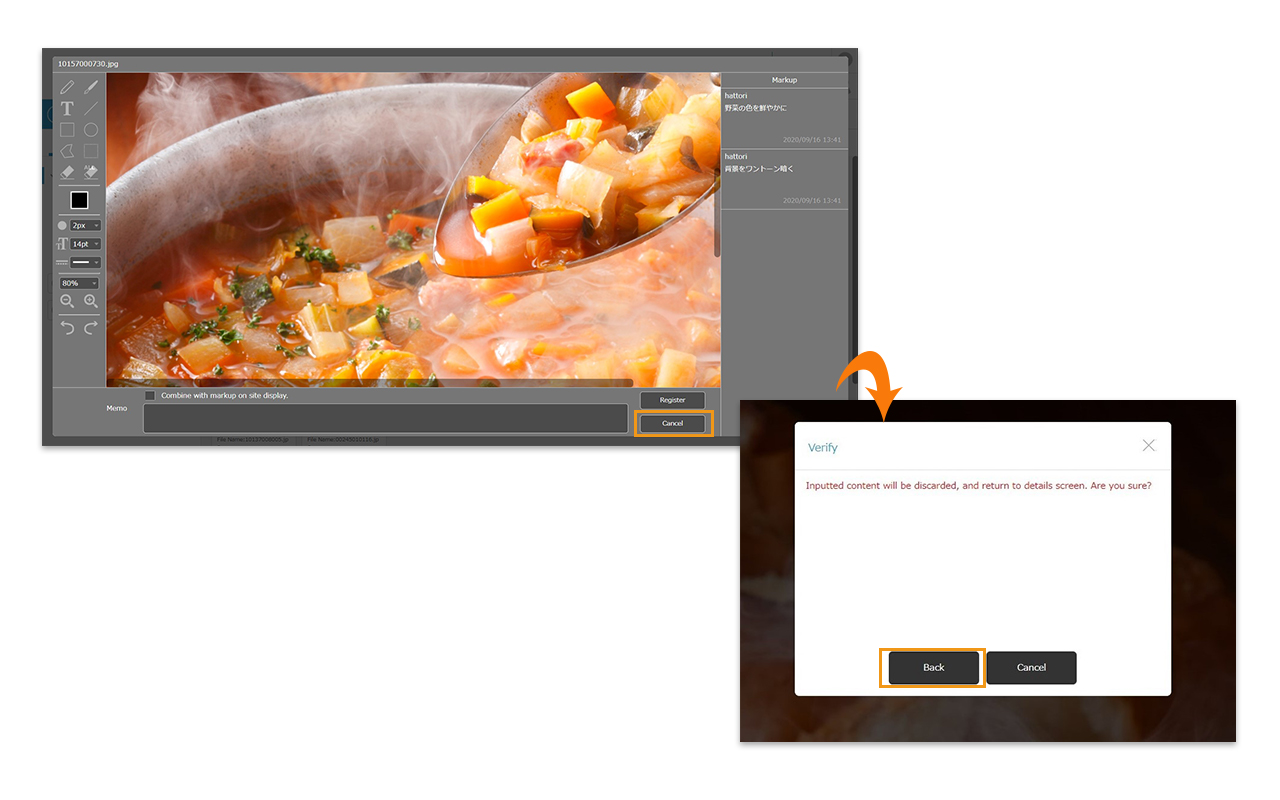
- Click [Cancel] to exit the Proofing Screen without saving the input contents. Then, a confirmation window will appear and click [Back] to return to the content’s information page.
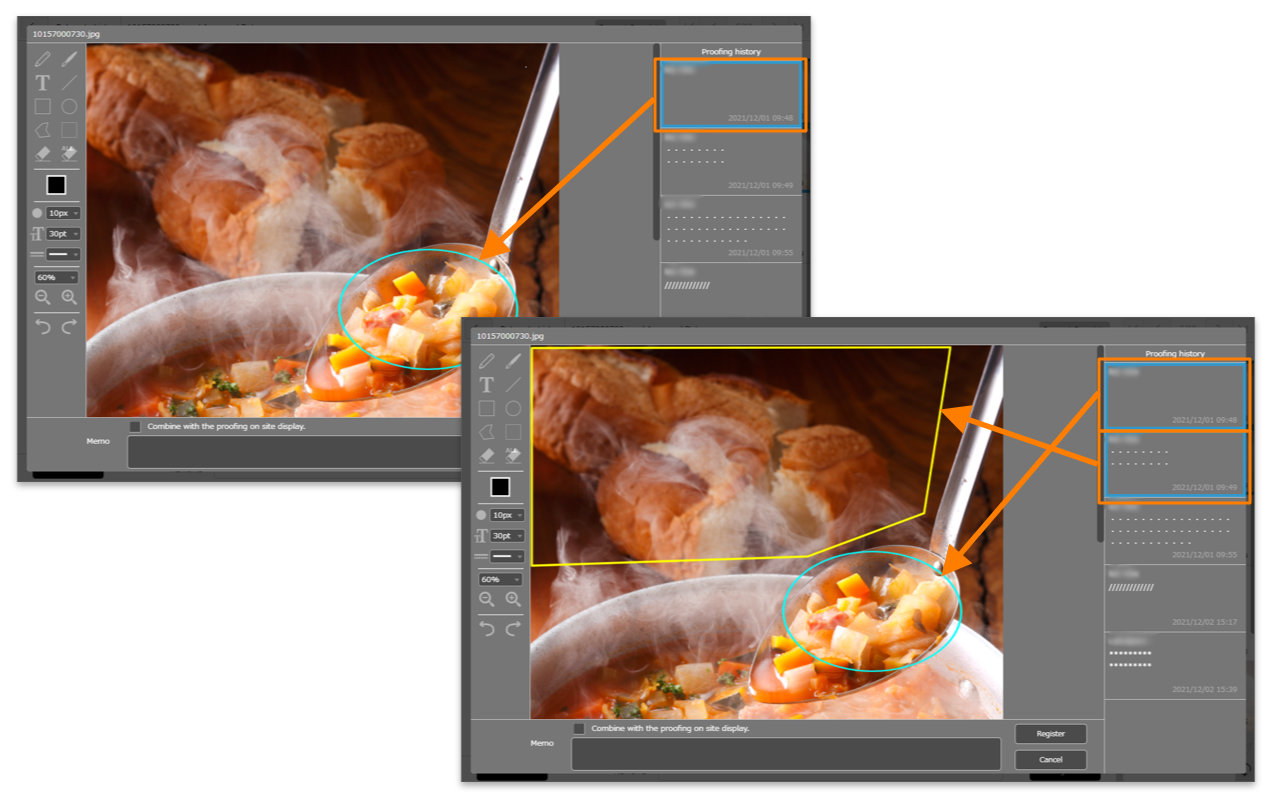
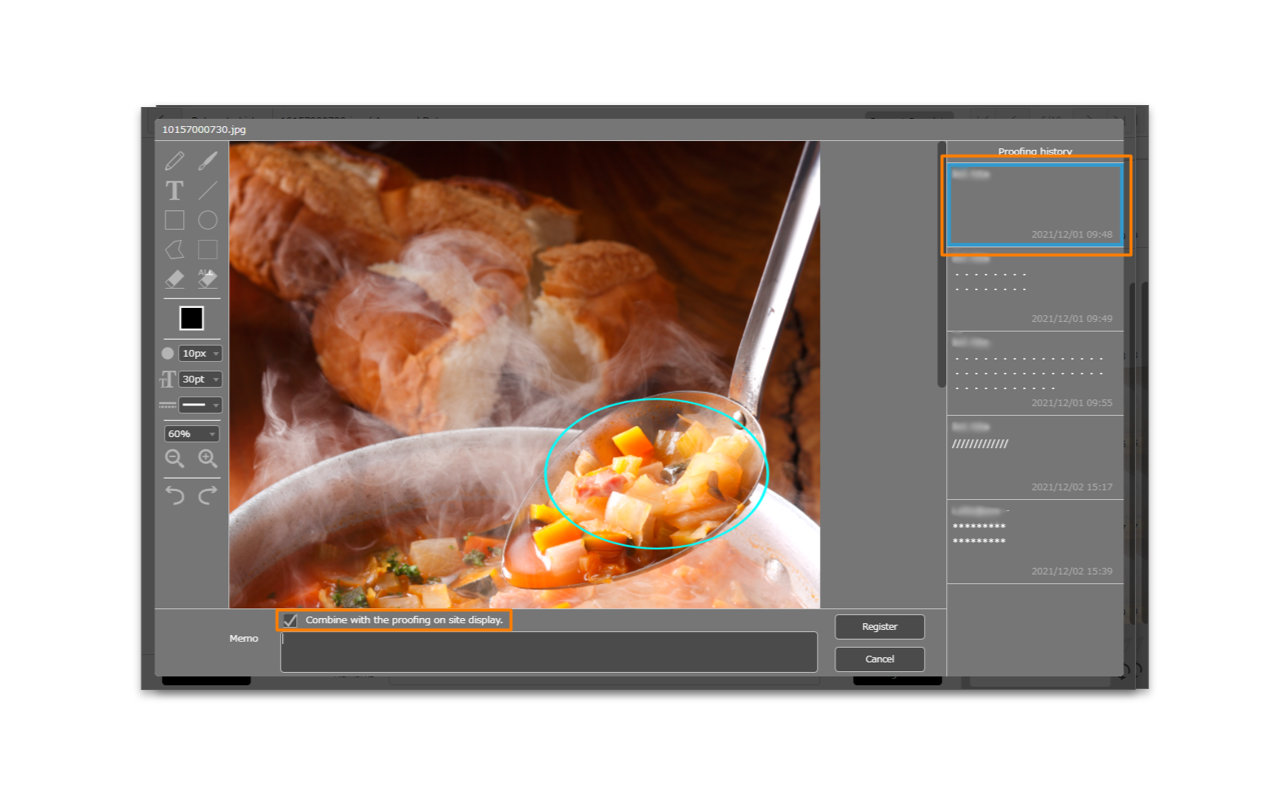
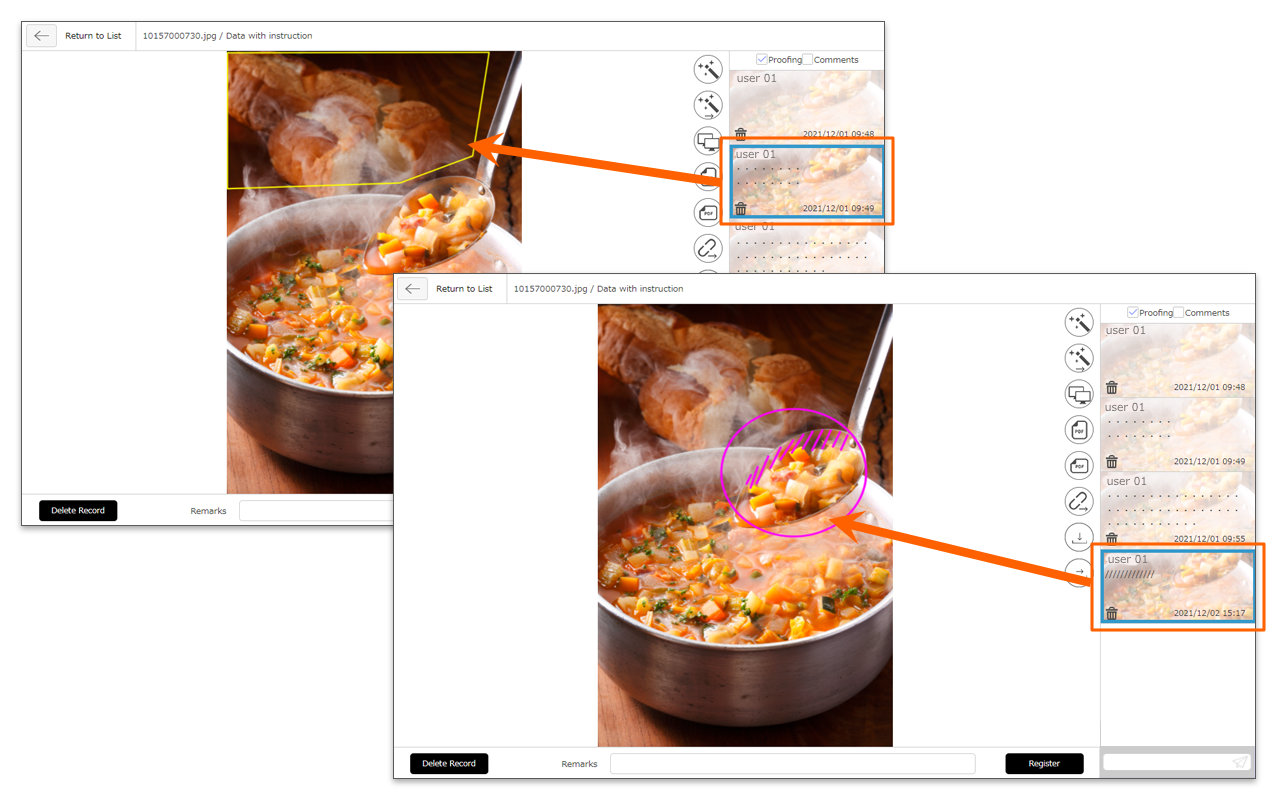
- If proofs are already entered, you can preview the proofs entered by using the pen tool as you click each proof in the Proofing History/Comment panel on the right side of the windows.
If you select multiple proofs, each post will be displayed at the same time.
If you want to hide them, click each proof in the Proofing History/Comment panel again.
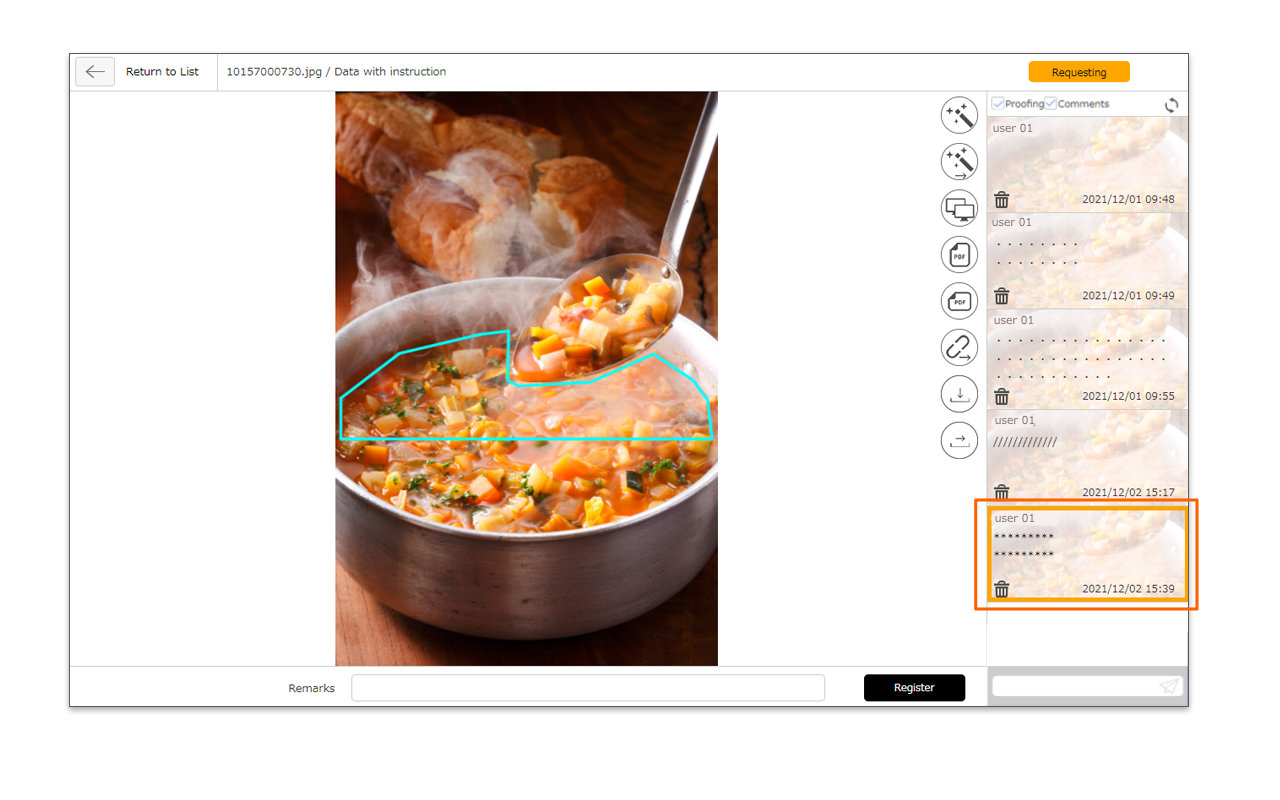
- If you check the “Combine with proofing on site display” checkbox when entering correction instruction, you can add the correction instruction to the image with the displayed proofing history.
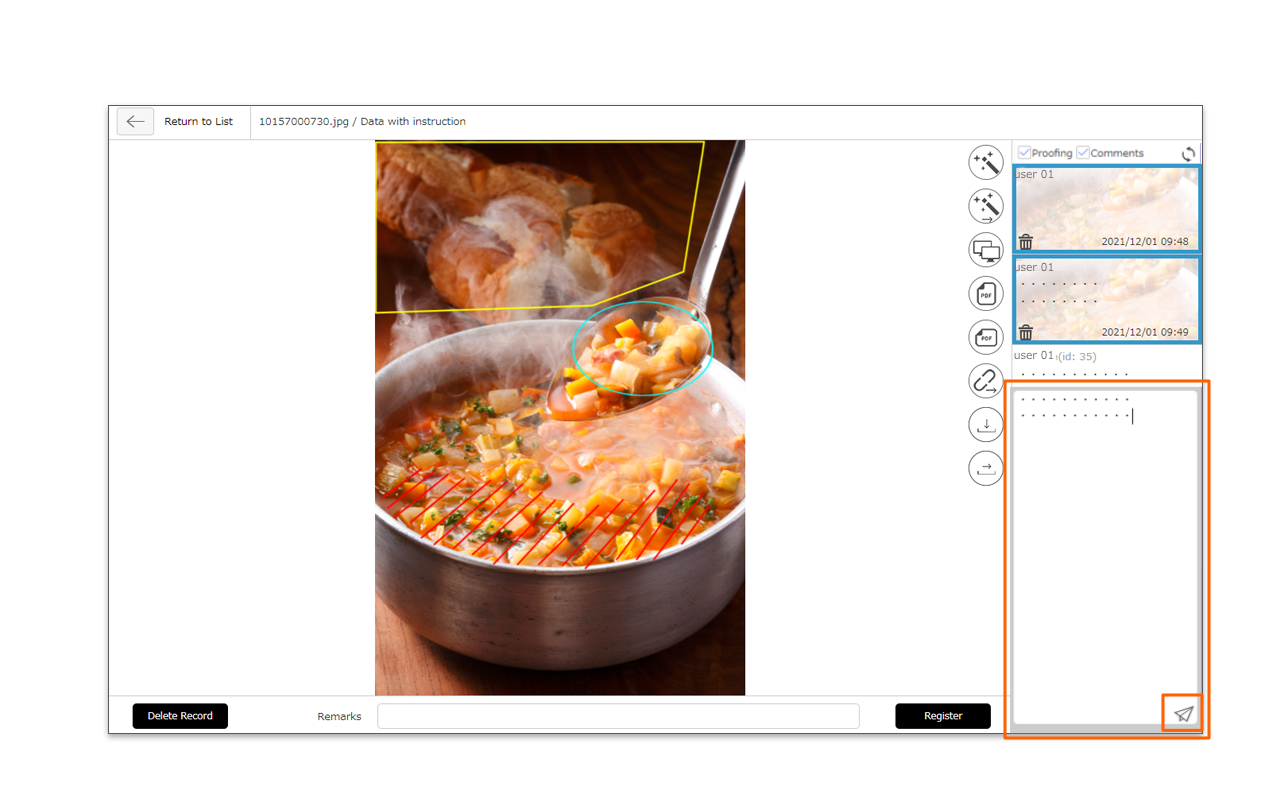
- Filling in the memo fields and click “Register” to display the registration information in the Proofing Panel.
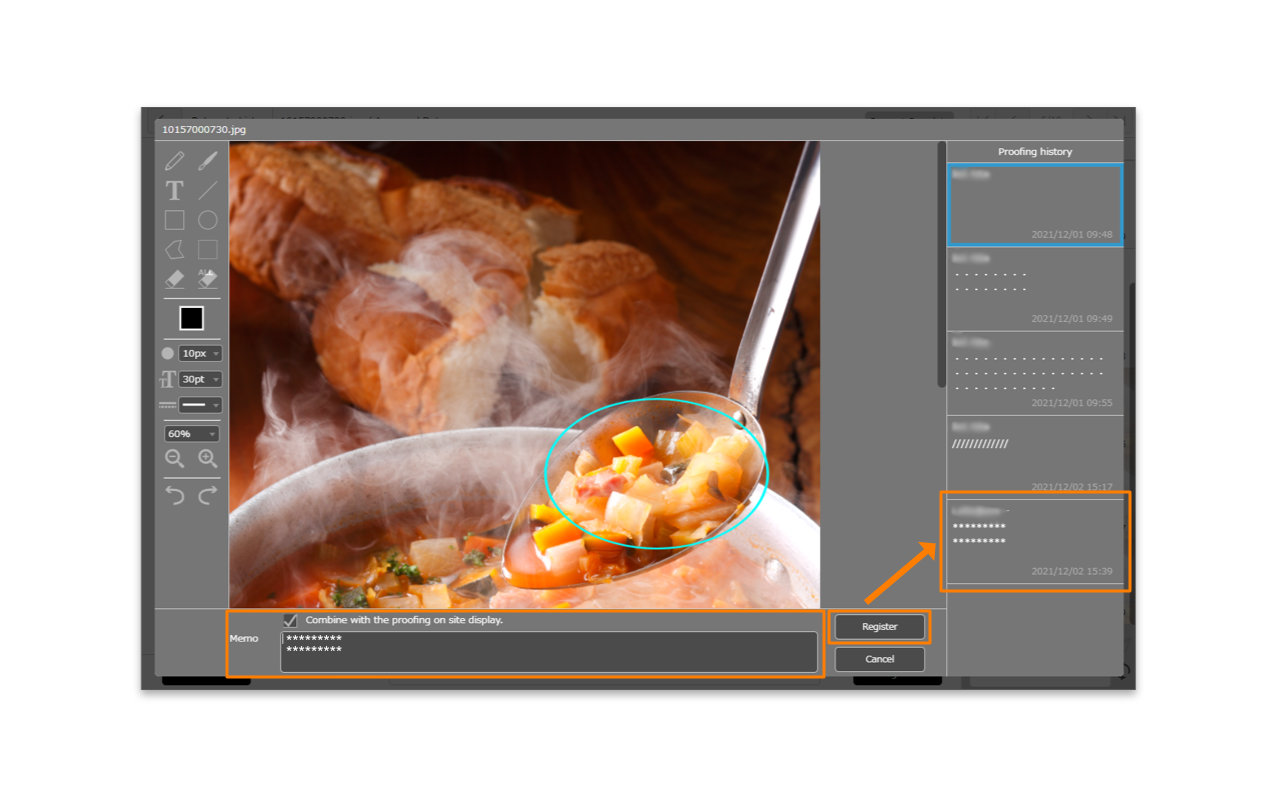
- When a proofing is registered, a notification email will be sent to members of the workspace.
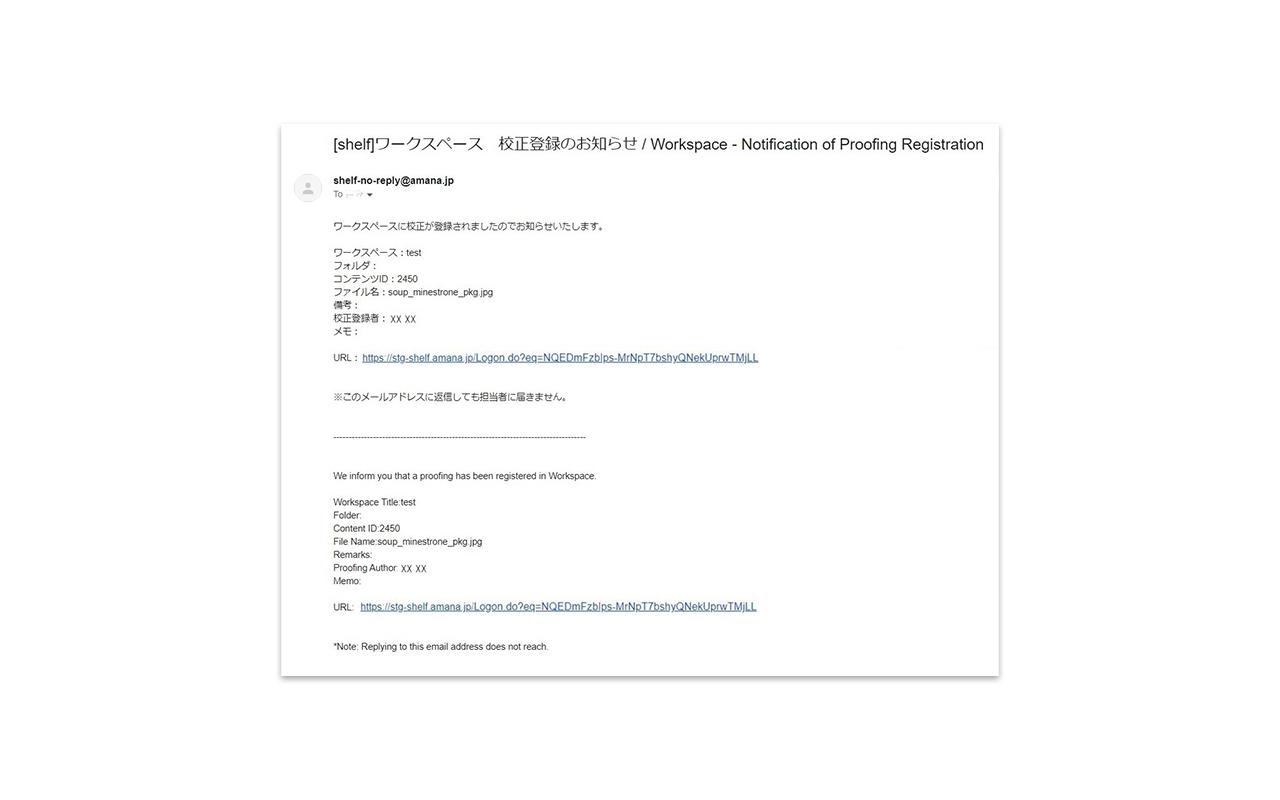
*The sending of notification emails can be set to turned on or off. By default, it is set to send ON.
If you do not want the notification email, uncheck the checkbox on the right side of [Create/Edit Workspace] window and click [Create] button at the bottom of window.

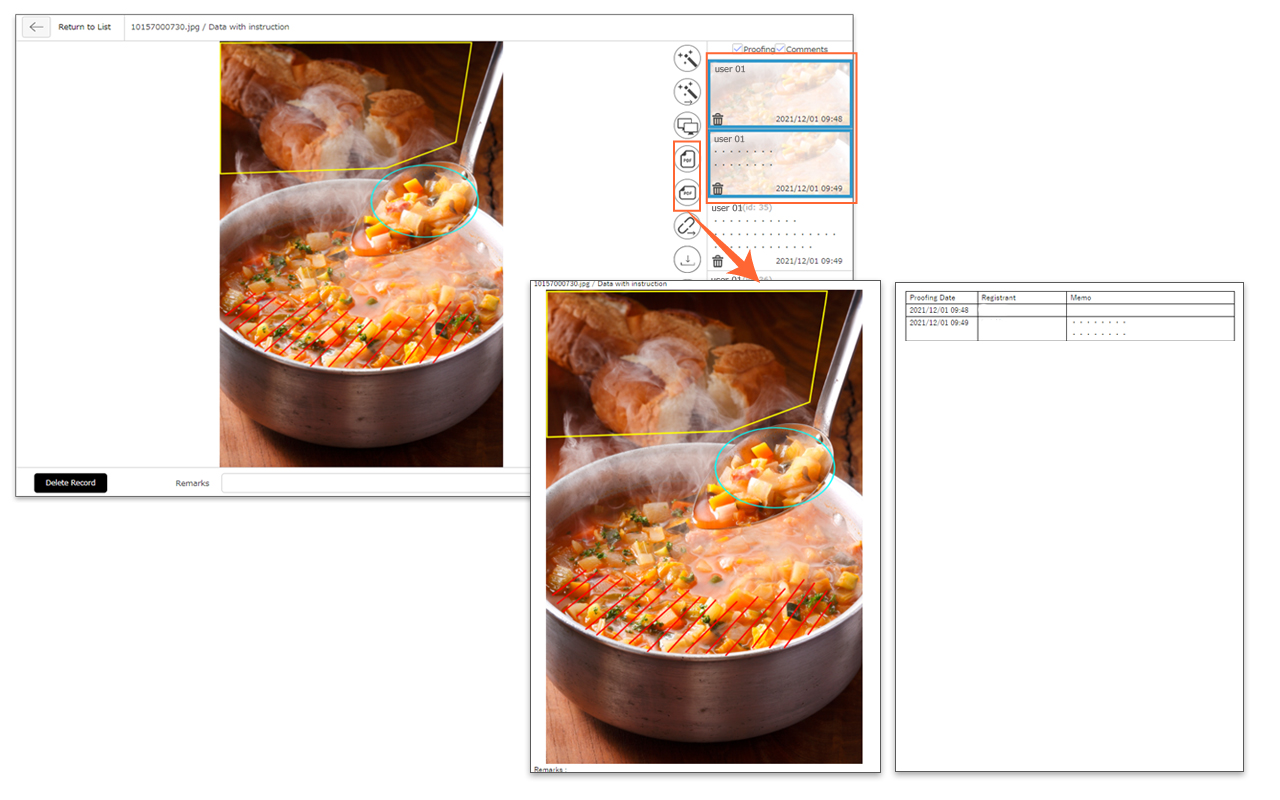
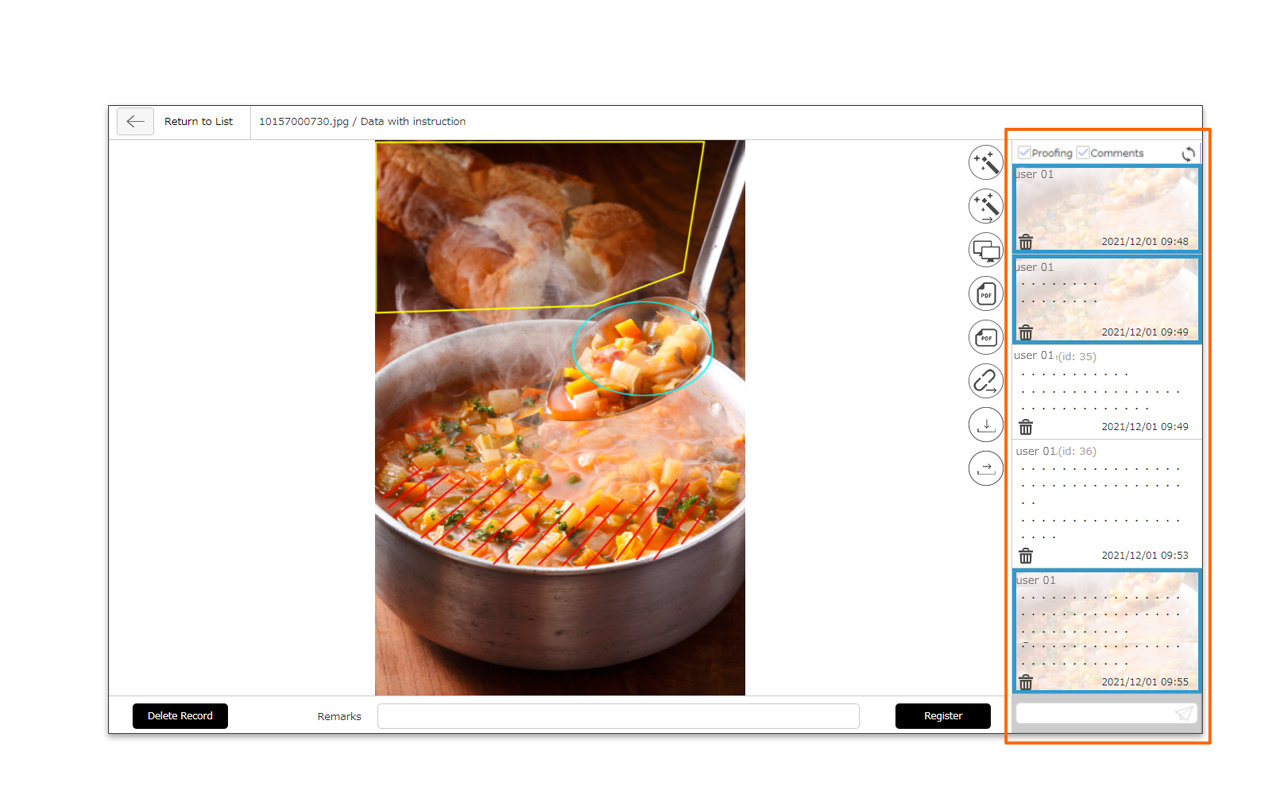
- The registered proofing will be displayed on the right panel of the content’s information page. In the case of a still image, the background of the each field will show an image. In the case of video, it will show the corresponding frame you entered the proofing for. The comments you entered will be displayed on a white background. The document file will show a image of the page where you enter the proofing in the background.
The checkboxes in the “Proofing/Comments” fields will enable you to show or hide the information.
【Still image】
The registered proofing is displayed in the order in which it was registered (in descending order). When you open the Proofing window, it is automatically scrolled to the bottom and the newly registered proofing history is automatically displayed.
【Video】
If you have selected “Proofing” only in the checkbox, the proofing history will be displayed in order of the playback time. If you have selected both “Proofing” and “Comments” or “Comments” only, it will be displayed in order of registration.
【Document file】
For document file proofing, if you have selected “Proofing” only in the checkbox, the proofing history will be displayed in page order, as well as video. If you have selected both “Proofing” and “Comments” or “Comments” only, it will be displayed in order of registration.
- When a comment is registered in the comment field in the lower right corner of the window, it will be reflected in the “Proofing/Comments” panel and a notification email will be sent to the members of the workspace at the same time.
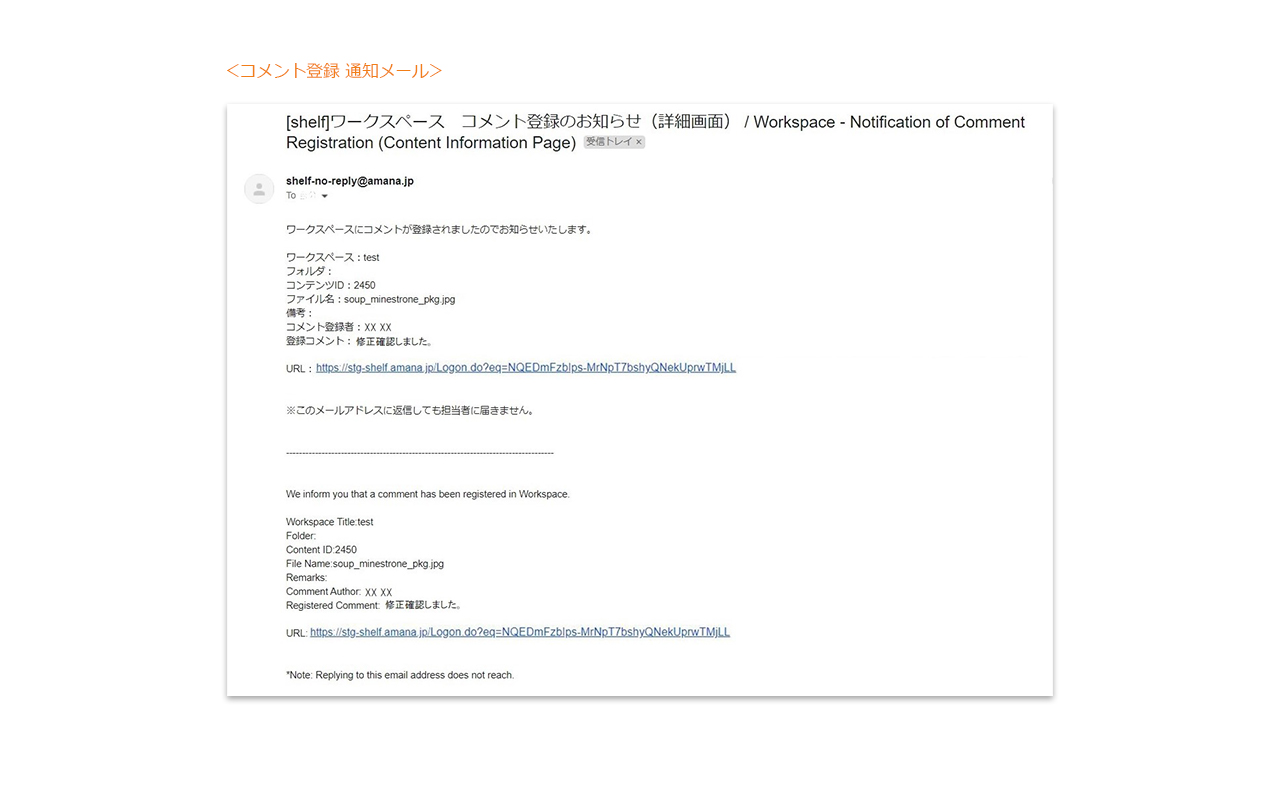
*The sending of notification emails can be set to turned on or off. By default, it is set to send ON.
If you do not want the notification email, uncheck the checkbox on the right side of [Create/Edit Workspace] window and click [Create] button at the bottom of window.

- In content’s information page, you can register a comment in the note field. Please fill in the note field and click the [Register] button. The information registered in the note field will be displayed in the “Remarks” section below the thumbnails on the content menu page. If you want to edit or delete the entered information, please click the [Register] button after deleting the information and leaving the note field blank.

- If you want to display the proofing history registered on the content’s information page, click the corresponding history in the proofing history area on the right side of the screen.
*When you click on ” Proofing ” or ” Comments “, the orange frame will be highlighted, which indicates that it is registered by non-shelf users. Please refer to Proofing Registration by non-shelf users for more details.
- To delete the registered proofing history/memo, click the [trash icon] in the corresponding history in the proofing history area on the right side of the screen. When the Verify Deletion window appears, click “Delete” to delete your proofing history and memo.
*Workspace administrators and site administrators can delete all proofing history/comments.
Other members can delete only the proofings/comments they themselves have registered.
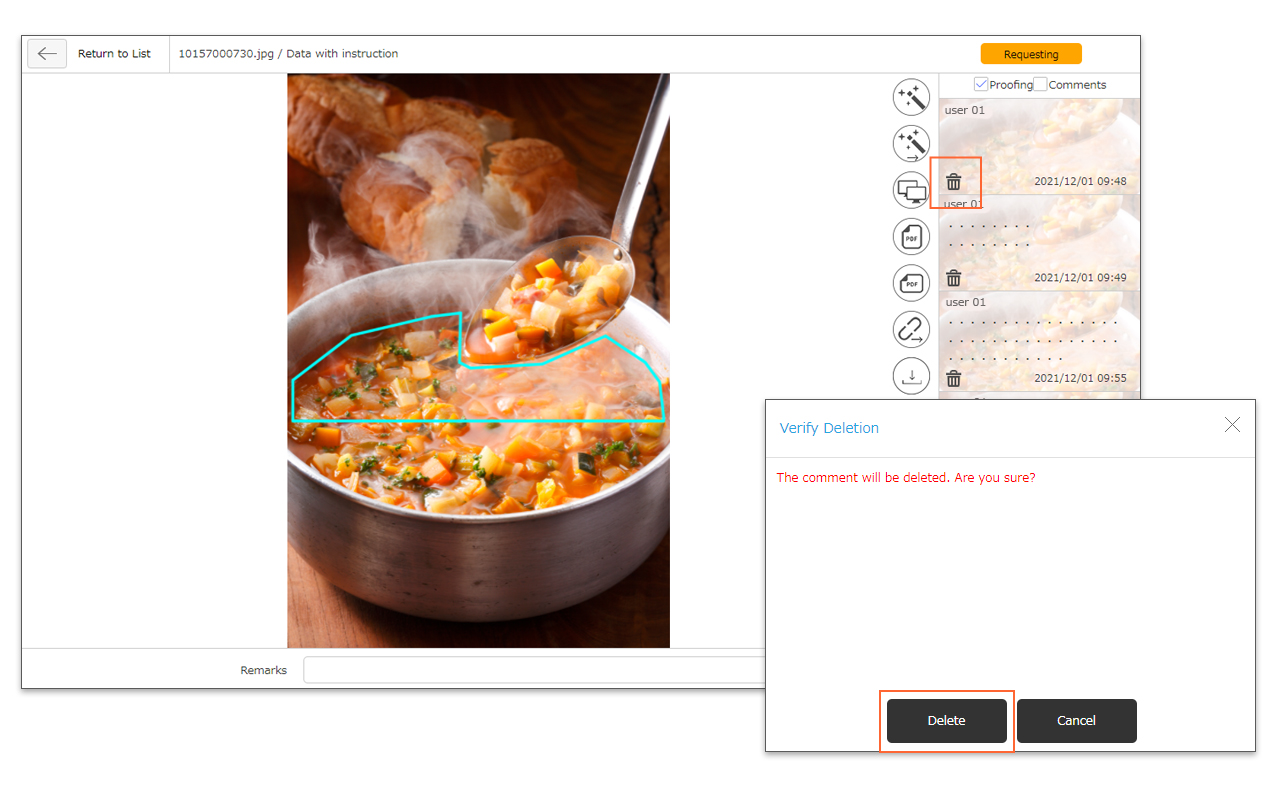
*You can only delete the proofing/memo registered by yourself.
[Print to PDF with Proofing History]
PDF output is available for registered proofing history. Select the proofing histories you want to output from the content menu page and click on the PDF icon to open the PDF image in your browser. There are two types of PDF icons, horizontal and vertical, depending on the contents.
You can also print the output PDF using the print function of your computer. To save as data, select PDF output from the print function of your computer, then download and save the file.
*Comment history cannot be output in PDF format.
*Please note that the PDF image may not be displayed correctly depending on your browser. Recommended Browser: Google Chrome, Safari